To avoid risk of electrical shock, personal injury, or death, disconnect electrical power source to unit, unless test
procedures require power to be connected. Discharge capacitor through a resistor before attempting to service.
Ensure all ground wires are connected before certifying unit as repaired and/or operational.
WARNING!
Disassembly
16 ©2012 Viking Preferred Service
Control Panel (continued)
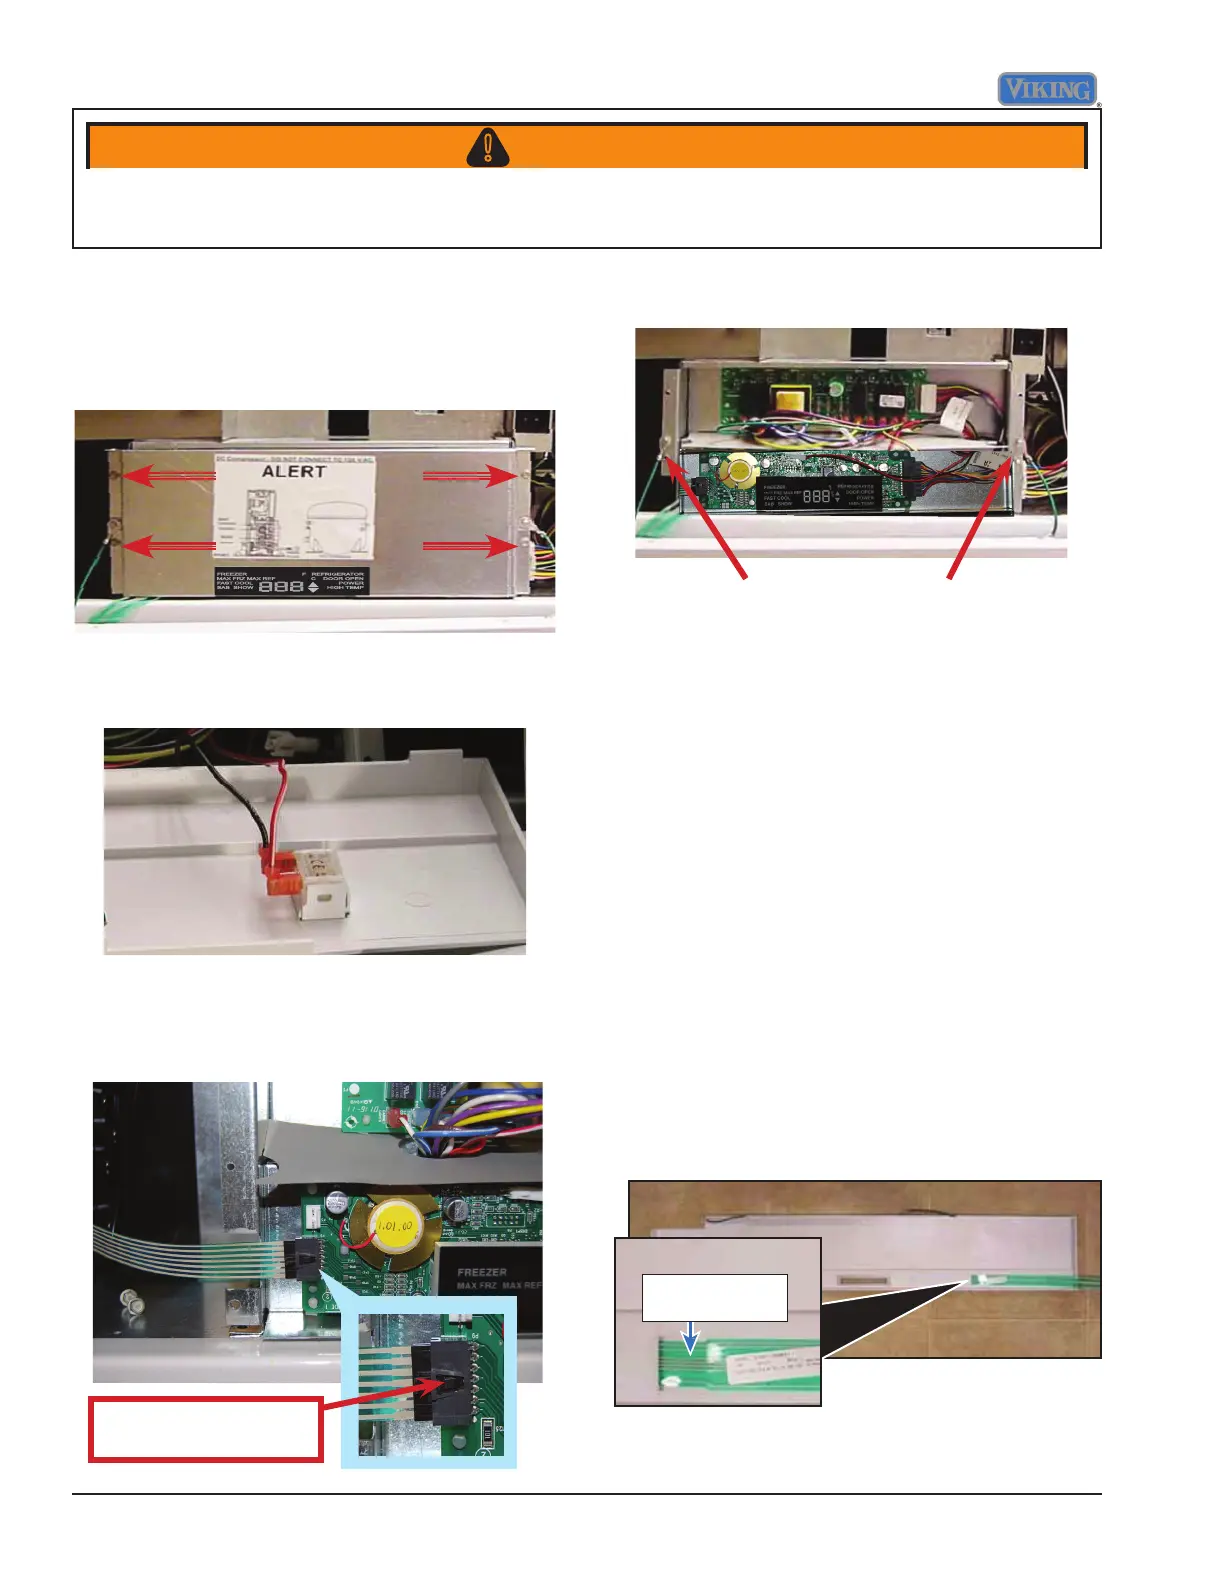
1. Remove the four screws securing the
control board cover. Remove control
board cover.
2. Disconnect the door switch from the back
of the control panel.
3. Disconnect the ribbon from the control
board.Take caution with the ribbon cable
to prevent damage.
Release tab and pull
connector out of socket.
4. Remove the two strain relief screws.
5. The control panel can now be removed
and the high voltage and low voltage
boards are accessible
6. Reverse procedure to reinstall
Overlay Switch
1. The unit uses an overlay switch to
communicate user input to the control
boards. The overlay connects to the
control board via a ribbon cable.
2. To replace the overlay switch, remove
the upper air grill assembly, remove the
control panel (see Air Grill and Control
Panel Removal sections, Page 15).
3. Disconnect overlay switch from control.
Overlay Switch


 To Next Page