USER MANUAL
7
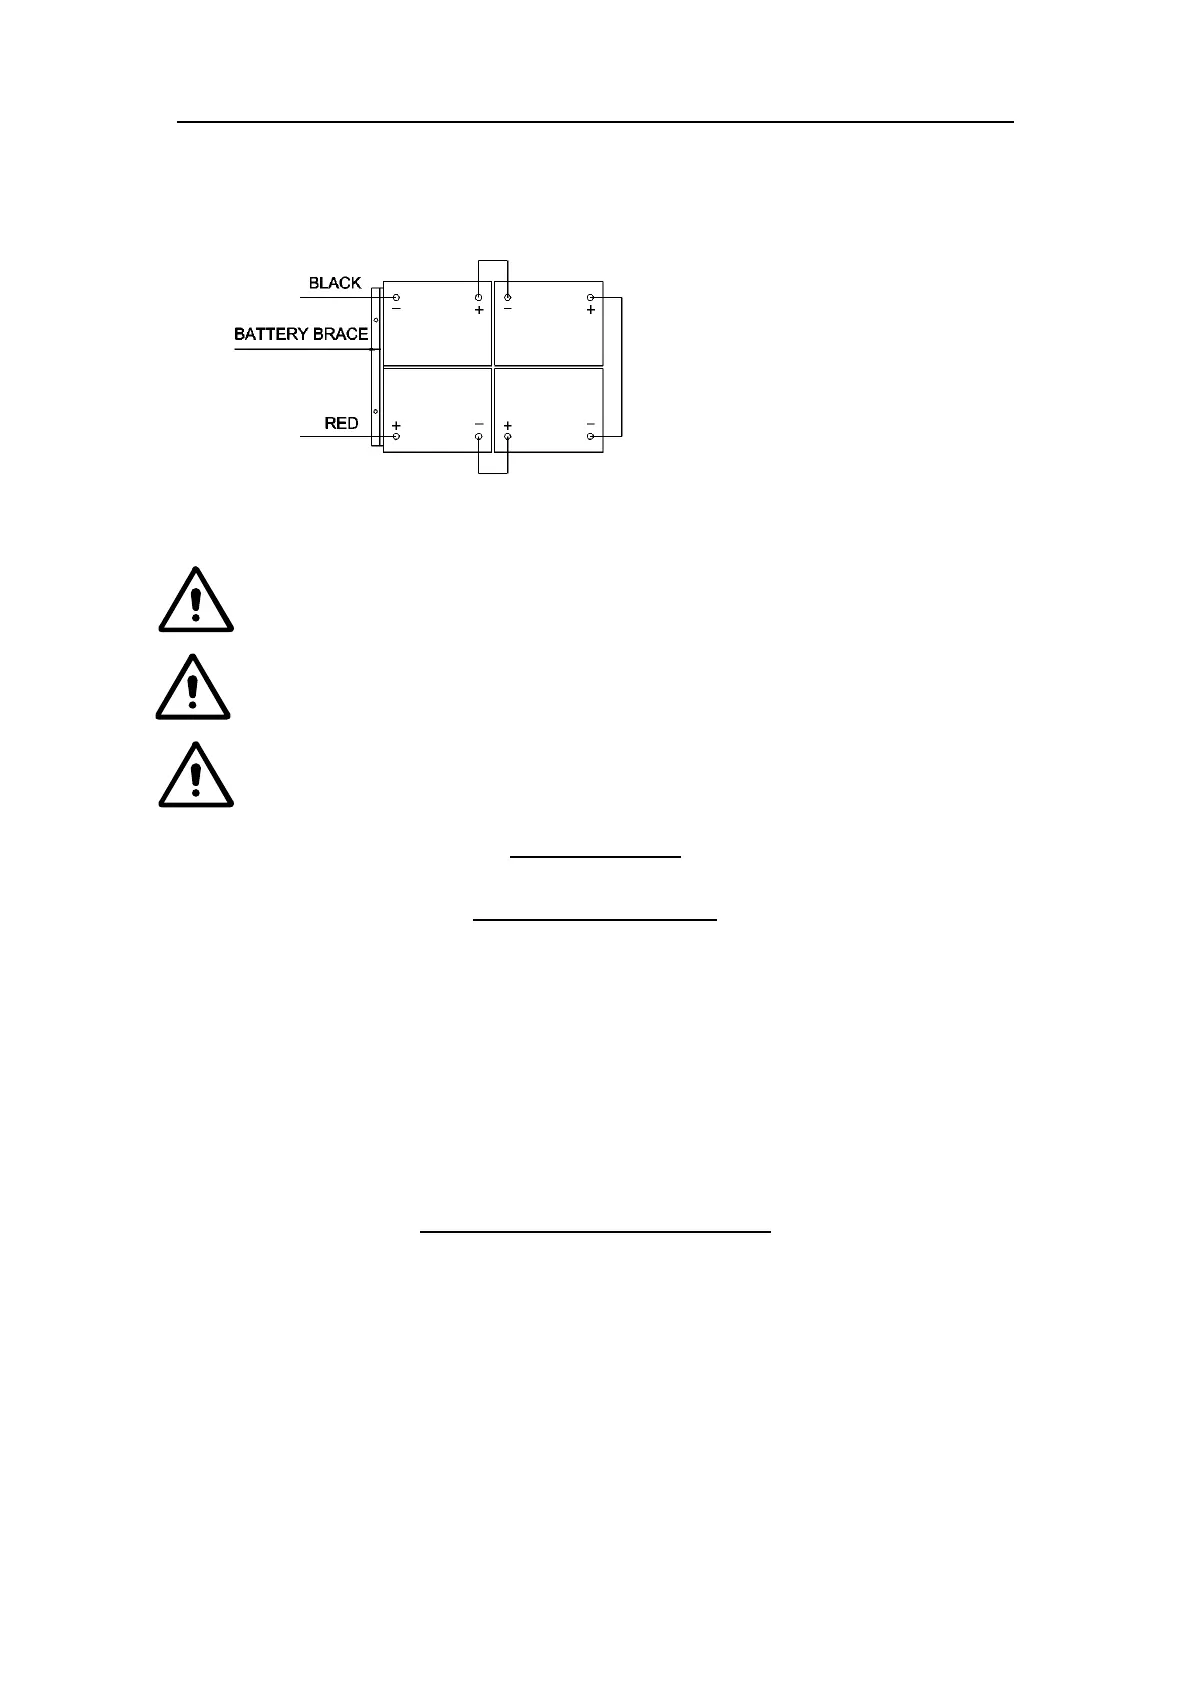
3. Carefully place the four batteries into the compartment as shown in figure below. Place the
battery brace at the front of the four batteries.
4. Connect battery cables to posts in numbered order as shown in the figure below.
5. Apply a coat or protective spray on the cable connections to prevent battery corrosion.
6. Cover recovery tank and seat.
Make sure the recovery tank is empty when opening it.
Do not drop batteries into compartment. Do not put metal on the batteries.
Never connect + to +, or - to - , never connect + to – with single battery, when
disassembling or installing the batteries.
MACHINE SET UP
PRE-OPERATION CHECKS
1. Sweep or dust mop the surface to be cleaned.
2. Check battery meter to make sure batteries are fully charged. (see BATTERY CHARGING)
3. Check that brush / pad is properly installed.
4. Check that squeegee is properly installed.
5. Check the speed driver (A9) is work normally.
6. Make sure the recovery tank is empty. If not, drain it.
7. Make sure solution tank water indicator (E10) is not on. If on, fill water in solution tank (A4).
8. Check that the water valve (D2) is not indicated “0”.
INSTALLING PAD DRIVER OR BRUSH
1. Ensure that the machine is turned off (E5).
2. Raise the brush head (A7) off the floor by depressing the front of foot pedal (A10) on the left
of machine.
3. Put brushes (A8) below both brush driver motor hub.
4. Lower the brush deck (A7) by depressing the rear of foot pedal (A10). While sitting on the
machine, turn on the brush switch (E3) insure the speed control knob (E4) is set to minimum.
Lightly depress driver pedal (C6), and the brush motors will turn on. The brushes should
attach to the machine automatically.

 Loading...