The VIQUA Owner's Manual describes an ultraviolet (UV) water disinfection system designed to provide years of trouble-free operation with minimal maintenance. This system utilizes advanced UV technology to protect drinking water from microbiological contaminants. The manual emphasizes the importance of using genuine VIQUA factory-supplied replacement lamps to ensure ongoing disinfection and prevent damage to the control module, which can occur with non-genuine lamps and is not covered by warranty.
Function Description:
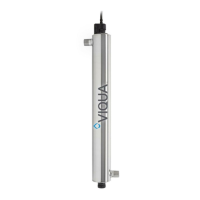
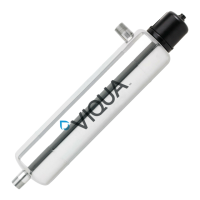
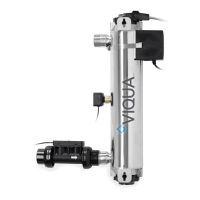
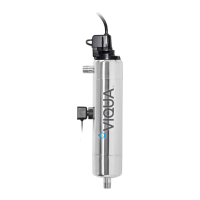
The VIQUA UV water disinfection system works by exposing water to ultraviolet light, which is a physical disinfection process that does not add any potentially harmful chemicals to the water. The UV lamp, the core of the system, emits UV-C radiation that inactivates bacteria, viruses, and other microorganisms, preventing them from reproducing and causing illness. The system is designed to be permanently connected to water lines and acts as the final piece of treatment equipment, ensuring that water is disinfected before consumption.
Usage Features:
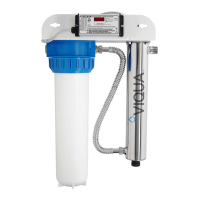
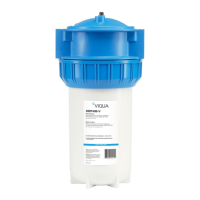
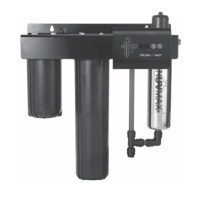
The system is designed for ease of use and continuous operation. It can be mounted either horizontally or vertically, with vertical installation (lamp connector on top) being preferred to prevent water damage to the lamp pins and connector. A 5-micron sediment filter is recommended to precede the UV system to ensure optimal performance. The system should be installed on a cold water line only, before any branched lines, and is intended for indoor use, not exposed to weather or freezing temperatures.
The controller, which should be mounted horizontally above or beside the chamber, features an LED display that provides important information. For basic systems with BA-ICE-C and BA-ICE-CL controllers, the display shows the "Lamp Life Remaining" in days, counting down from 365 days until the lamp requires changing. At "0" days, an intermittent audible chirp and an "A3" code indicate the need for lamp replacement. This alarm can be deferred up to four times for seven days each by pressing the timer reset button, allowing users time to obtain a new lamp. The controller also displays the "Total Days of Operation," which is the total running time of the controller in days and cannot be reset. A blank screen and an intermittent audible tone indicate a "Lamp Failure" (no current running through the lamp), requiring immediate attention.
For Plus systems incorporating BA-ICE-CM controllers, the default display shows "UV Intensity (%)", indicating the UV output between 50% and 99%. If the UV level drops below 50%, a "low UV warning" (R2) is displayed, flashing alternately with the actual UV level, and an intermittent audible tone sounds. Different UV levels correspond to different operational statuses: 65-99% indicates normal operation, 56-64% suggests cleaning or lamp/sleeve replacement may be needed, 50-55% indicates nearing unsafe UV intensity, and below 49% means the water is unsafe for consumption, activating a solenoid output (if installed) to stop water flow. The audible alarm for low UV can be temporarily deferred for 12 hours by pressing and holding the timer reset button for five seconds, which also reactivates the solenoid valve.
The system also features an "Over Temperature" warning ("Ot" on display) if the water temperature in the reactor chamber exceeds 40°C, typically due to extended periods of no water flow. This can be cleared by simply opening a faucet to allow water to flow. An optional 4-20mA output is available for transmitting UV intensity data to a remote location, using a "Y" cable.
Maintenance Features:
Regular maintenance is crucial for the VIQUA UV system's effectiveness.
- UV Lamp Replacement: The UV lamp has an effective life of approximately 9000 hours and should be replaced annually to ensure continuous disinfection. The procedure is simple and requires no special tools. Before replacement, power must be disconnected, water flow shut off, and system pressure released. The lamp connector is squeezed to remove it, and the old lamp is pulled out, holding it by its ceramic ends. The new lamp is inserted, the connector reattached until an audible click is heard, and the system is re-pressurized to check for leaks. After replacement, the lamp life timer must be reset by holding down the timer reset button while reapplying power until "5EL" is seen, then releasing the button. A 5-second delay will occur before the display reads "365".
- Quartz Sleeve Cleaning and Replacement: Minerals in the water can form a coating on the quartz sleeve, reducing UV light transmission and disinfection performance. The sleeve should be cleaned periodically with a cloth soaked in CLR, vinegar, or a mild acid, then rinsed with water. If the sleeve cannot be cleaned completely or is scratched/cracked, it must be replaced. The process involves draining the chamber, removing the retaining nuts and O-rings, and then carefully sliding out the quartz sleeve. After cleaning or replacement, the sleeve is reinstalled, O-rings and retaining nuts are secured, and the system is re-pressurized. The disinfection procedure (Section 3.2) should be performed after replacing the UV lamp or quartz sleeve.
- UV Sensor Cleaning and Replacement (for Plus systems): The UV sensor is a delicate instrument, and its quartz window can accumulate mineral deposits, decreasing detected UV energy. If the system indicates low UV intensity, a stained quartz sleeve and/or sensor window may be the cause. The sensor should be cleaned at the same time as the quartz sleeve. This involves disconnecting the sensor cable, removing the sensor by rotating it counter-clockwise, submerging only the end of the sensor in a commercial scale remover for 30 minutes, cleaning it with a cotton swab and water, and then re-inserting it until a water-tight seal is achieved.
Disinfection Procedure:
After installation or any service that requires the UV unit to be shut down, the entire plumbing system after the UV unit must be chemically disinfected with chlorine (household bleach) to eliminate any bacteriological contaminants. This involves shutting off the water, closing faucets, removing filter cartridges, pouring bleach solution into filter housing(s), reinstalling housings, turning on cold and hot water supplies to flush bleach through all openings until the smell is detected, then closing faucets and allowing the system to sit for 30 minutes. After this period, the system is flushed until no chlorine smell is detectable, and filters are reinstalled. During this process, water should not be consumed. For monitored systems, the bleach solution may temporarily trigger a low UV condition, which can be deferred for 12 hours by pressing the "RESET" switch for 5 seconds.