Do you have a question about the ViscoTec preeflow eco-CONTROL EC200 2.0 and is the answer not in the manual?
Details the items included in the eco-CONTROL EC200 2.0 package.
Instructions for checking the delivery for damage and completeness.
Explains the symbols and safety notices used in the manual.
Defines proper use and lists misuse cases for the dosing control unit.
Specifies requirements for qualified and authorized personnel operating the machine.
Lists essential documents to be read and followed for safety.
Guidelines to prevent damage to the unit and ensure precise dosing.
Specifies requirements for compressed air supply.
Discusses provision and use of personal protective equipment.
Details potential hazards: electrical voltage, material hazards, and pressurized material.
Precautions to protect control unit and IT systems from viruses and malware.
Identifies and describes the rear connections of the dosing control unit.
Illustrates connections for a 1-component dispenser.
Illustrates connections for two 1-component dispensers working together.
Illustrates connections for a 2-component dispenser.
Illustrates connections for a 2-component dispenser with a dynamic mixer.
Step-by-step guide for the initial setup of the dosing control unit.
Instructions on how to operate the power switch.
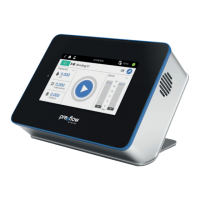
Overview of the user interface navigation flow.
Explanation of icons used on the individual screens.
Describes the steps involved when booting up the dosing control unit.
Guide for initial setup after factory installation.
Provides two methods for quickly starting a dosage.
Details how to modify program settings for desired dosing.
Explains quantity dosing and start/stop dosing modes.
Defines flow rate and its importance for dispenser operation.
Details settings for preventing material dripping after dosing.
Explains setting and importance of pot life for 2-component systems.
Describes blank shot quantity and lead time settings.
How to set the mixing ratio for components A and B.
Explains the need to input material density for accurate dosing.
How to calibrate each dispenser for accurate dispensing.
How to assign a program number for external selection.
Setting maximum dosing pressure for overpressure switch-off.
How to set up and use pressure monitoring.
Settings for activating and controlling the dynamic mixer.
Step-by-step guide to editing program values on screen.
Detailed procedure for calibrating dispensers with required aids.
How to copy or create new programs.
How to customize the dispense screen layout and options.
How to choose and display parameters on the dispense screen.
Options for changing between three-column and two-column views.
How to choose between PRESSURE and SCHEMA views.
How to set up and manage favourite programs on the start screen.
Steps to select, delete, and confirm program deletion.
Overview of the settings menu for detailed program editing.
How to set up passwords and manage user access rights.
Contains information on software updates, licenses, and operating hours.
Tools for editing, duplicating, deleting, and backing up programs.
Ways to access, view details, and get help for error messages.
How to adjust screen brightness and audio volume.
Setting whether to start with the start screen or last used program.
How to set the system's date and time.
How to select the display language.
How to set units for pressure and temperature.
Recalibrating the unit without changing programs.
How to purge the mixer for components A and B.
Setting up and activating connected sensors.
Activating and controlling the unit via external signals.
Overview of interfaces and connections.
Testing interfaces, motor connections, and sensor connections.
How to perform manual purging directly from the start screen.
Accessing help information from the start screen.
Explanation of icons used in the Dosing Pressure Monitoring section.
Describes the process of teaching-in dosing operations for pressure monitoring.
How to apply, adjust, and delete monitoring units.
Monitors pressure trend deviation from the mean value.
Monitors dosed quantity within a specified time range.
Checks if pressure trend runs through or avoids the region covered by the control box.
Settings for consecutive incorrect dosages, teach-in measurements, and sensors.
Displays list of teach-in operations, allows deletion and editing.
How dosing operations are marked as "OK" or "not OK".
Saves pressure trend of Start-Stop dosing operations.
Customizing the two-column dosing window display.
Live feed of dosing pressure data via RS232 interface.
Exports past dosing processes to the connected USB stick.
How to perform manual dosing using the touch display.
How the system reacts to foot switch activation.
How external operation is activated using digital inputs.
Determining programs using digital inputs and signal values.
Explains signal flow for program change and dosing.
Common faults and their causes when using external control.
Recommendations for routine visual checks.
Table of faults, possible causes, and recommended actions.
Detailed description of the system I/O interface.
Description of the inlet pressure interface.
Description of the external program selection interface.
Visual representation of external input/output wiring.
Explains the H-level and L-level logic for various outputs.
Formal declaration of compliance with EU directives.
Summary of technical specifications: dimensions, weight, power, etc.
Instructions for attaching and mounting the holder.
Steps for installing the unit in a control cabinet.
How to install the optional pneumatic unit.
| Brand | ViscoTec |
|---|---|
| Model | preeflow eco-CONTROL EC200 2.0 |
| Category | Control Unit |
| Language | English |