D-303169 KP-160 PG2 User’s Guide 9
3. USING THE TOUCH SCREEN KEYPROX
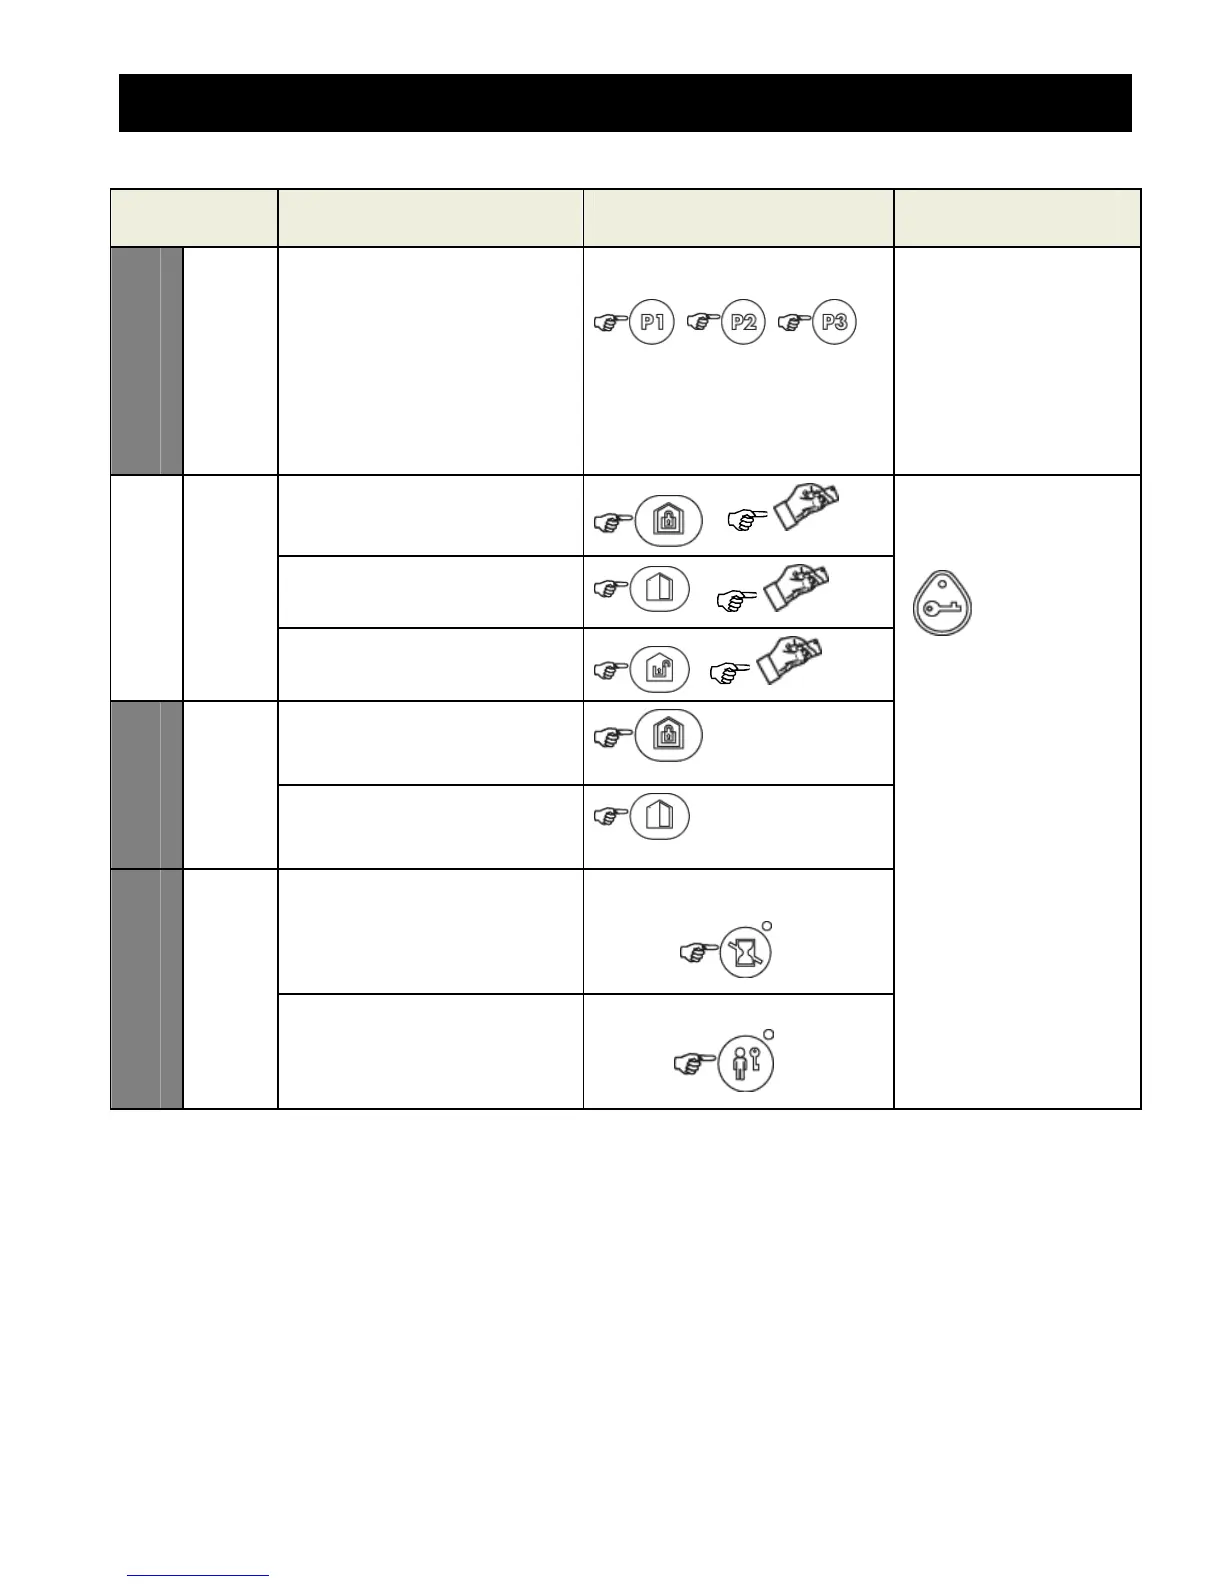
3.1 Arming and Disarming the System
Step Operation User Actions Keyboard &
Panel Response
Optional
1
Select a PARTITION
(1)
(if Partition is enabled)
Any combination of
The selected key
blinks.
2
Arm AWAY
+ [ ]
(4)
The selected key
and the "Present
Prox Tag" icon
( ) begin to
blink and prompt you
to present your Tag.
The keyprox's LED
blinks red once to
indicate transmission
of the arming
command to the
control panel.
The LED and the
buzzer then indicate
the control panel's
response – see
“System Status
and Indications”
section 3.3.
Arm HOME
+ [ ]
(4)
Disarm (OFF)
+ [ ]
(4)
Optional
3
Quick arm AWAY
(3)
(If
Quick Arm is enabled)
( 2 sec.)
Quick arm HOME
(3)
(If
Quick Arm is enabled)
( 2 sec.)
Optional
4
INSTANT (After arming HOME/
AWAY)
(5) (7)
LATCHKEY (After arming
AWAY)
(6) (7)
Notes:
1. If Partition is disabled at the control panel, skip Step 1.
2. If Partition is enabled at the control panel and a partition was not selected in Step 1,
Step 2 will activate all of the partitions assigned to the user.
3. The Quick arm functions only if enabled at the control panel.
4. If the action is not completed while the selected arming key is blinking, the desired
function will not be executed.
5. Press the INSTANT key within maximum 8 seconds timeout period after completing the
previous step. This will delete the entry delay for the current arming session.
INSTANT is available only if supported in the PowerMaster control panel (refer to the
PowerMaster Installer Guide).
6. For LATCHKEY activation, press the LATCHKEY key within maximum 8 seconds
timeout period after completing the previous step.

 Loading...


