4 D-303169 KP-160 PG2 User’s Guide
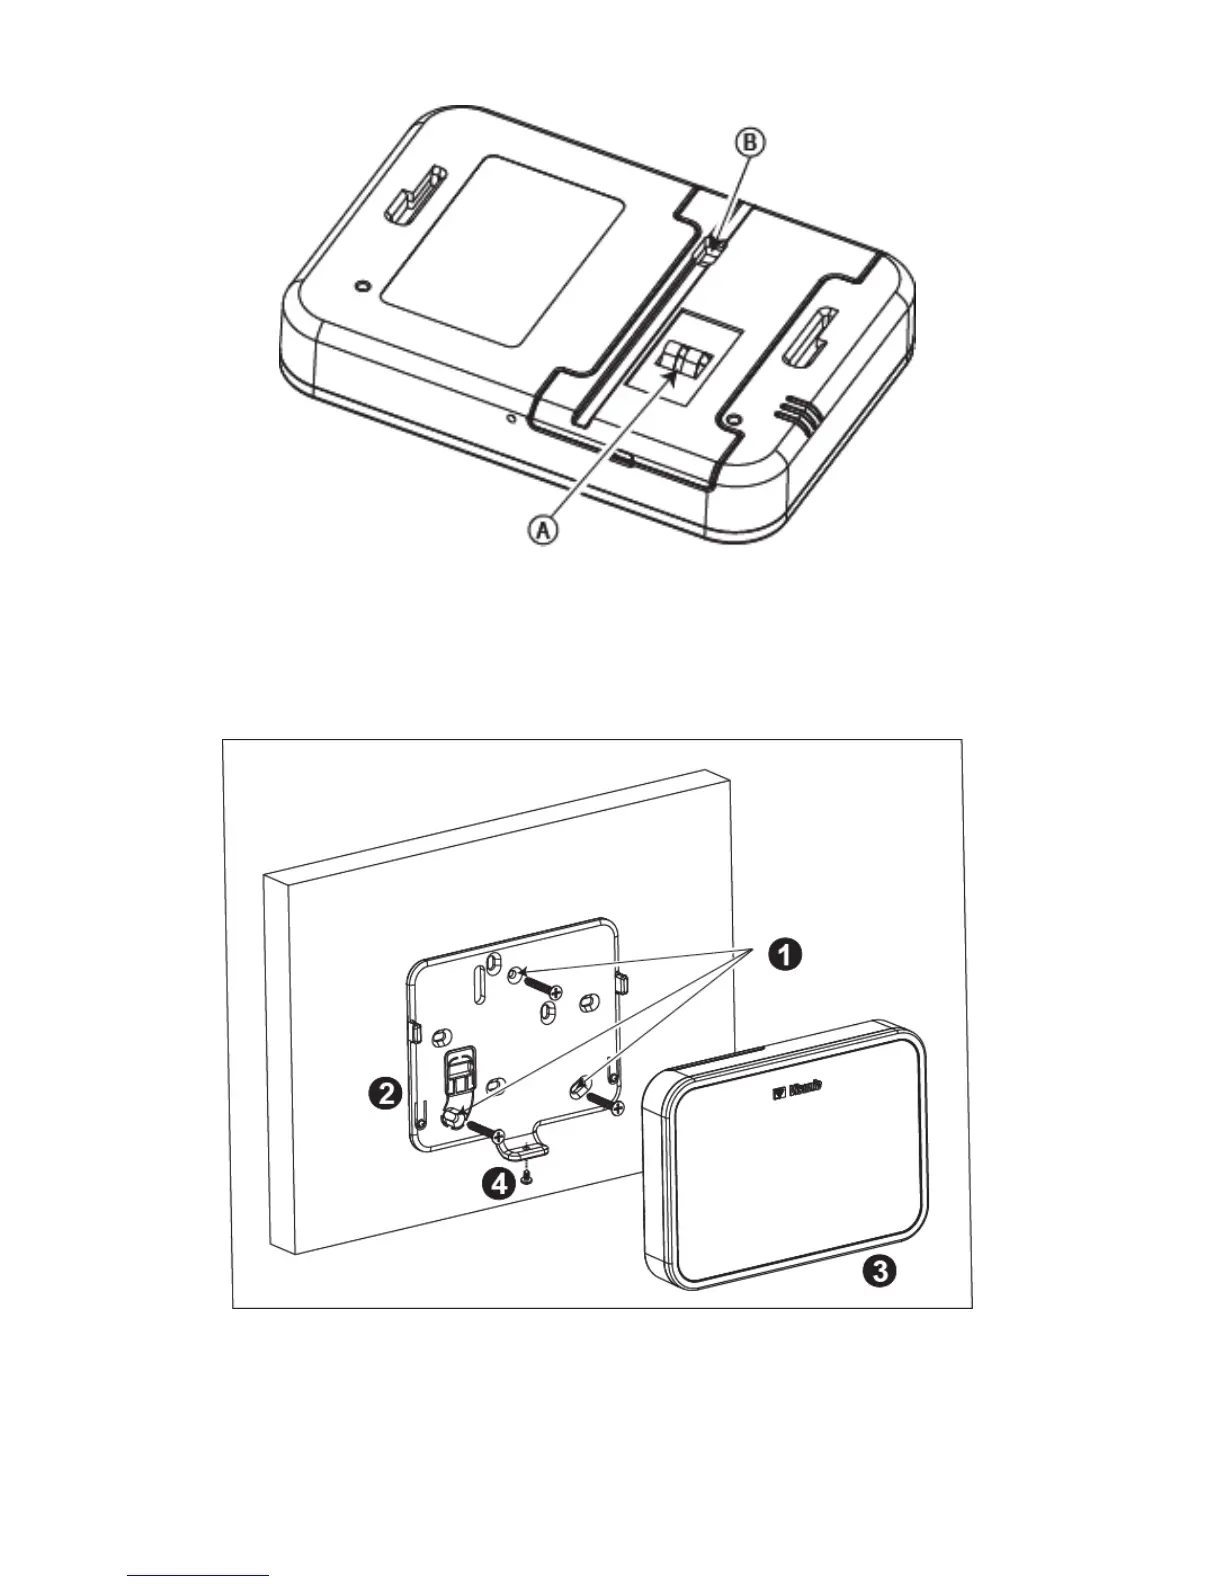
Wall-mounted Installation (Using Battery Cover without Tamper Hole –
see "A")
Figure 3 - Battery Cover Mounting (part b)
A. Tamper B. DC Power Connection
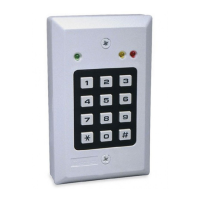
2.3 Wall Mounting Options
The KP-160 PG2 unit mounting options are illustrated in the following drawings.
Wall Mounting
Figure 4a – Wall Mounting
1. Drill 3 mounting holes 3. Attach the unit to the bracket
2. Position the bracket and secure with 3 screws 4. Secure the unit with the screw