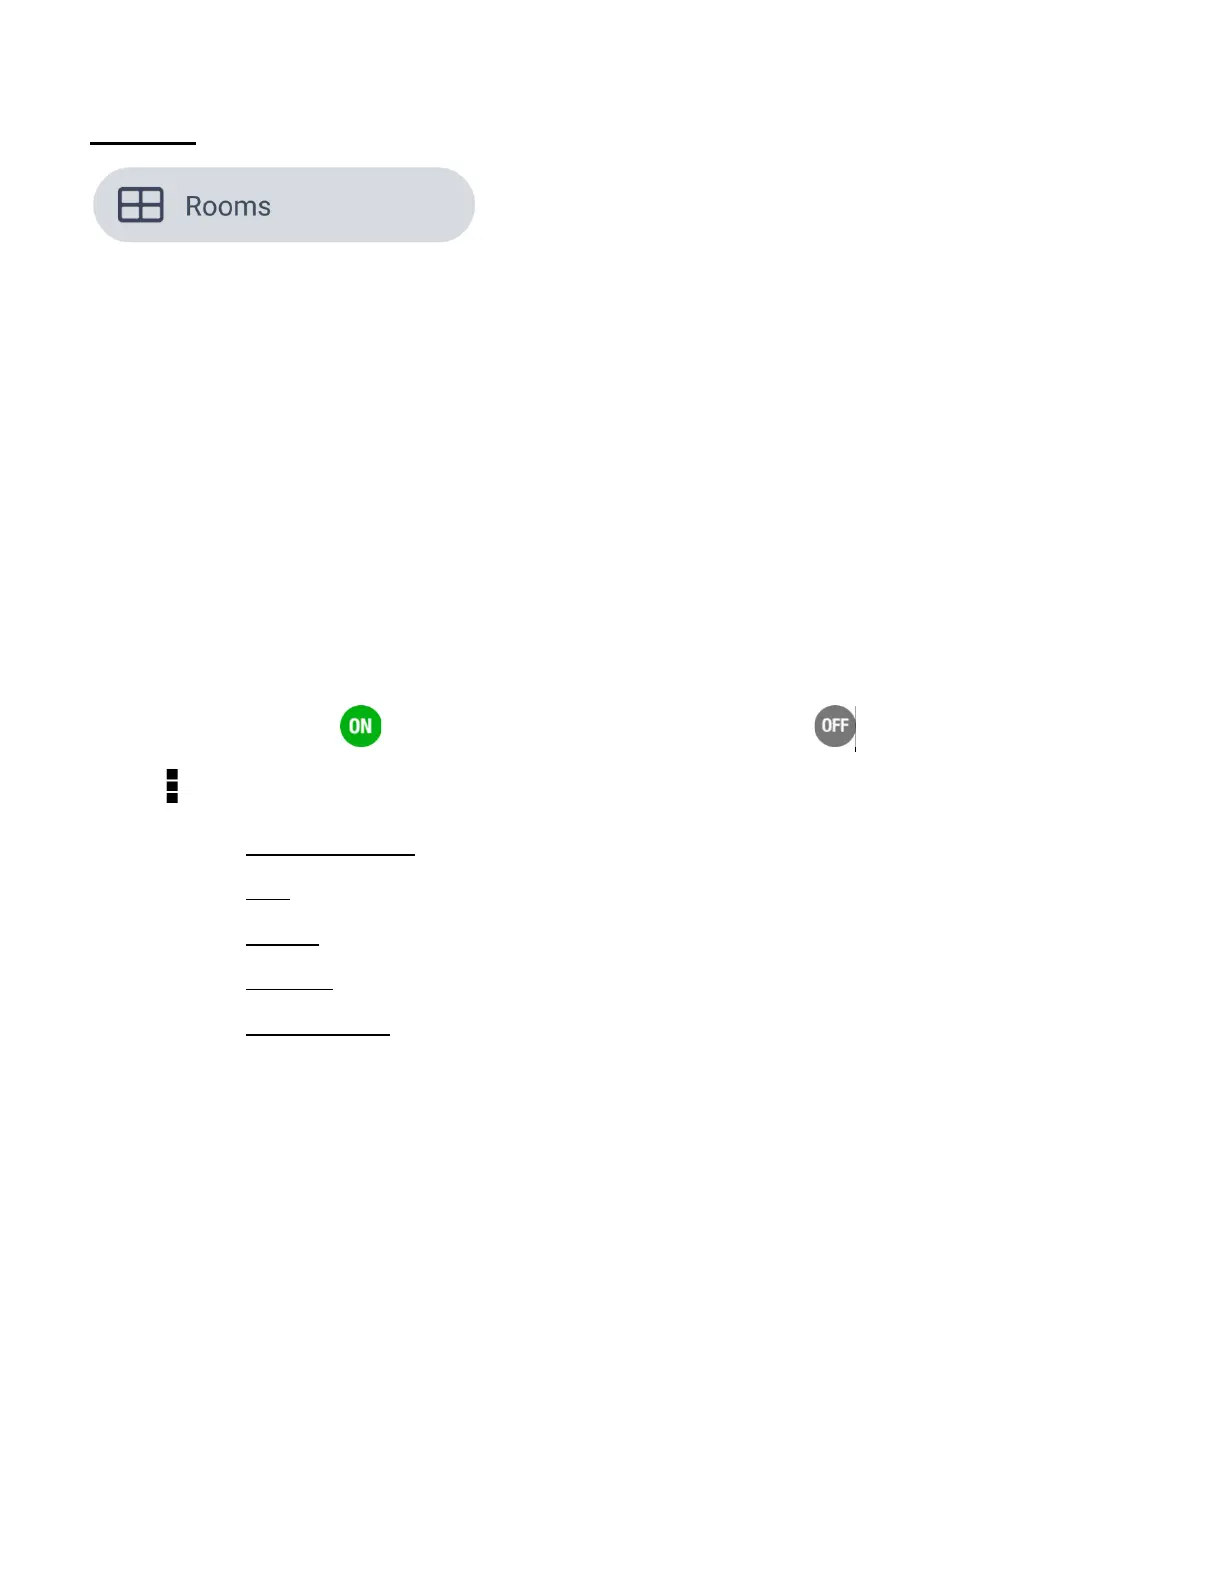
ROOMS
Each camera includes the room name as per the room name added during initial setup or via the
camera’s settings. The room name options include:
Kitchen, Office, Living Room, Dining Room, Bathroom, Bedroom, Hallway, Cellar, and New
Room (enter custom room name)
1. Tap Rooms from the Main Menu to open the ‘Rooms’ screen.
2. The list of rooms (room name and icon) per your registered camera(s) appears.
3. Tap on a room to open the list of camera’s associated with the selected room.
Each camera appears as a video thumbnail in the selected room screen.
Each thumbnail displays the following:
- Room Name: Camera Name
- Camera Status: ON (camera is streaming live video) or OFF (camera is offline)
- Menu Options: Tap on the Menu icon to open the window with the following options –
• Remove Device – Tap to remove the selected IP camera from the app.
• Live – Tap to open the ‘Live IP Camera’ screen.
• Events – Tap to open ‘Events’ screen for the selected IP Camera.
• Settings – Tap to open the ‘Settings’ screen for the selected IP Camera.
• Share Device – Tap to open the ‘Share’ screen for the selected IP Camera.
4. Tap on a video thumbnail to go to the camera’s ‘Live IP Camera’ screen.
NOTE: To change the camera’s room name, tap on Settings > Room. Tap to select the room
name from the list or tap on New Room to enter a custom name for the camera’s room name.