11
Ethernet Environment
Hardware installation
Before installing multiple Network Cameras at the well-chosen locations, the
administrator should memorize the serial numbers on the packages respectively for
future use.
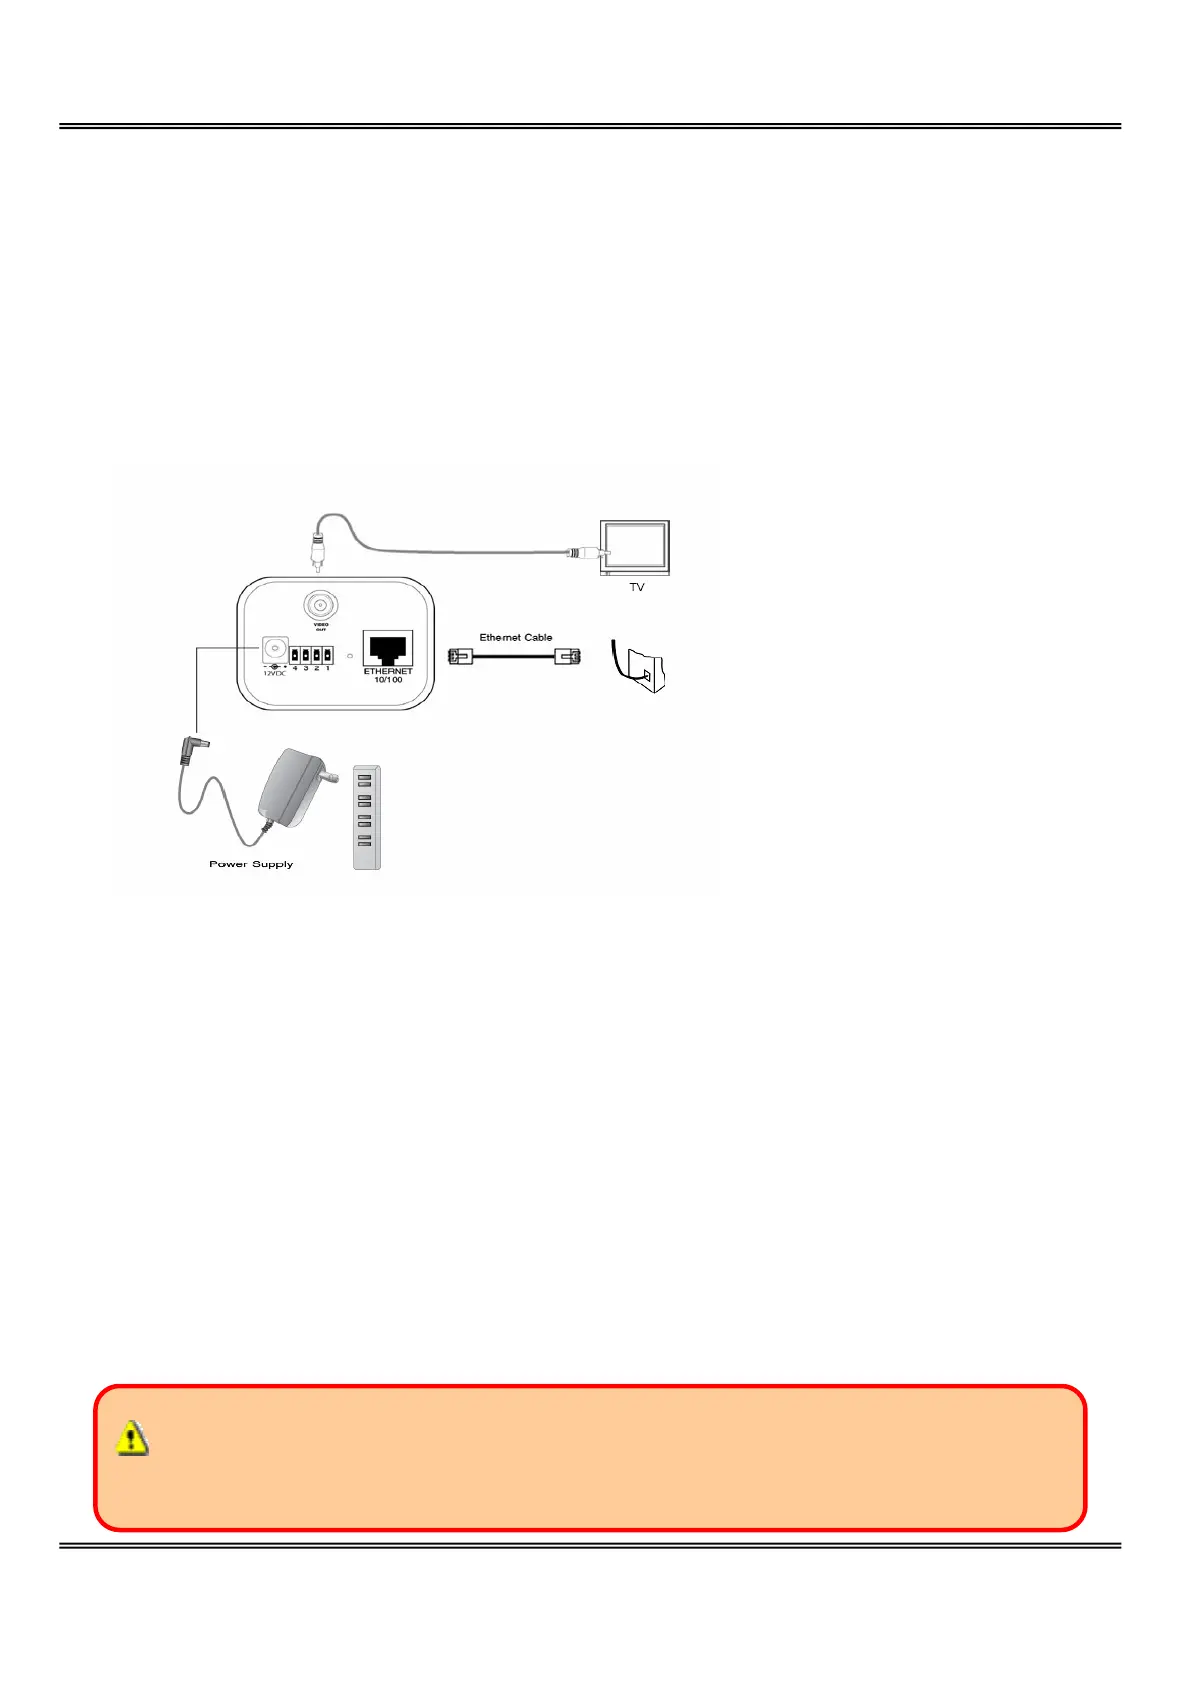
Cable connection
Connect the supplied cables from Network Camera to related devices according to the
above diagram. Note that the power adaptor must be kept unplugged until other cables
are firmly connected.
Power on
Make sure all cables are correctly and firmly connected before turning on Network
Camera. Turn on cameras, sensors, alarm devices, and then attach the power adaptor of
Network Camera to the electric power socket. After the POST (power-on self test) is
complete and the result is successful, Network Camera is ready for software
configuration as described in this manual. At this stage, network speed and video
modulation type are automatically detected. Refer to the configuration section for
further information.
Connect the power jack of the power adapter to Network Camera prior to plugging
the utility end into the utility power socket. It will reduce accidental electric surge shock.