Volt Time Source 2 Installation Guide - alternative entry
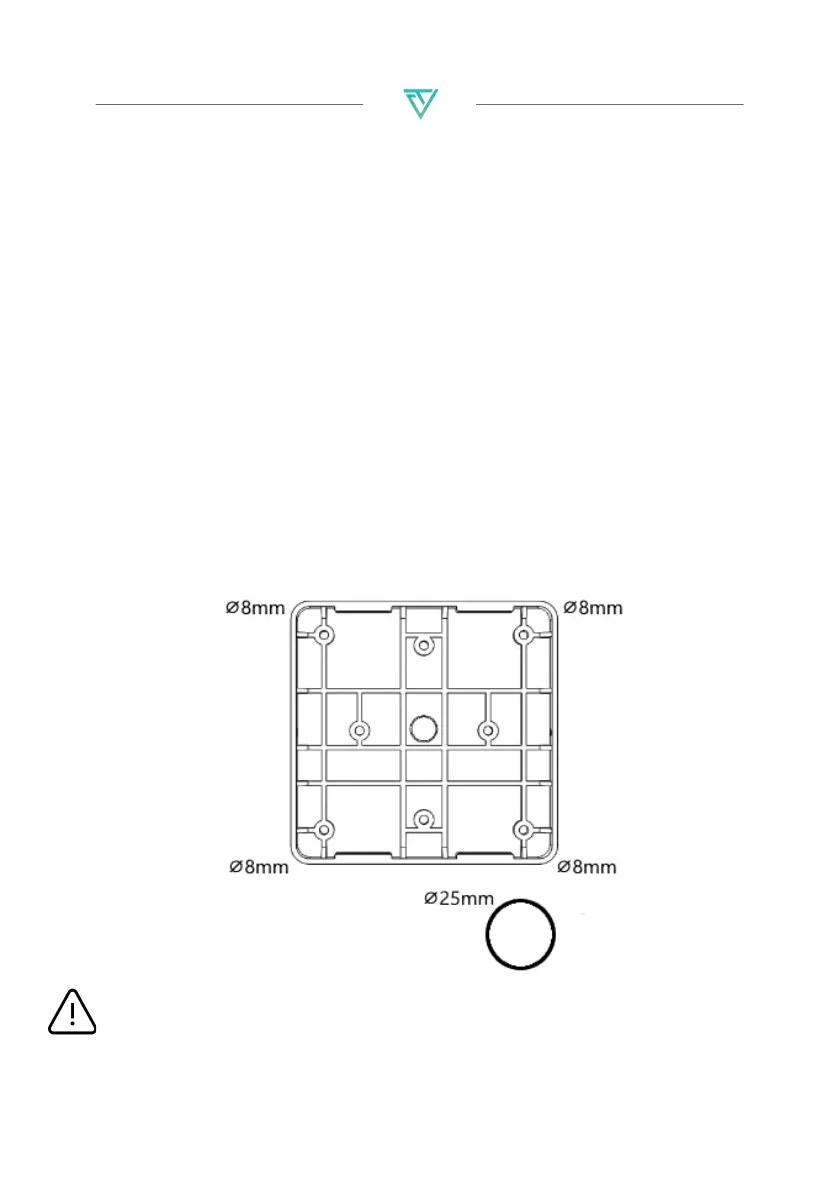
Installing the mounting plate
1. Hold the mounting plate drawing against the wall and make
sure it is level.
2. Recommended installation height is 120cm. Minimum
installation height is 90cm.
3. The drawing has 4 screw locations. Drill these 4 holes with an
8mm drill bit.
4. The drawing has 1 big drill hole at the bottom. Drill this hole
with a 25mm drill bit so that the AC mains cable can be
connected through the back of the charger.
5. Push M8 wall plugs (4x) into the drilled holes.
6. Place the mounting plate with the flat edge against the wall
and the slits of the mounting plate pointing up- and
downwards.
7. Screw the mounting plate against the wall using PZ2 screws
(4x).
CAUTION: The installation wall must cover the entire backplate
and should be perfectly flat.