4 5
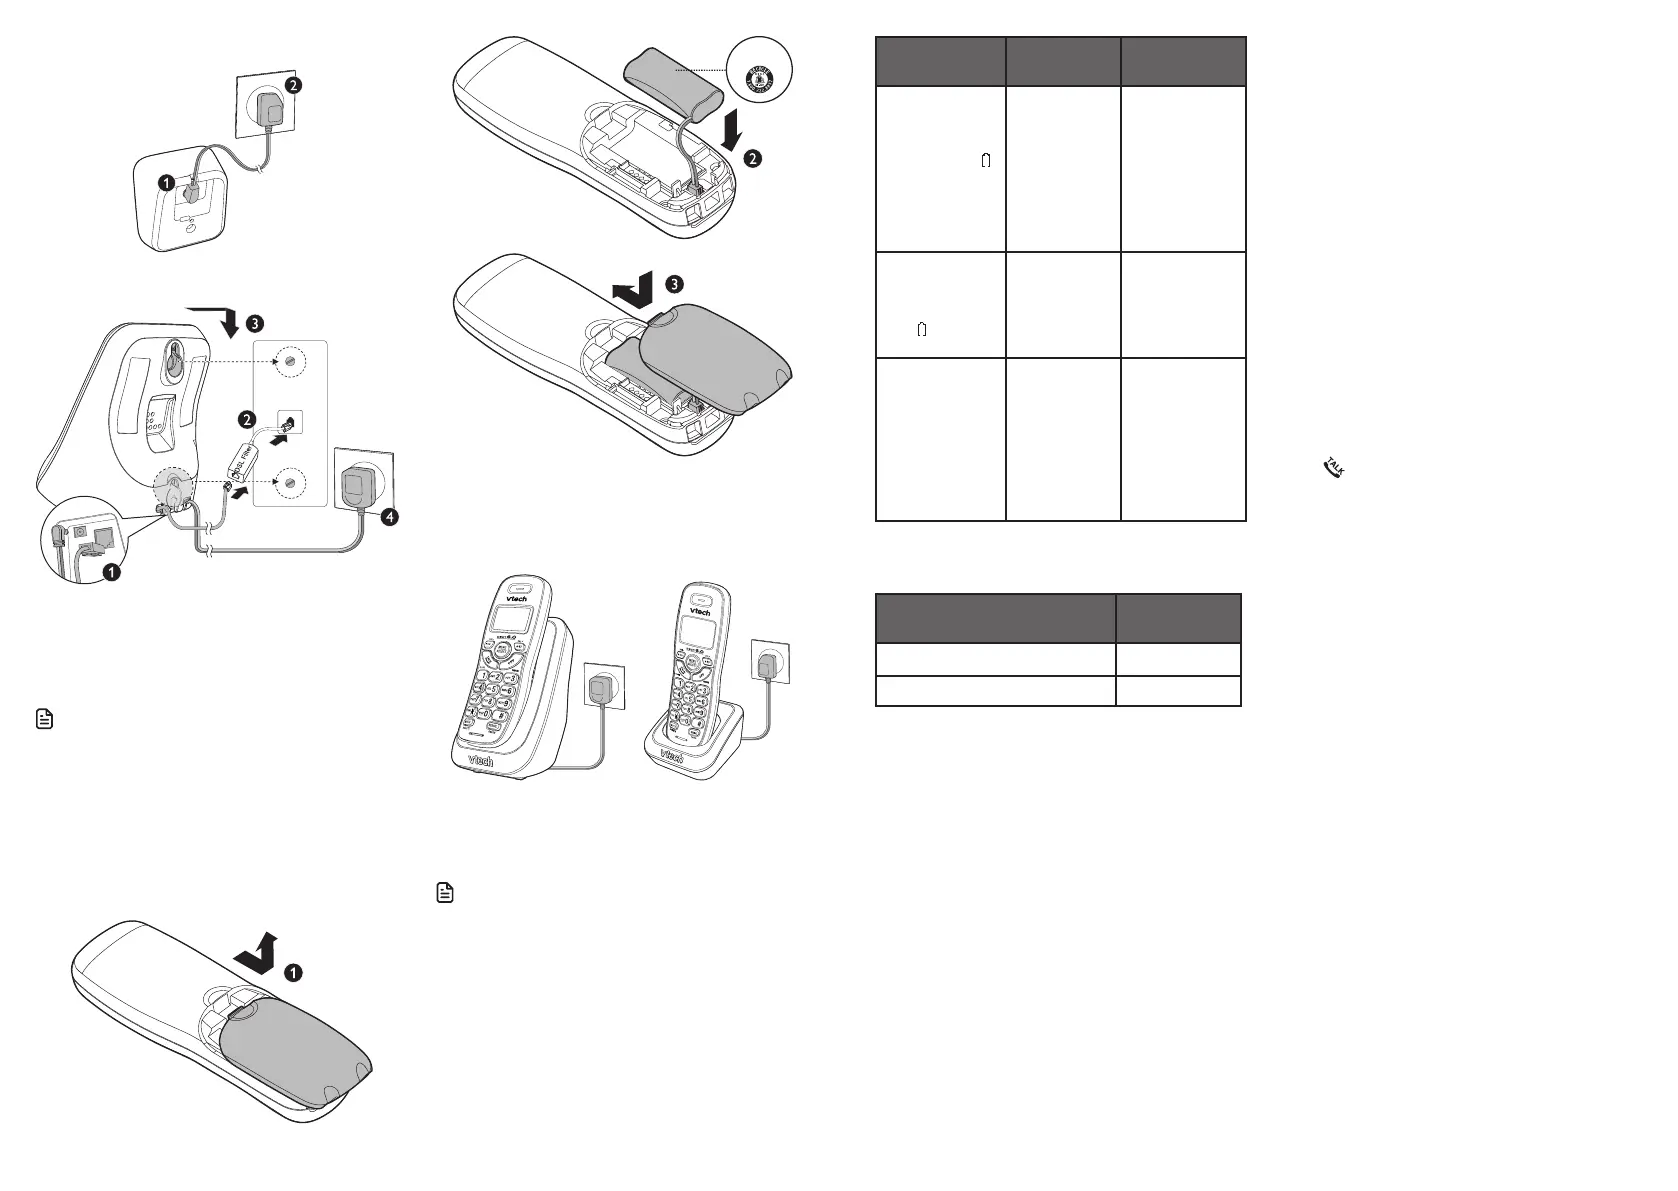
Charge the battery
Place the handset in the telephone
base or the charger to charge.
Once you have installed the battery, the
handset LCD display indicates the battery
status (see the following table).
• For best performance, keep the handset in
the telephone base or charger when not in
use.
• The battery is fully charged after 16 hours of
continuous charging.
• If you place the handset in the telephone
base or the charger without plugging in the
battery, the screen displays No battery.
Connect the charger
Mount the telephone base
Install and charge the battery
Install the battery
Install the battery as shown below.
• Use only supplied battery.
• Charge the battery provided with this
product only in accordance with the
instructions and limitations specified in this
manual.
• If the handset will not be used for a long
time, disconnect and remove the battery to
prevent possible leakage.
Battery
indicators
Battery
status
Action
The screen
is blank, or
displays Put in
charger and
flashes.
The battery
has no or
very little
charge. The
handset
cannot be
used.
Charge
without
interruption
(at least 30
minutes).
The screen
displays
Low battery
and flashes.
The battery
has enough
charge to be
used for a
short time.
Charge
without
interruption
(about 30
minutes).
The screen
displays
HANDSET X.
The battery
is charged.
To keep
the battery
charged,
place it in the
telephone
base or
charger when
not in use.
When the battery is fully charged, you can
expect the following performance:
Operation
Operating
time
While in use (talking*) Seven hours
While not in use (standby**) Five days
* Operating times vary depending on your
actual use and the age of the battery.
** Handset is not charging nor in use.
Before use
After you install your telephone or power
returns following a power outage, the
handset will prompt you to set the date
and time.
Set date and time
1. Use the dialing keys (0-9) to enter the
month (MM), date (DD) and year (YY).
Then press SELECT.
2. Use the dialing keys (0-9) to enter the
hour (HH) and minute (MM). Then
press q or p to choose AM or PM.
3. Press SELECT to save.
Check for dial tone
Press . If you hear a dial tone, the
installation is successful.
If you do not hear a dial tone:
• Make sure the installation procedures
described above are properly done.
• It may be a wiring problem. If you have
changed your telephone service to
digital service from a cable company or
a VoIP service provider, the telephone
line may need to be rewired to allow
all existing telephone jacks to work.
Contact your cable/VoIP service
provider for more information.
THIS SIDE UP