10 Appendix III
108
WABCO Maintenance Manual MM-0112 (Revised 07-18)
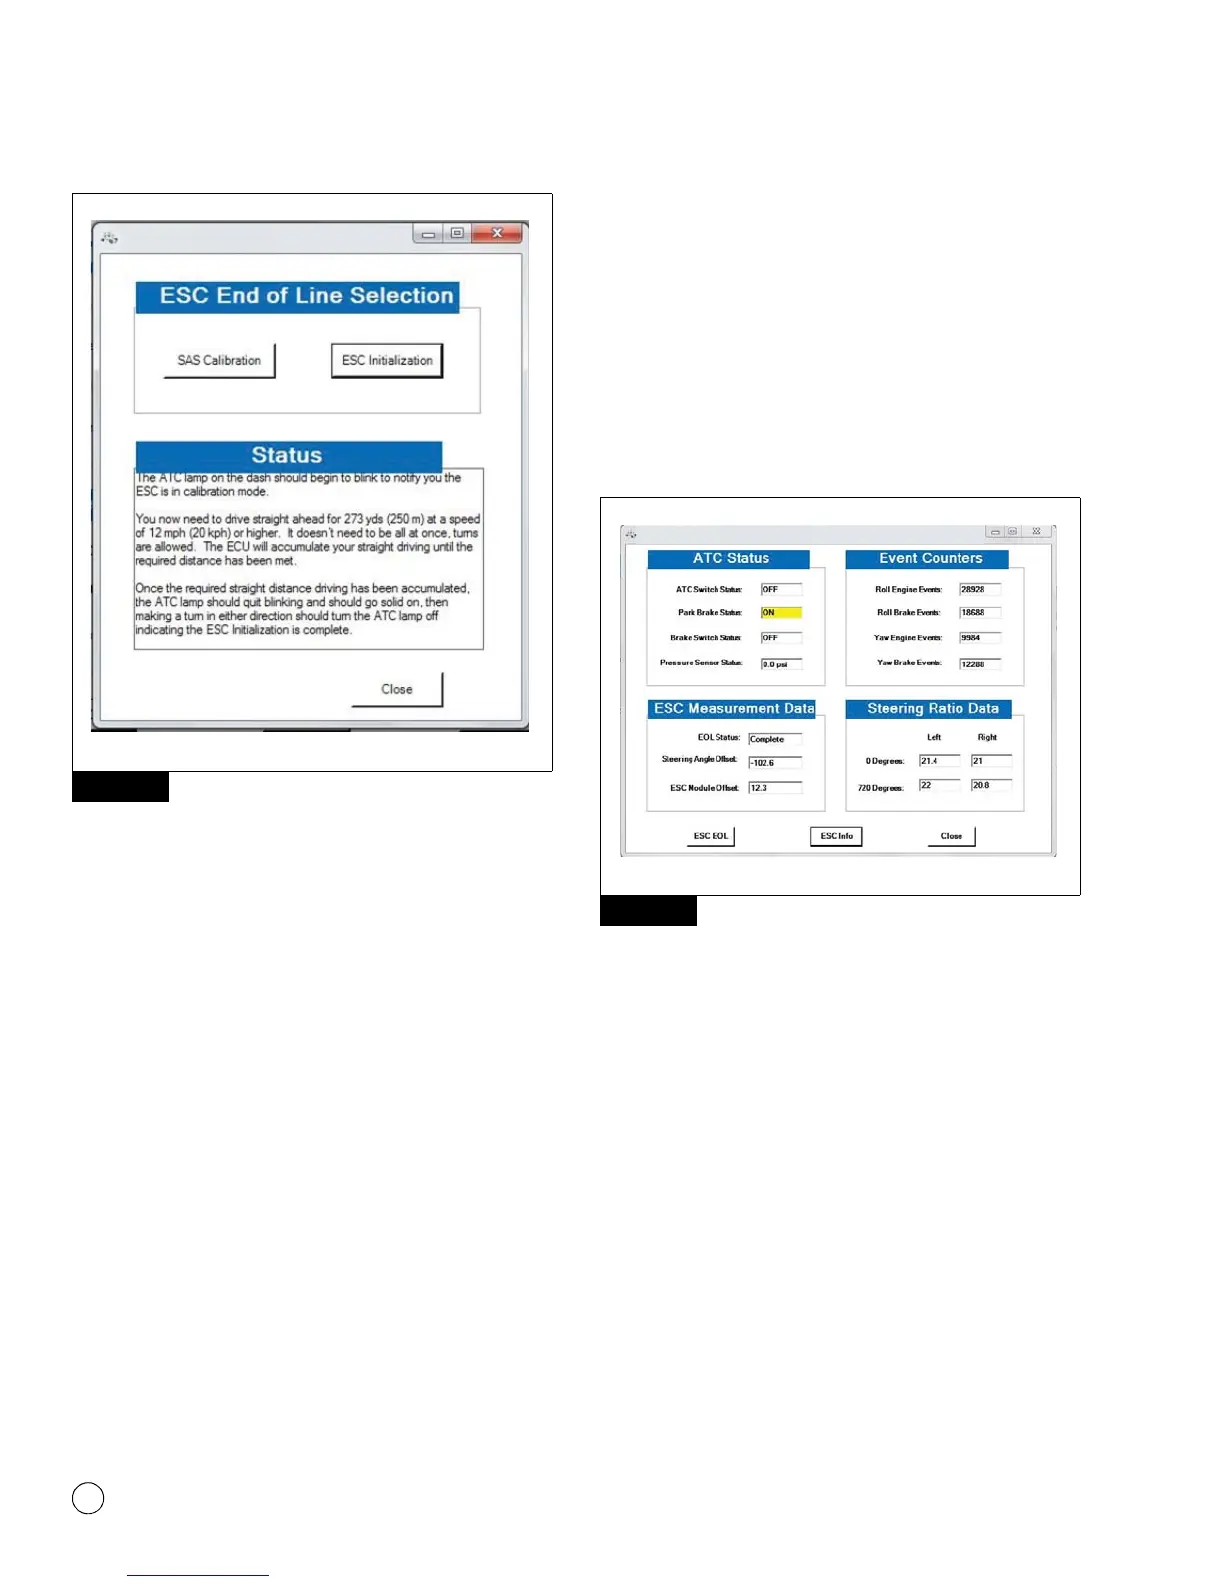
Figure 10.6
Tip: Carefully follow the instructions that appear in the
message box. Once the ESC initialization is started, the
messages will automatically change as the requirements are
met. DO NOT click the “continue” button again as this may
cause the process to fail. The ESC Initialization procedure
requires the vehicle to be driven.
The straight driving adjustment can be done in segments as the ECU
will accumulate the information until the 273 yards is reached.
Cornering and stopping is allowed as long as calibration is done
within the same ignition cycle.
When the Straight Driving Adjustment is completed after ECU
accumulated 273 yards of straight driving, the ATC lamp will stop
blinking and will remain ON.
Once the straight driving portion of the calibration is completed,
make a left or right turn to complete the initialization procedure. At
this point the ATC lamp will turn off indicating the ESC initialization
was successful.
For the ECU to be able to save ratios and ESC EOL data, the ignition
MUST be cycled. With the vehicle stopped, close window that
appeared and cycle the ignition for around 10 seconds.
NOTE: Power down cycle time and sequence will vary amongst
vehicle manufacturers. Some vehicles might require the key to be
removed from the ignition for ignition power to be completely turned
off. Please follow the vehicle manufacturer procedure to make sure
ignition is turned off.
When the ignition is turned back ON, check that no active or stored
faults are logged in the ECU and that the ABS and ATC/ESC warning
lamps are OFF.
To check ESC system status, open the ESC menu and click the “ESC
Info” button. Figure 10.7.
Figure 10.7
The ESC Information screen will display the ESC straight driving,
Steering Ratio Learning, and ESC End of Line Status as “Complete”.
Figure 10.8.
Figure 10.6
4012627a
WABCO TOOLBOX - ESC Menu
Figure 10.7
4012628a
WABCO TOOLBOX - ESC