6
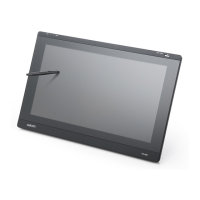
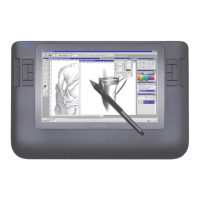
Connect DTI-520 to a computer
1.
Turn off your computer. The cover in the rear of DTI-520 is made to slide in the
direction of "
▶
", and is removed.
2.
Connect the VGA cable between DTI-520 and your computer.
3.
Connect the AC adaptor to DTI-520.
4.
Connect the AC adaptor power cable and plug the adaptor into an AC outlet.
Be sure to connect an earth cable.
5.
Turn on the power switch of DTI-520. The power lamp will light blue, and then
turns orange.
6.
Turn on your computer to start your operating system.
7.
The maximum resolution of DTI-520 is 1024 x 768, True Color . As necessary,
configure the monitor control panel settings for the proper size and color resolution.
The number of colors is constrained by the performance of your computer or
graphics card. Refer to the documentation of the manufacturer for details.
If you want to fine-tune the display, please refer to Adjusting the LCD Monitor on
page 22 for more information.
8.
To install the Wacom tablet software, turn off your computer and connect the USB
cable or serial data cable.
9.
Fix cables to a cable guides. Shut the connector cover is and take out the cables from
the hole of the cover.
10.
Install tablet software. Refer to
Tablet Software Installation for Windows and
Macintosh
on
page 8
.
CAUTION
■
Do not use any cable that did not come with DTI-520; use of an improper cable
may damage DTI-520.
■
Make sure your graphics card has a VGA connector. The use of an improper
video card may damage DTI-520.
■
Do not connect or disconnect the video or power cable while DTI-520 or your
computer are turned on; this can damage the LCD display or computer video card.
■
Never connect or disconnect the video cable or power cable while your computer or
DTI-520 is powered on. This can damage the LCD display or video card.
Connect DTI-520 to a computer as adisplay.
 Loading...