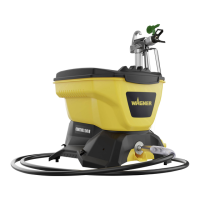
1
2
METAL
3
PLASTIC
4
5
ASSEMBLY
6
EN
Do not plug in the power cord until assembly is
complete.
TOOLS NEEDED
• Two 6” adjustable wrenches
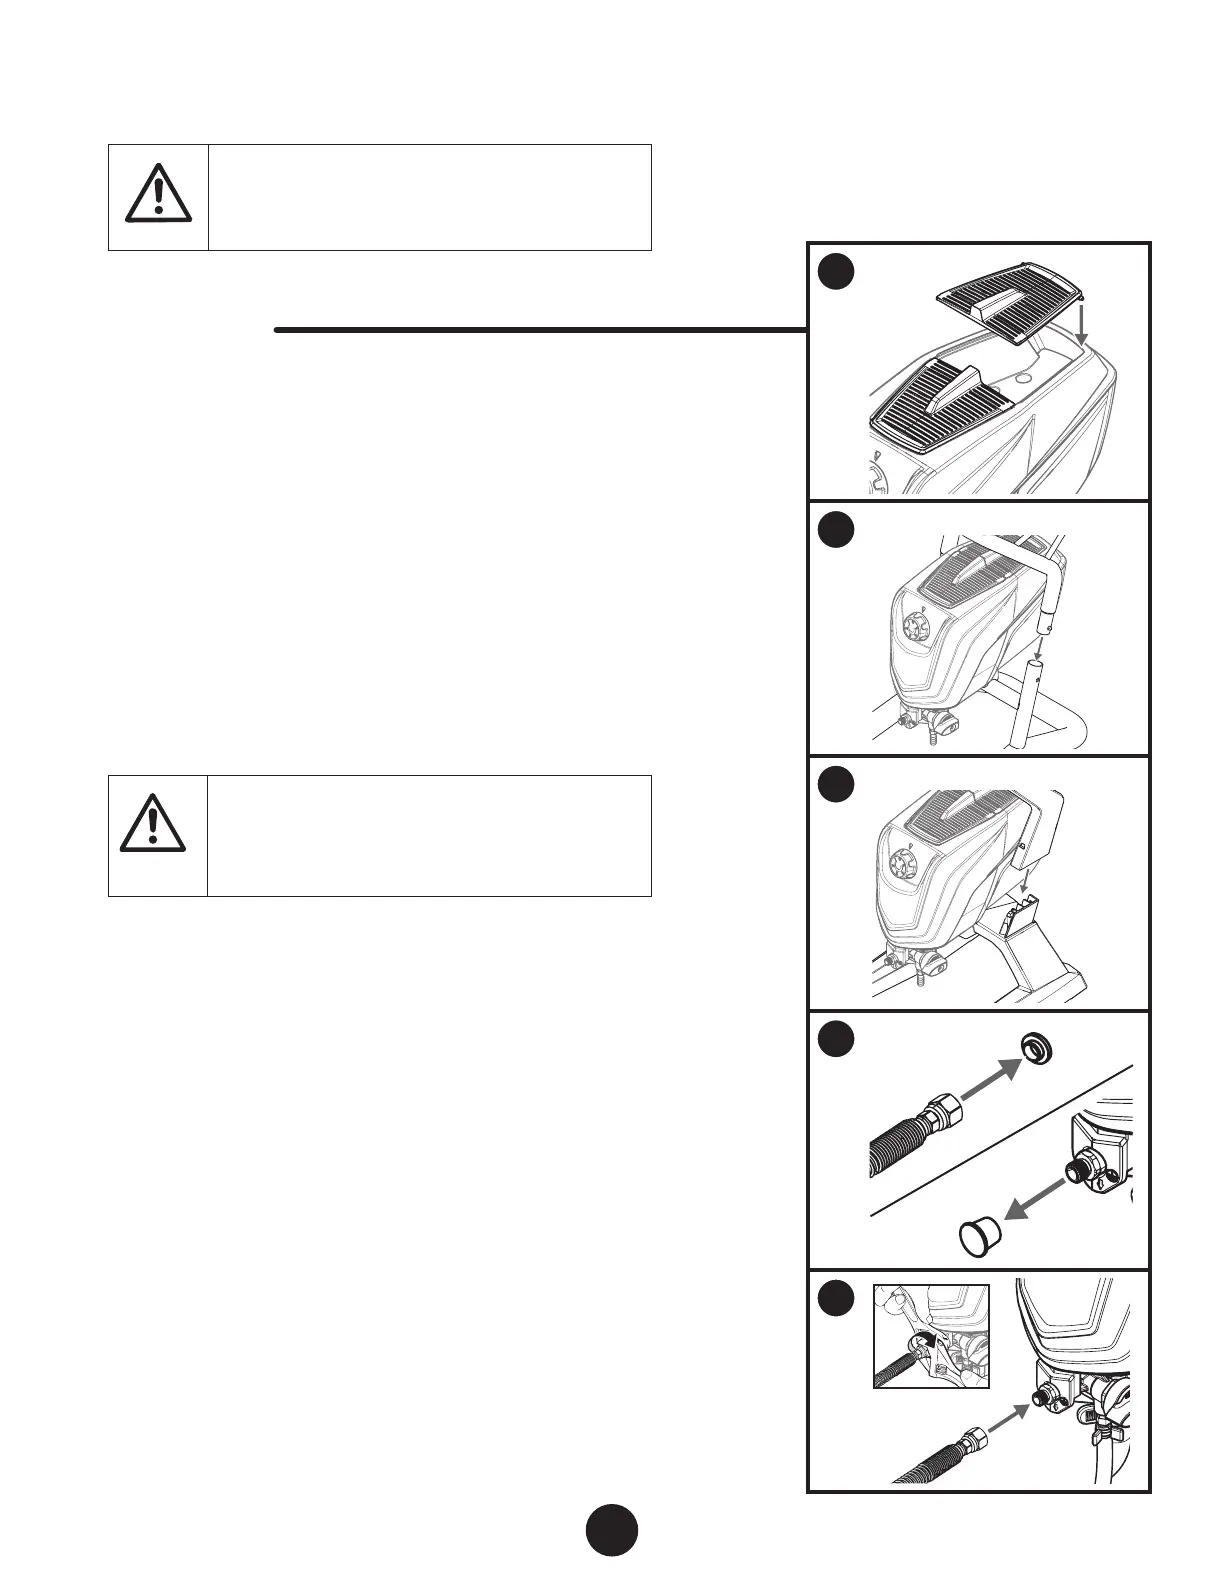
1. Attach the tool box doors to the top of the sprayer as shown.
Snap one peg into one of the orices, and then snap the other
peg into the other orice. The pegs on the ends will snap into
the orices on the unit.
2. METAL FRAME Attach the handle:
Line up the handle with the frame as shown. Push the snap
buttons on each side and drop the handle into the frame. The
snap-buttons will secure the handle into place.
3. PLASTIC FRAME Attach the handle:
Align the handle to the tabs on the unit and press into place
until it snaps (no snap buttons).
tention
Plastic Frame - Do not attempt to remove the
plastic handle once installed. Removal can damage
the snap connection.
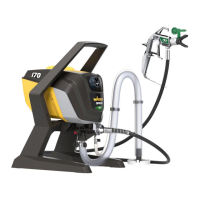
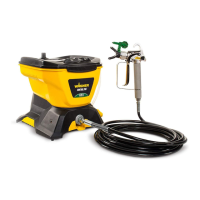
4. Remove the plug from inside the hose ttings and remove the
cap on the spray hose port. Discard both.
5. Thread one end of the high pressure spray hose to the spray
hose port. Hold the port with an adjustable wrench, and
tighten the hose with the other. Do not over-tighten.