23
GB
CORRECTION OF MALFUNCTIONS
Warning
If the supply cord of this appliance is damaged, it must only
be replaced by a repair shop appointed by the manufacturer,
because special purpose tools are required.
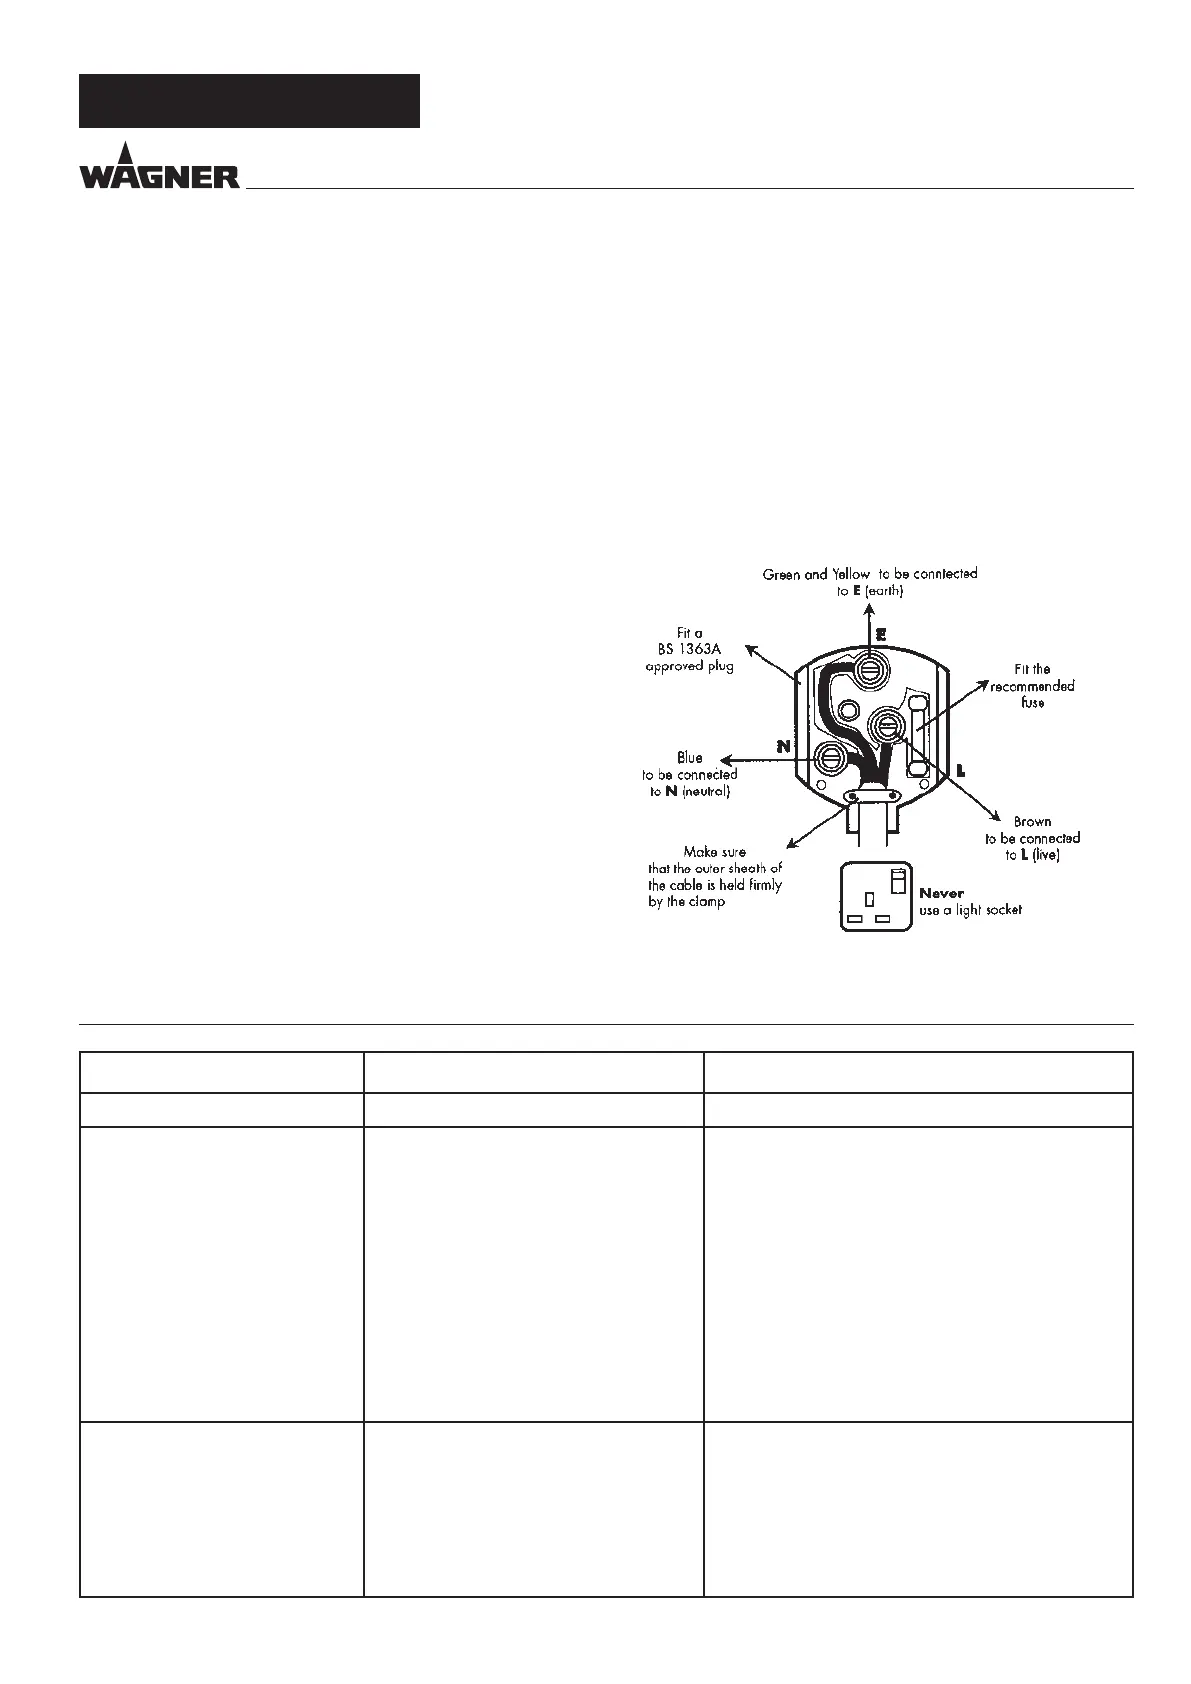
The wires in this mains lead are coloured in accordance with
the following code:
green/yellow = earth
blue = neutral brown = live
As the colours of the wires in the mains lead of this appliance
may not correspond with the coloured markings identiying
the terminals in your plug, proceed as follows:
•
The wire which is coloured green and yellow must be
connected to the terminal in the plug which is marked with
the letter E or by the earth symbol or coloured green or
green and yellow.
•
The wire which is coloured blue must be connected to
the terminal which is marked with the letter N or coloured
black.
•
The wire which is coloured brown must be connected to
the terminal which is marked with the letter L or coloured
brown.
•
Should the moulded plug have to be replaced, never re-use
the defective plug or attempt to plug it into a dierent 13 A
socket. This could result in an electric shock.
14 CORRECTION OF MALFUNCTIONS
MALFUNCTION CAUSE REMEDY
The unit will not start
•
No mains voltage
•
Check
No coating material emerges
from the nozzle
•
Nozzle clogged
•
Material volume setting too low
•
Paint container seal damaged
•
No pressure build-up in container
•
Container empty
•
Ventilation hose loose/damaged
•
Feed tube loose
•
Feed tube / feed tube lter clogged
•
Air vent on feed tube blocked
•
Diaphragm stuck
•
The diaphragm is positioned the
wrong way round.
•
Clean
•
Increase volume
•
Replace
•
Tighten container
•
Rell
•
Insert or replace
•
Insert
•
Clean or use another lter
•
Clean
•
Remove and clean (see section 13.2)
•
Position the diaphragm correctly (see section
13.2)
Coating material drips from the
nozzle
•
Air cap, nozzle or needle soiled
•
Spray attachment incorrectly
assembled
•
Nozzle loose
•
Nozzle seal is missing or worn
•
Nozzle worn
•
Needle worn
•
Clean
•
Assemble correctly (see section 12.1)
•
Tighten Union nut
•
Insert an intact nozzle seal
•
Change
•
Use new spray attachment
•
Should it be necessary to exchange the fuse in the plug only
use fuses approved by ASTA in accordance with BS 1362.
Only 13 Amp fuses may be used.
•
To ensure that the fuse and fuse carrier are correctly
mounted please observe the provided markings or colour
coding in the plug.
•
After changing the fuse, always make sure that the fuse
carrier is correctly inserted. With out the fuse carrier, it is not
permissible to use the plug.
•
The correct fuses and fuse carriers are available from your
local electrical supplies stockist.