R21 Service
53
the LH spindle pulley for the moment. Be sure
to have the correct 1/4 twist on each side as it
leaves the deck area.
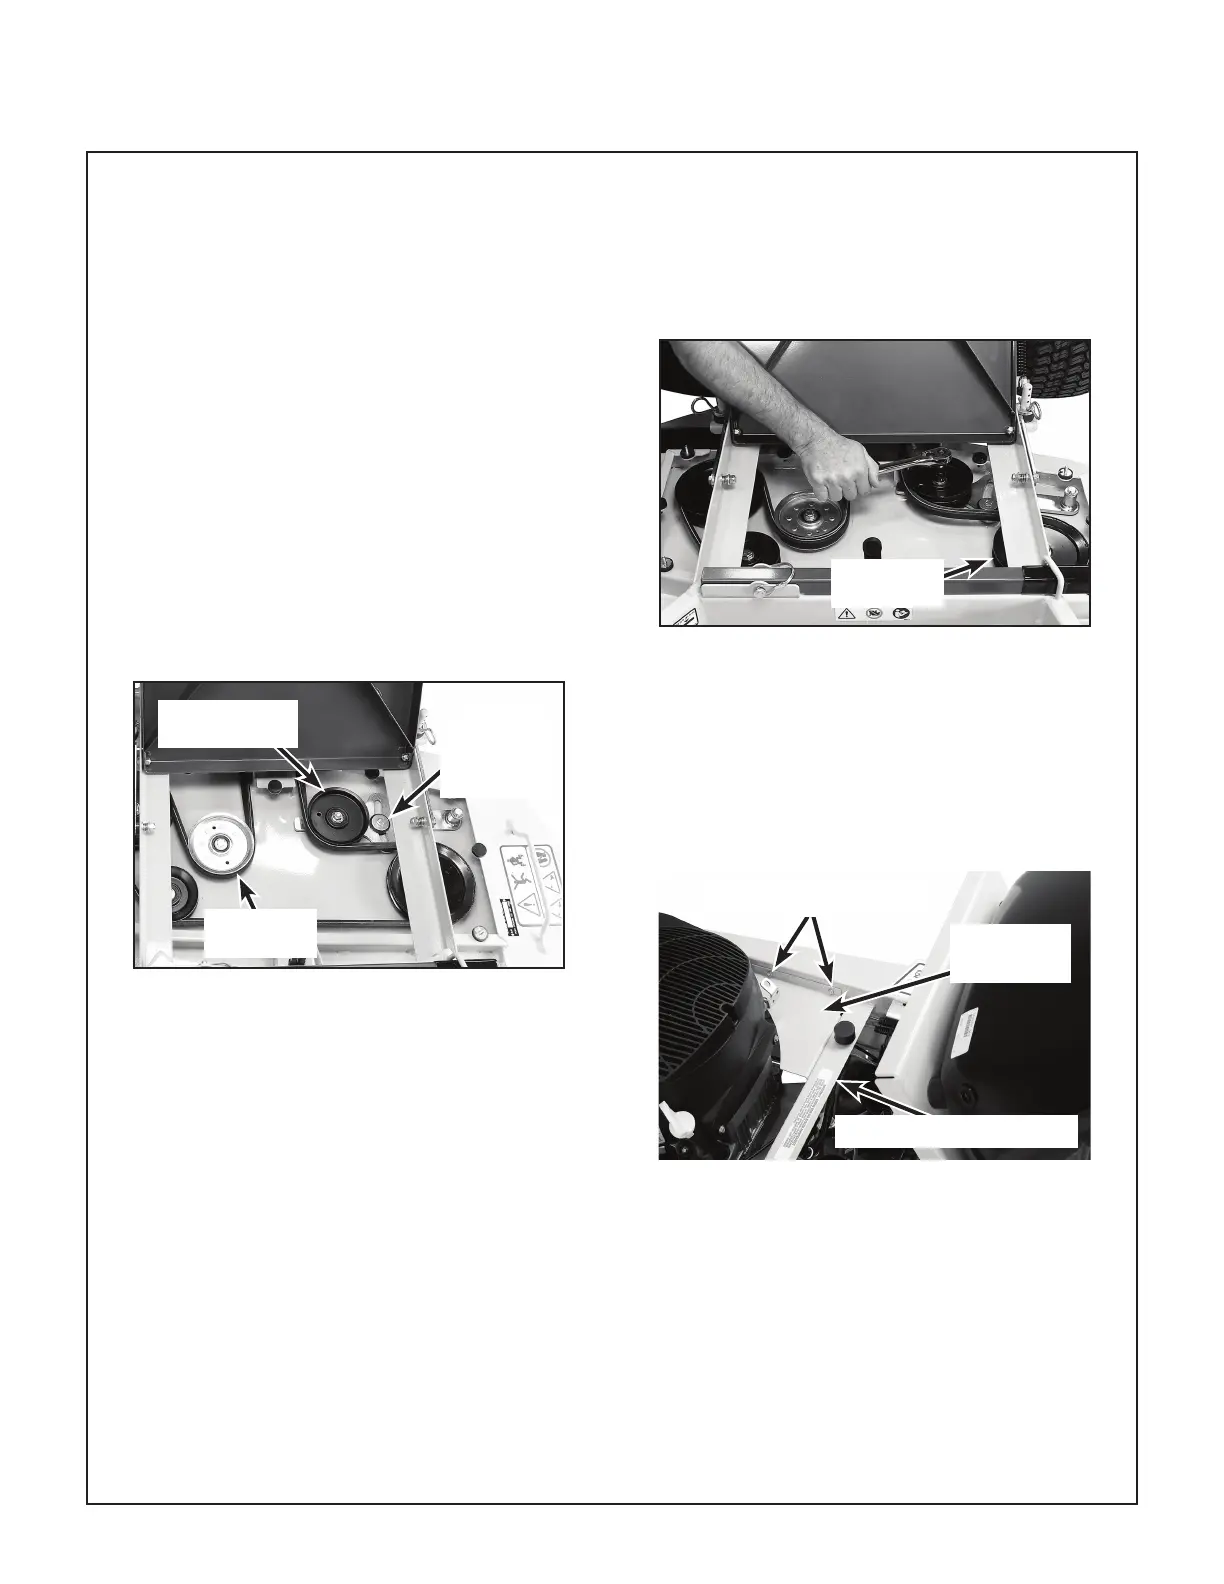
9. Use a 9/16 in. socket wrench (with a long
drive handle for increased leverage) to rotate
the deck idler arm clockwise, and install the
belt on the LH spindle pulley. Release the
idler arm to tension the belt.
10. With the new belt in place, check the position
of the stop in the slot of the belt tensioning
idler arm—the stop should be near the middle
of the slot. If the stop is on one side or the
other (due to belt length variation), the xed
rear idler pulley on the RH side of the deck
has three (3) adjustable mounting positions.
Adjust the xed idler pulley mounting position
to put the tensioning arm stop in the middle of
the slot.
Stop in
Middle of
Tensioning
Slot
Fixed Rear
Idler
Belt Tensioning
Idler
Check Position of Stop in the Slot
11. Lower the seat panel, raise and lock the car-
rier frame, and reinstall the deck belt cover.
Tighten the four (4) wing nuts to secure the
cover.
Replacing the Ground Drive Belt
NOTE: The rst part of this procedure involves
loosening the blade drive belt and disconnecting
the clutch wire to allow for the ground drive belt to
be removed.
1. With the engine off and the key removed from
the ignition, lift the seat panel.
2. Remove the four (4) wing nuts on the deck
belt cover and slide the cover out.
3. Use a 9/16 in. (14 mm) socket wrench (with
a long drive handle for increased leverage) to
rotate the deck idler arm clockwise and create
slack in the belt. Remove the belt from the LH
spindle pulley.
LH Spindle
Pulley
Removing Belt from LH Spindle Pulley
4. Remove the loosened blade drive belt from
the clutch pulley directly below the engine.
5. Remove the solenoid guard by removing
three (3) screws and nuts as identied in the
Remove Solenoid Guard for Clutch Wire
Access photo.
Mounting Screws
Mounting Screw Below
Solenoid
Guard
Remove Solenoid Guard for Clutch Wire Access