Page 15
1.9 Setting the date and time
In order for the appliance to operate with maximum DHW efficiency, and if the built in timeclock
is to be used, it is necessary to correctly set the date and time upon first start-up of the
appliance. If the date is correctly set, daylight saving changes will be applied automatically.
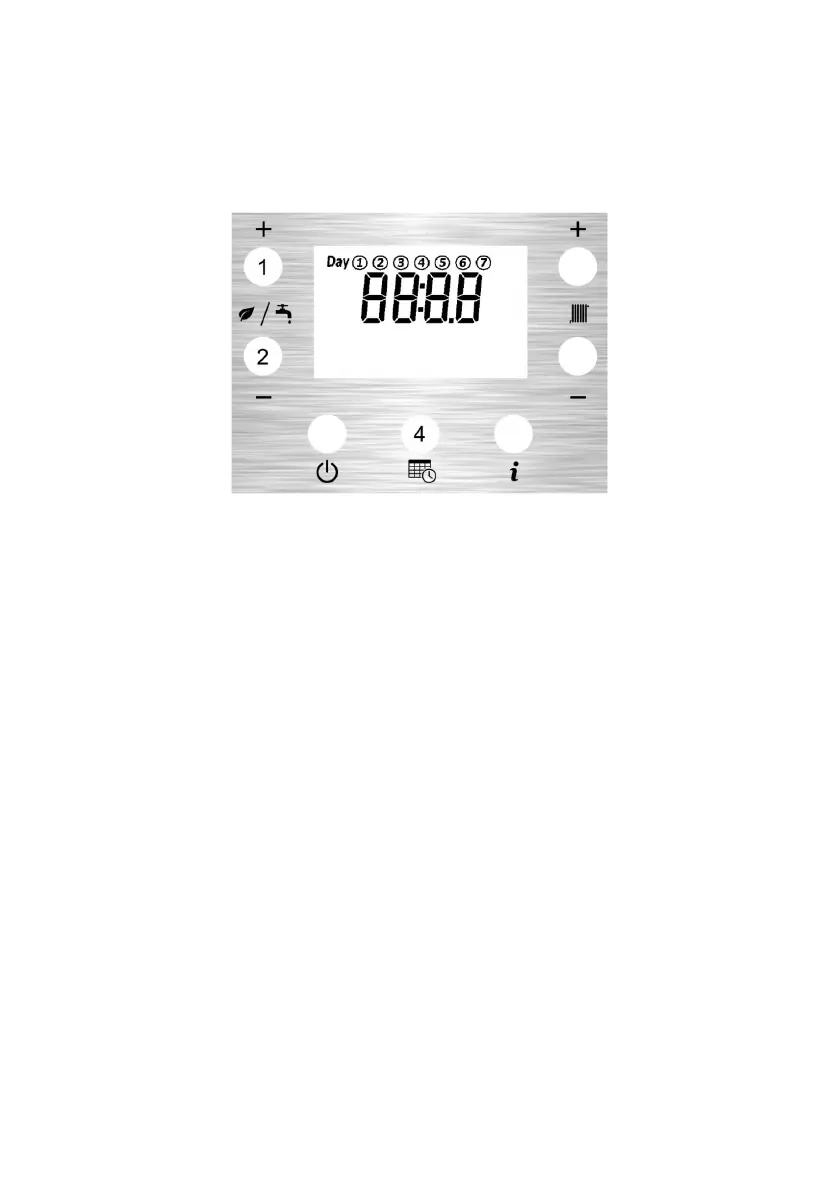
From the Home Screen, the date and time can be set by simultaneously pressing the Time
Programming button (4) and DHW- button (2) for 3 seconds.
Step 1 – Set the current hour (24 hr format) using the DHW+ button (1) and DHW- button (2),
then press the Time Programming button to confirm.
Step 2 – Set the current minute using the DHW+ button (1) and DHW- button (2), then press the
Time Programming button (4) to confirm.
Step 3 – Set the current week day (1-7) using the DHW+ button (1) and DHW- button (2), then
press the Time Programming button (4) to confirm.
Step 4 – Set the current year using the DHW+ button (1) and DHW- button (2), then press the
Time Programming button (4) to confirm.
Step 5 – Set the current month (1-12) using the DHW+ button (1) and DHW- button (2), then
press the Time Programming button (4) to confirm.
Step 6 – Set the current date using the DHW+ button (1) and DHW- button (2), then press the
Time Programming button (4) to confirm.
The LCD will show the time, and display the text ‘done’ when the programming is completed.
After the appliance has been in operation for a number of days, it will be able to maintain a
memory of the date and time settings during short power interruptions. If power is interrupted for
an extended period it may be necessary to re-set the time and date again using the above
routine.