WARN® INDUSTRIES PAGE 21 72171 Rev A0
VI. Operation
VI. A. Attaching the plow to the vehicle
1. Set up the plow support and blade on level solid
ground. Operate the winch to extend hook and
cable out approximately three feet. Drape
extended hook and cable over bumper tube. Do
not hook to vehicle bumper.
2. SLOWLY drive the vehicle up to the plow support
and align the receiving flanges on the plow mount
to the receivers on the plow support. See Figure
39. Stop the vehicle when the support is fully
engaged in the plow mount.
3. Turn off the vehicle, set the parking brake, and
walk over to the plow support. Check to make
sure that the support receivers are fully engaged
into the plow mount. You may have to push on
the plow support or pull on the plow to get the
receivers to go in as far as possible.
4. Pull the detent pin out in one of the stands, lift the
stand until it locks fully into the plow mount, place
the detent pin back into the bottom hole in the
plow support. See Figure 40. Repeat on the
other side.
5. Double check that the plow is fully engaged into
the system. Pull and push on the plow blade to
ensure nothing on the plow mount or plow support
moves. The blade should be solidly attached to
the vehicle.
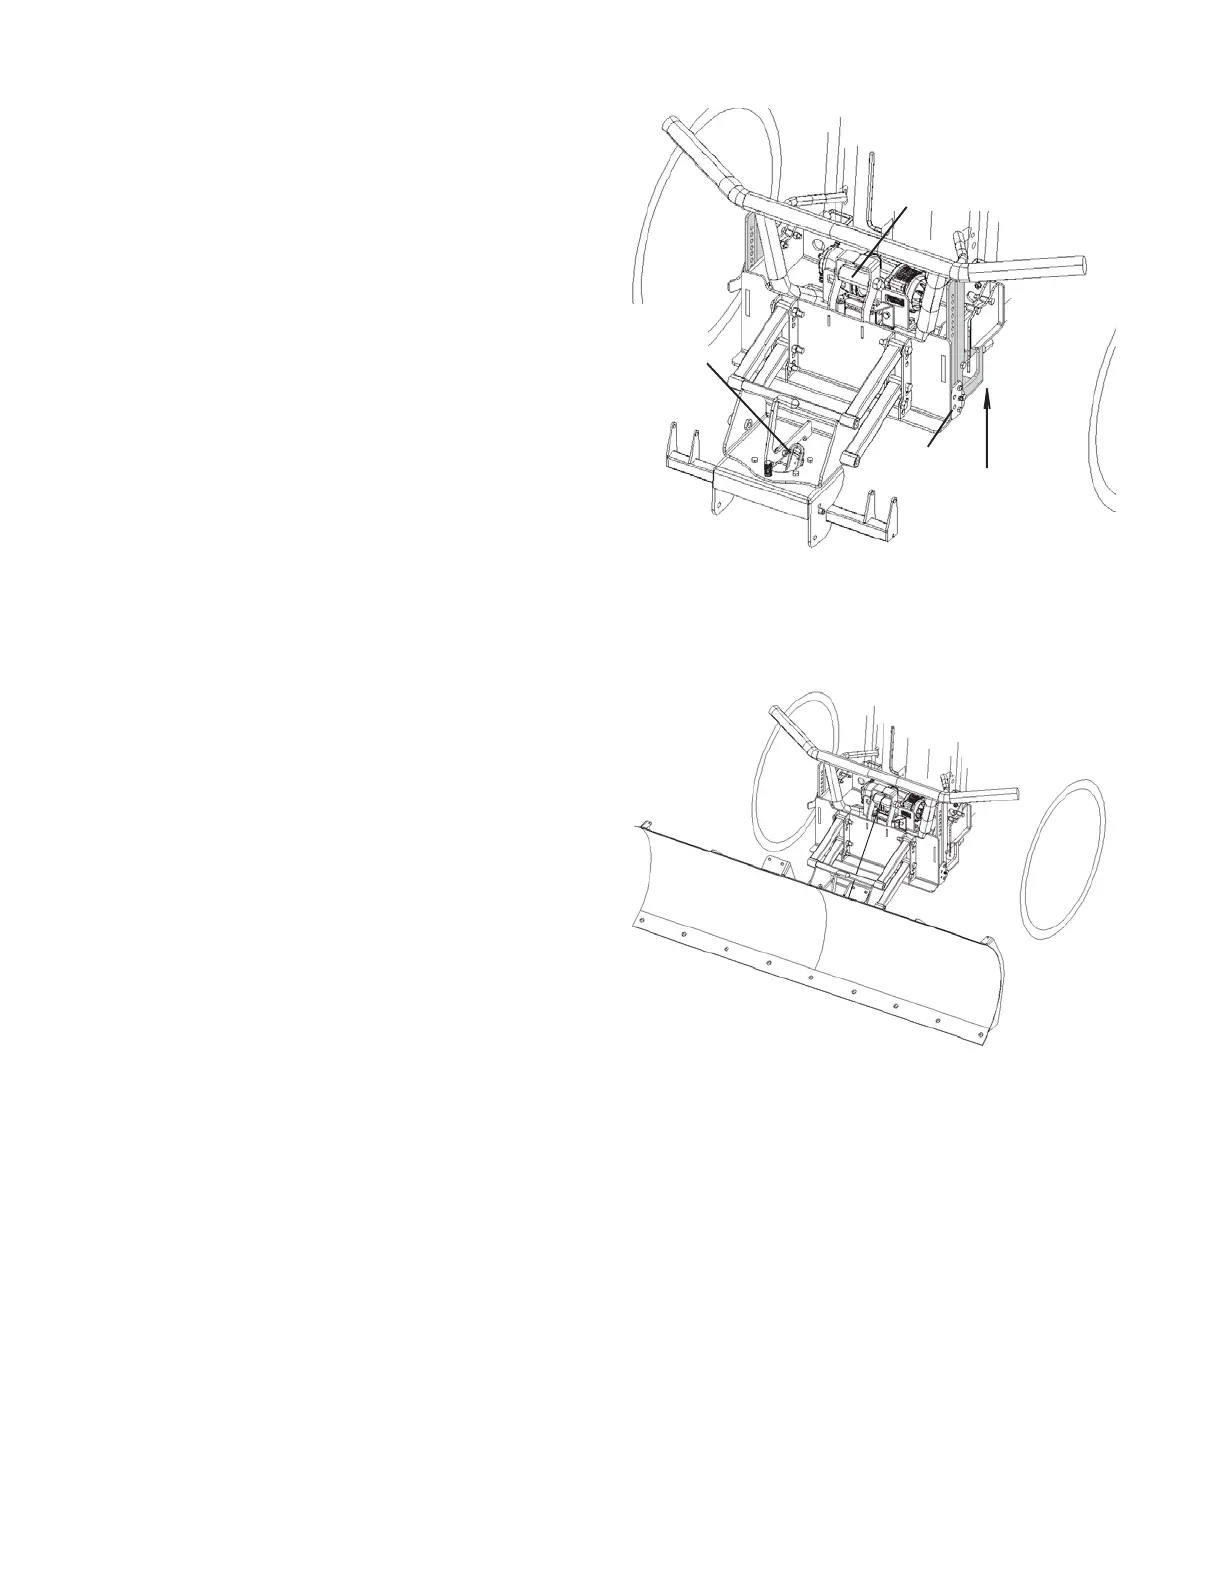
6. MANUALLY route the winch cable and hook over
the middle roller on the plow support. Be sure the
winch cable is going directly off the winch drum to
the roller, it should NOT interfere with any part on
the vehicle.
7. Attach the winch hook onto the quicklink located
on the plow base. See Figure 41.
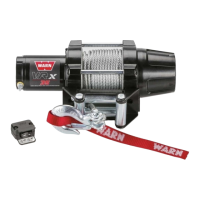
8. Turn the ignition switch to ON, and operate the
winch to lift and lower the plow. The plow is now
ready for operation and should look like Figure 42.
Figure 41 Attach plow to vehicle
Add detent pin
to bottom hole
(blade not shown)
Route winch cable and
hook over roller
Attach
winch hook
to quicklink
Figure 42 Plow attached to vehicle