CHAPTER 4 CLICK 104 71
Autobaud
e second option that comes up when you’re cycling through the front panel menu is
the autobaud function. To select this option, release the push-button when the green LED
comes on solid.
Note
The autobaud function can only be accessed here, on the front panel menu.
is function initiates an autobaud on the communication buses (you will select which bus
to autobaud on the Level 2 LEDs). An autobaud will stop data reporting on the selected port
and attempt to communicate with the SmartSensor at all supported baud rates.
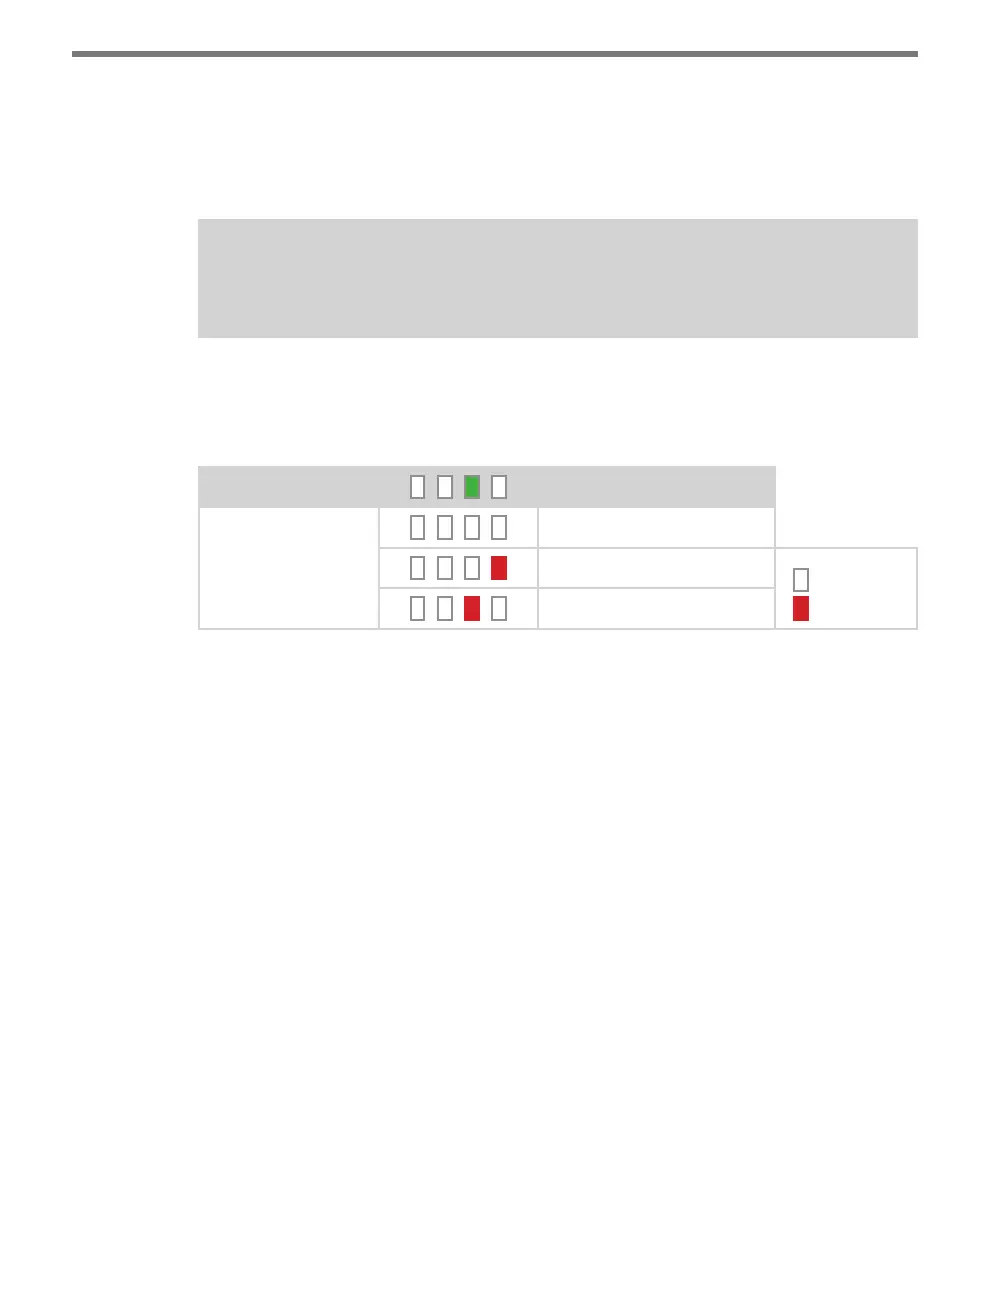
Level 1 LEDs
Autobaud
Level 2 LEDs
Cancel and exit menu
Autobaud on bus 1
LED o
LED on
Autobaud on bus 2
Table 8.5 – Front Panel Menu Autobaud Settings
See the earlier Navigating through the Menu and the Menu Operation Example sections for
how to congure this parameter.
As each baud rate is attempted, the Level 2 LEDs will sequence with a single LED illumi-
nated from LED 1–4.
If the Click 104 is successful in communicating with a SmartSensor, it will display the baud
rate found, using the same Level 2 LED pattern used in selecting the baud rate (covered in
the Baud Rate section of this chapter and Table 8.6). Aer a short time of displaying the au-
tobaud results, the menu will return to normal operation with the baud rate setting updated
(and stored) to the baud rate detected during the autobaud process.
If the autobaud fails, all four Level 2 LEDs will light up for a few seconds, and then the
menu will return to normal operation with the baud rate setting remaining unchanged.
Baud Rate (Bus 1 and 2)
e next two conguration parameters that come up in the front panel menu allow you to
manually set the baud rate of the two communication buses. Bus 1 comes up rst, with the
yellow LED coming on solid, then bus 2, with the yellow LED ashing.