18 CHAPTER 1 INSTALLING THE SMARTSENSOR ADVANCE
To verify your pointing, look at the road from directly behind the sensor. If from this
vantage point you do not see the target location, then the sensor is pointed in the right
general direction.
Note
With roadside alignments, it may be beneficial to use a pointing assistant (e.g. a
Quick-Grip beam clamp) for precise alignment. A beam clamp can be attached to the
sensor and aimed by looking down the length of the beam to verify pointing.
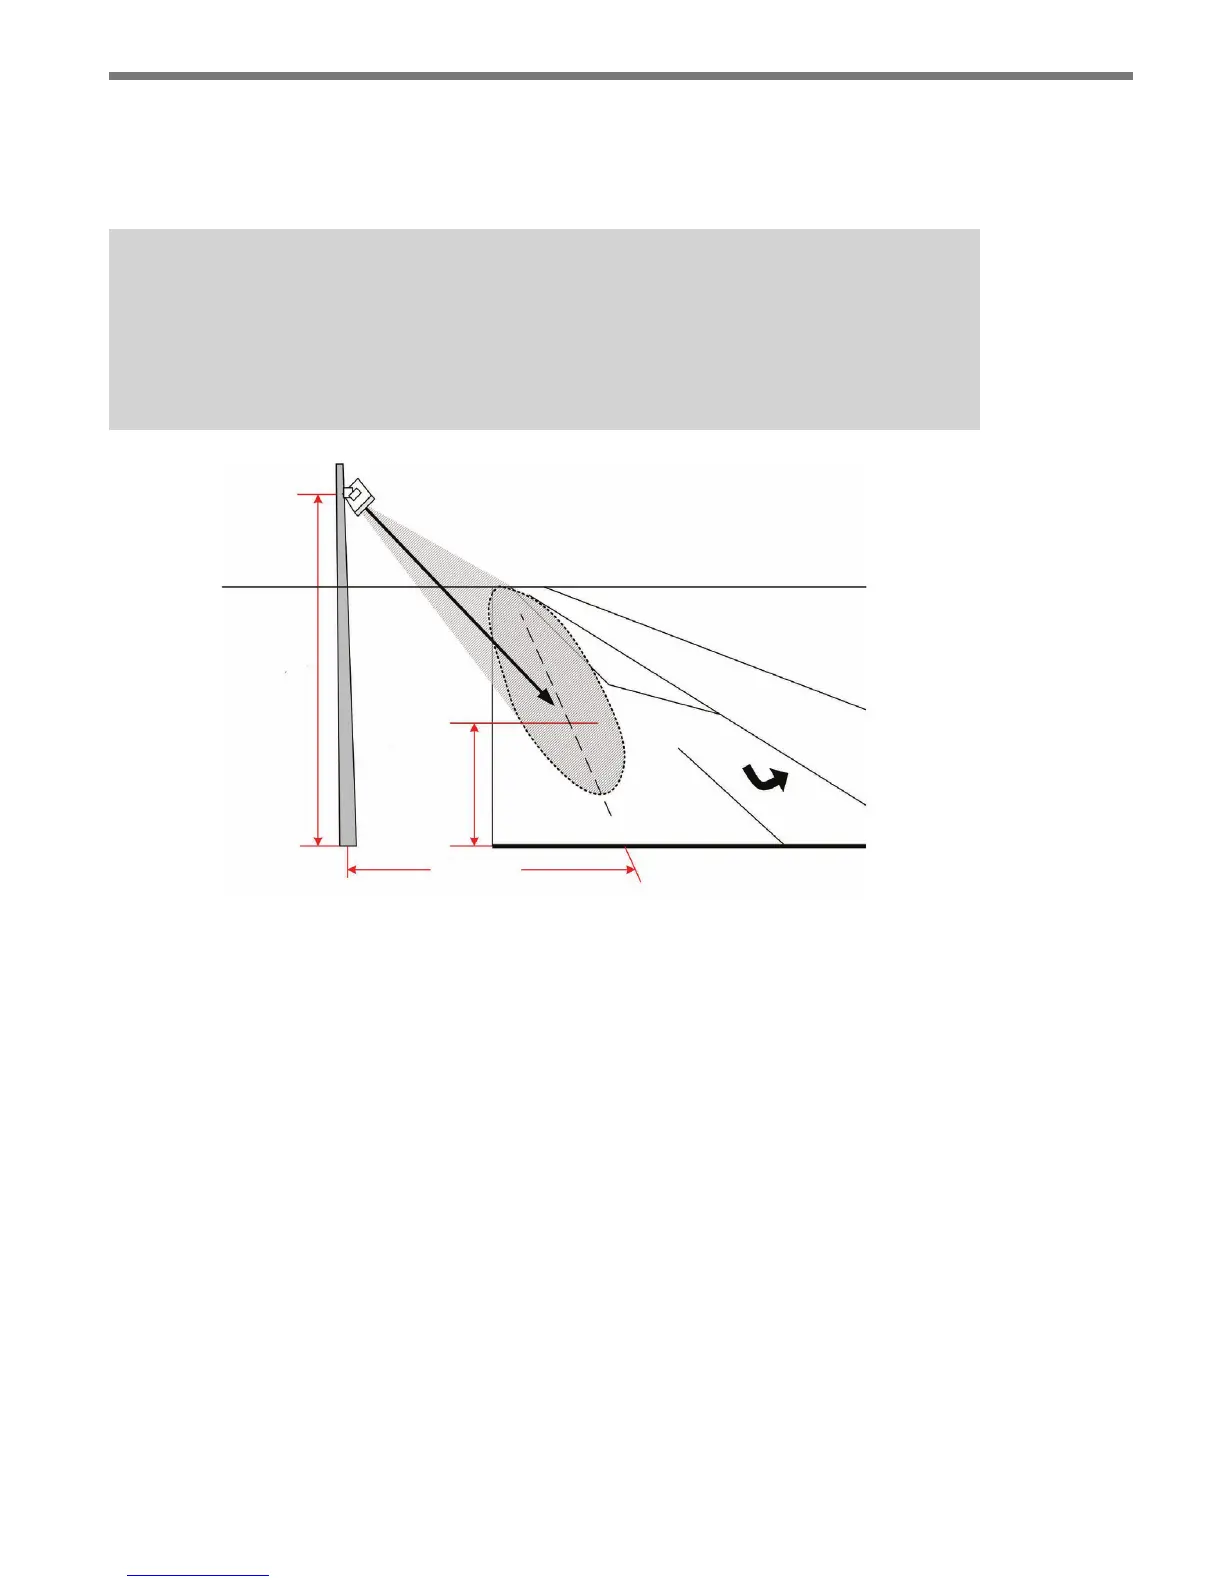
Height
Oset
Target
Distance
Figure 1.3 – Pointing the Sensor
2 Roll the sensor using the backplate, while keeping it pointed at the target location, to
align the elliptical beam. If the sensor is mounted directly above the lanes of interest,
you will not need to roll the sensor. (See Appendix D for target roll angles.)
3 Align the top and bottom center-tabs of the sensor with the center of the lanes of
interest. It may be benecial to use a 90 degree edge from a rafter’s square or other
framing device to correctly align the sensor. Place the parallel edge of the framing de-
vice on the top or bottom of the sensor and then line the perpendicular edge with the
roadway (see Figure 1.4).