Please Do Not Return This Product To The Store. Call Us Directly! Our Trained Technicians Will Answer Your Questions and/or Ship Any Parts You May Need
You can reach us Toll Free at 1-888-827-3667 for Consumer Assistance or online at www.wayne-dalton.com
1
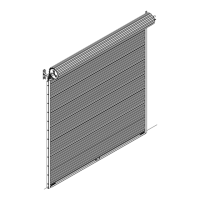
Rail Assembly
IMPORTANT: DO NOT RUN OPENER UNTIL
INSTRUCTED TO DO SO!
Pre-position parts for assembly. Bolt a splice
bracket to the opener rail assembly and bolt
the intermediate rails to the same splice
bracket, using 5/16” x 1/2” carriage bolts
and 5/16” lock washer nuts. The bolt head
must be on the inside of the rail and the
nuts on the outside. Bolt the other splice
bracket to the intermediate rails, leaving the
four holes on the splice bracket open for the
front rail assembly.
NOTE: Note position of oval head and flat
head carriage bolts.
NOTE: The rails will have to be adjusted
later, so only finger tighten the bolts. The
bolts will have to be tightened after
the rail alignment is achieved.
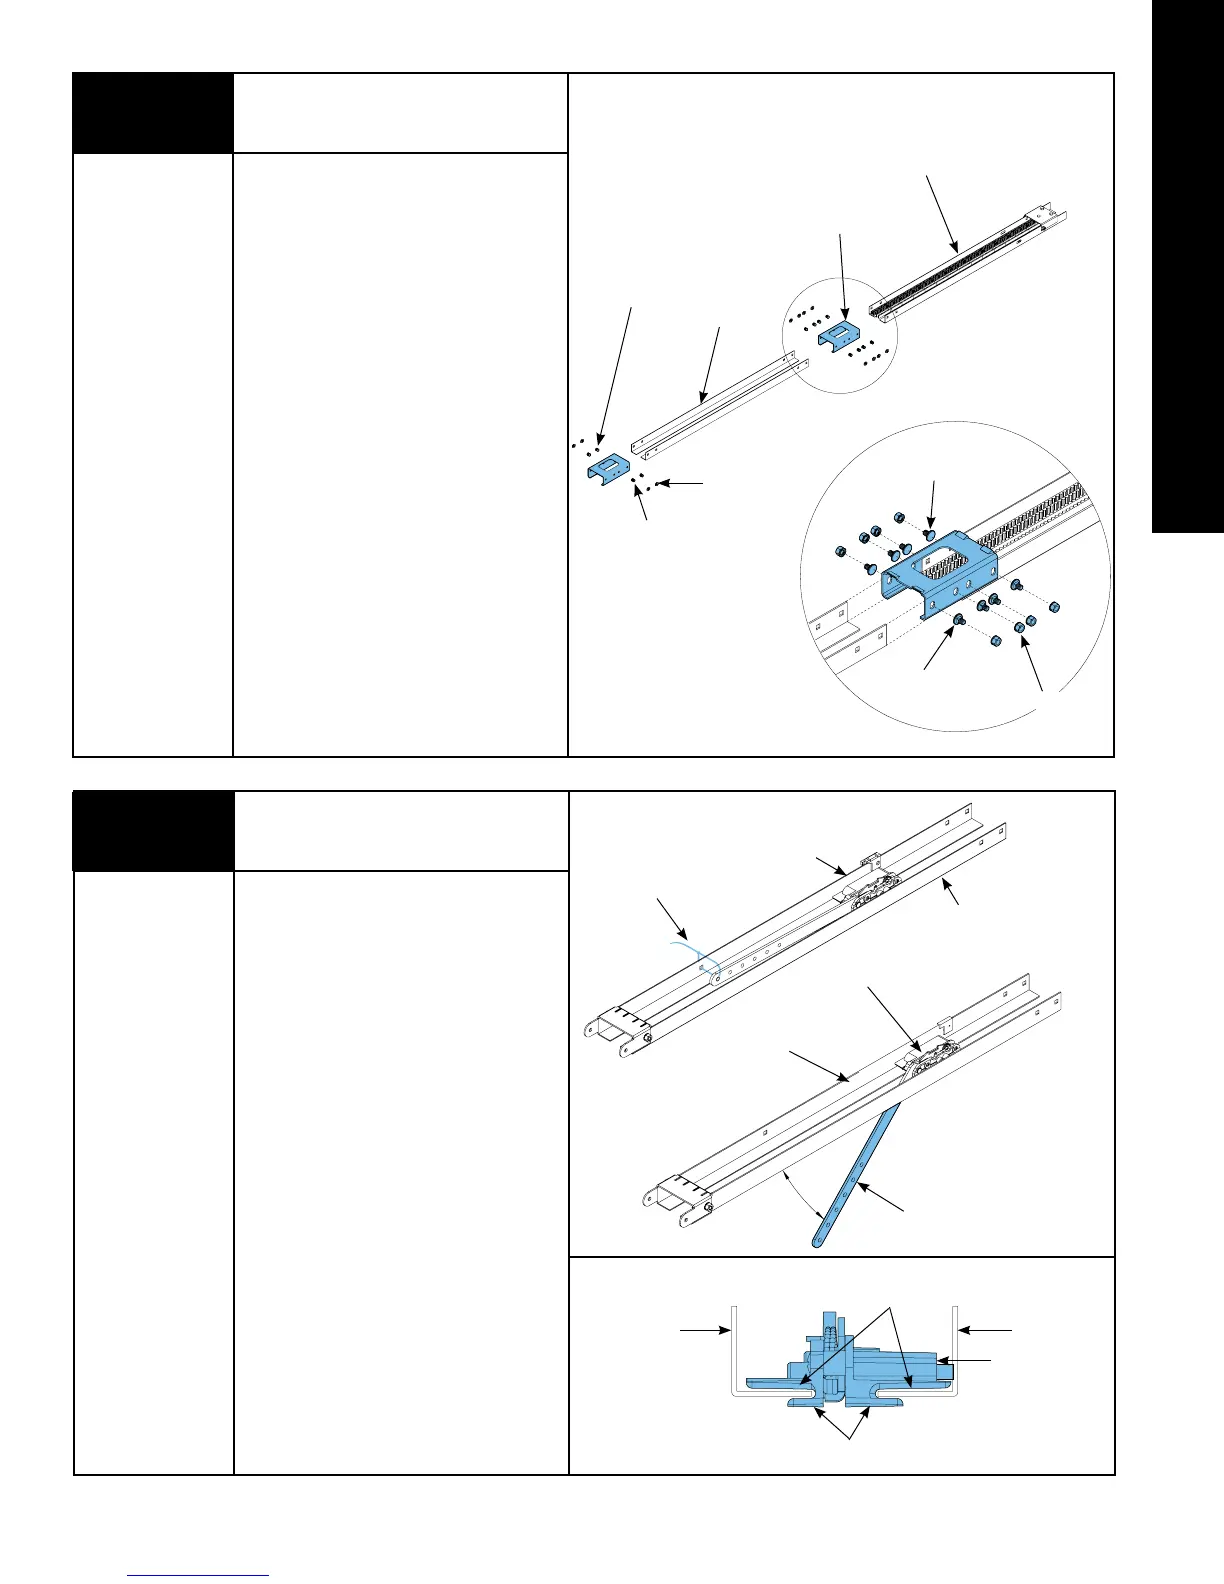
Removing Tie Wrap
The upper door arm is secured to the front
rail assembly with a tie wrap. Remove tie
wrap from the upper door arm.
Ensure rails fit between the upper and
lower trolley guide.
Tie Wrap
FRONT RAIL ASSEMBLY
Rail Stop
Trolley
Upper Door
Arm
Splice
Bracket
Opener Rail
Assembly
5/16” x 1/2” Flat Head
Carriage Bolts
Intermediate Rails
1
2
5/16” Lock Washer Nut
5/16” x 1/2” Oval Head
Carriage Bolts
5/16” x 1/2” Flat Head
Carriage Bolts
5/16” x 1/2” Oval Head
Carriage Bolts
5/16” Lock Washer Nut
Tools Needed:
1/2” Socket
Ratchet Wrench
Tools Needed:
Pliers/ Wire Cutter
INSTALLATION
Upper Guides
Lower Guides
End View
Left Hand Rail Right Hand Rail
Trolley
Left Hand Rail
Right Hand Rail