32
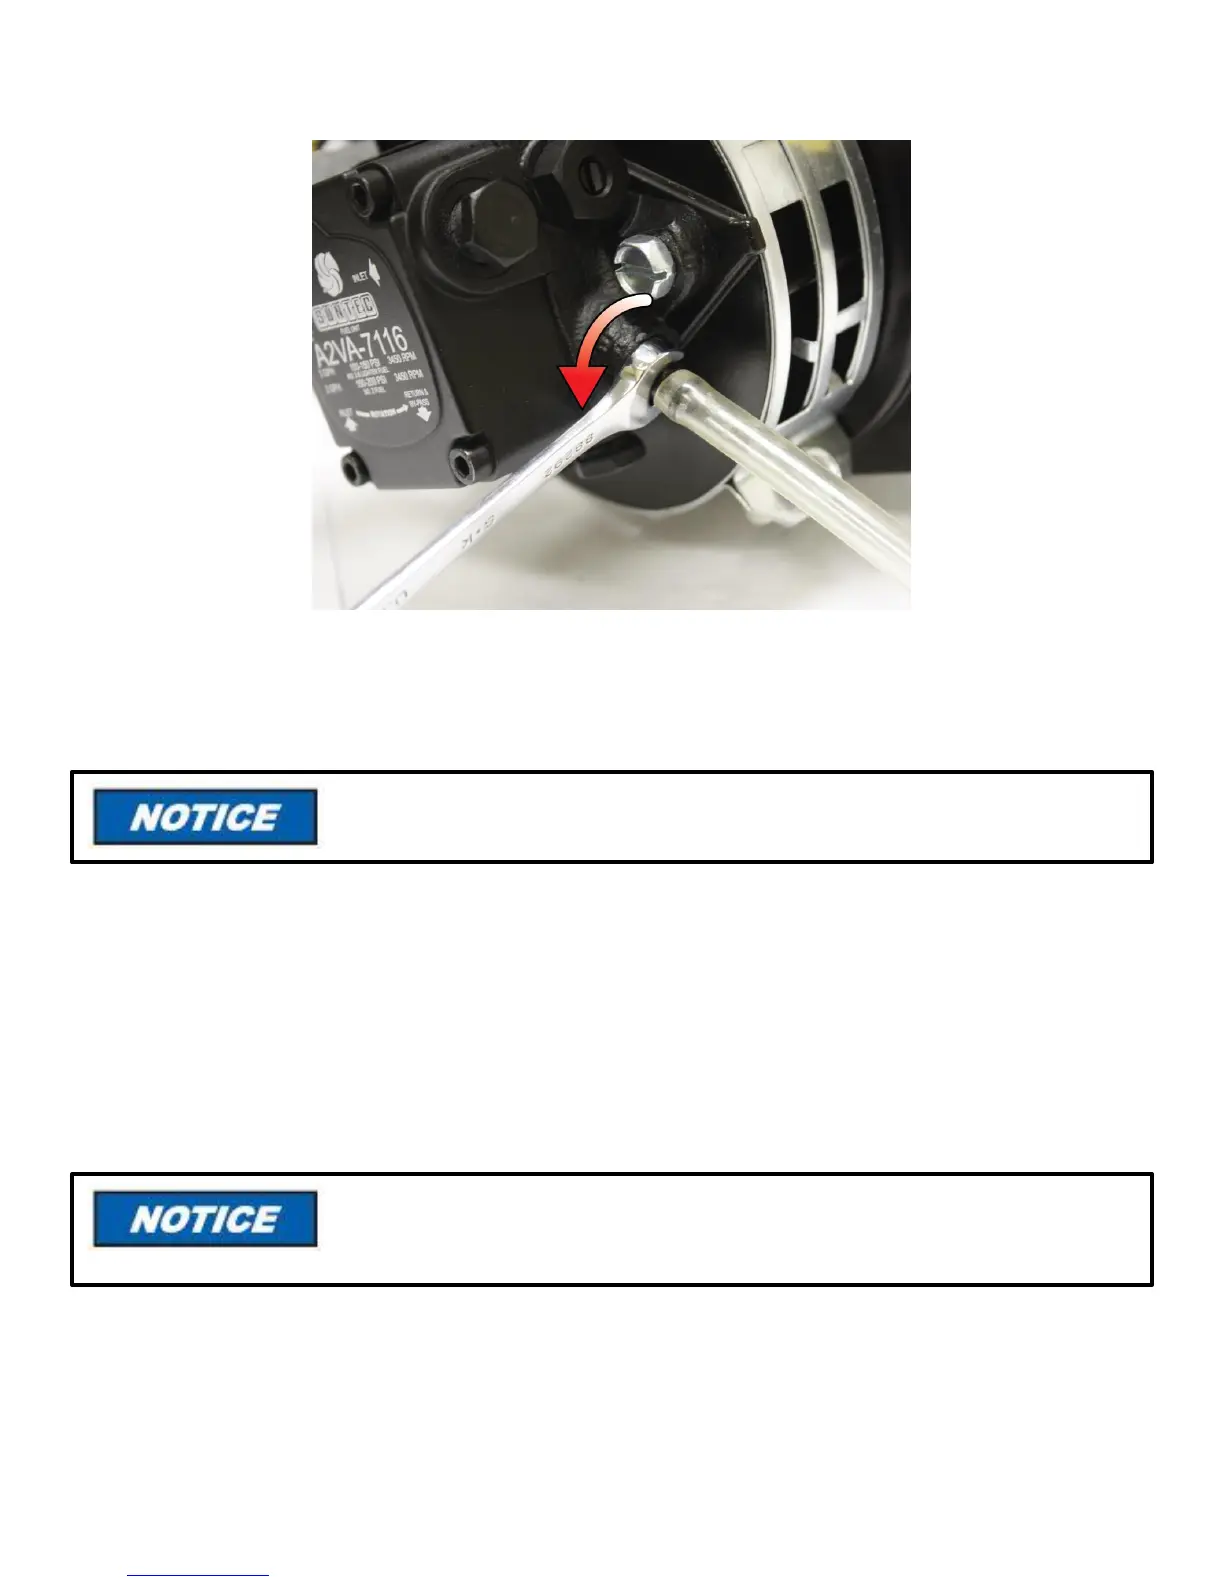
2. With the burner running, use a 3/8 inch wrench to open the bleeder valve about one-half turn (Figure 24). Allow oil
to drain into the container until a steady, clear bubble free oil stream is noticed. Close the bleeder plug.
Figure 24– Bleeder valve adjustment
Note: If safety lockout occurs during burner operation, reset after one or two minutes.
3. Close the ignition device mounting plate, and tighten the hold down clip screw
FINAL ADJUSTMENTS
At this point a final adjustment should be made by the use of a COMBUSTION TEST KIT. After operating for ten minutes
to warm up the appliance, a smoke tester should be used to take a smoke reading. Smoke test should read no greater
than #1 (Shell Bacharach scale), and less than a #1 smoke is desired. At times, a new heating unit requires more time
than this to burn clean due to the oil film on the new heater unit surfaces. Recheck draft and take a CO
2
reading over the
fire and in the stack. If a large differential between CO
2
readings is noted, air leakage is the most common cause. CO
2
readings must be taken ahead of draft control, if used. The CO
2
measured in the stack should be at least 10-12% for oil
rates 1.00 gal/hr or below, and at least above 10% for oil rates over 1.00 gal/hr Units should be started and stopped
several times to assure good operation. Open ignition device mounting plate, unplug solenoid valve lead, and check the
oil primary control (if equipped) for normal operation see SEQUENCE OF OPERATION: BURNERS WITH R7284G
AND R8184G CONTROLS on pages 17-18. Check operation of limit controls and thermostat. Check for oil leaks.
SETTING COMBUSTION EFFICIENCY
1. Fire burner, adjust interlocking air bands until smoke from the exhaust changes from black to clear and see
through.
2. Record CO
2
and smoke levels. If CO
2
is low, close the air band by a 1/8 inch using a ruler or scale, and repeat
CO
2
and smoke test. Continue this adjustment until desired CO
2
and smoke levels are obtained. Record stack
temperature.
3. Check lighting with cold and hot chamber.
4. Lock all adjustment screws.
Do not run fuel unit dry for more than five minutes or damage to the pump may result.
All new installations should be re-inspected after one or two weeks of normal operation.