9
Mercedes Sprinter
NOTE: Due to vehicle build variations, it may be necessary to utilize an A/C compressor manifold with
downward-facing ports.
NOTE: Some components in this manual are prototype parts and may not directly reflect the parts you
have in your kit.
NOTE: This manual was based on an install that utilized vertical fittings at the A/C compressor. If your
installation utilizes a different orientation, some deviation from the steps outlined may be necessary.
Preparation
Refer to the manufacturer’s instructions as necessary:
• Remove rear interior body panels.
• Remove the headliner.
• Remove the driver’s seat.
• Remove the driver- and passenger-side step well trim.
• Remove the left- and right-hand b-pillar trim.
1. Install the A/C compressor and A/C manifold per the manufacturer’s instructions
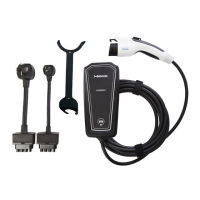
2. Cut the tie-strap from the wiring boot
located near the battery box.
NOTE: Exercise caution when working
around impact sensors.
NOTE: Passenger side shown, driver’s side
similar.
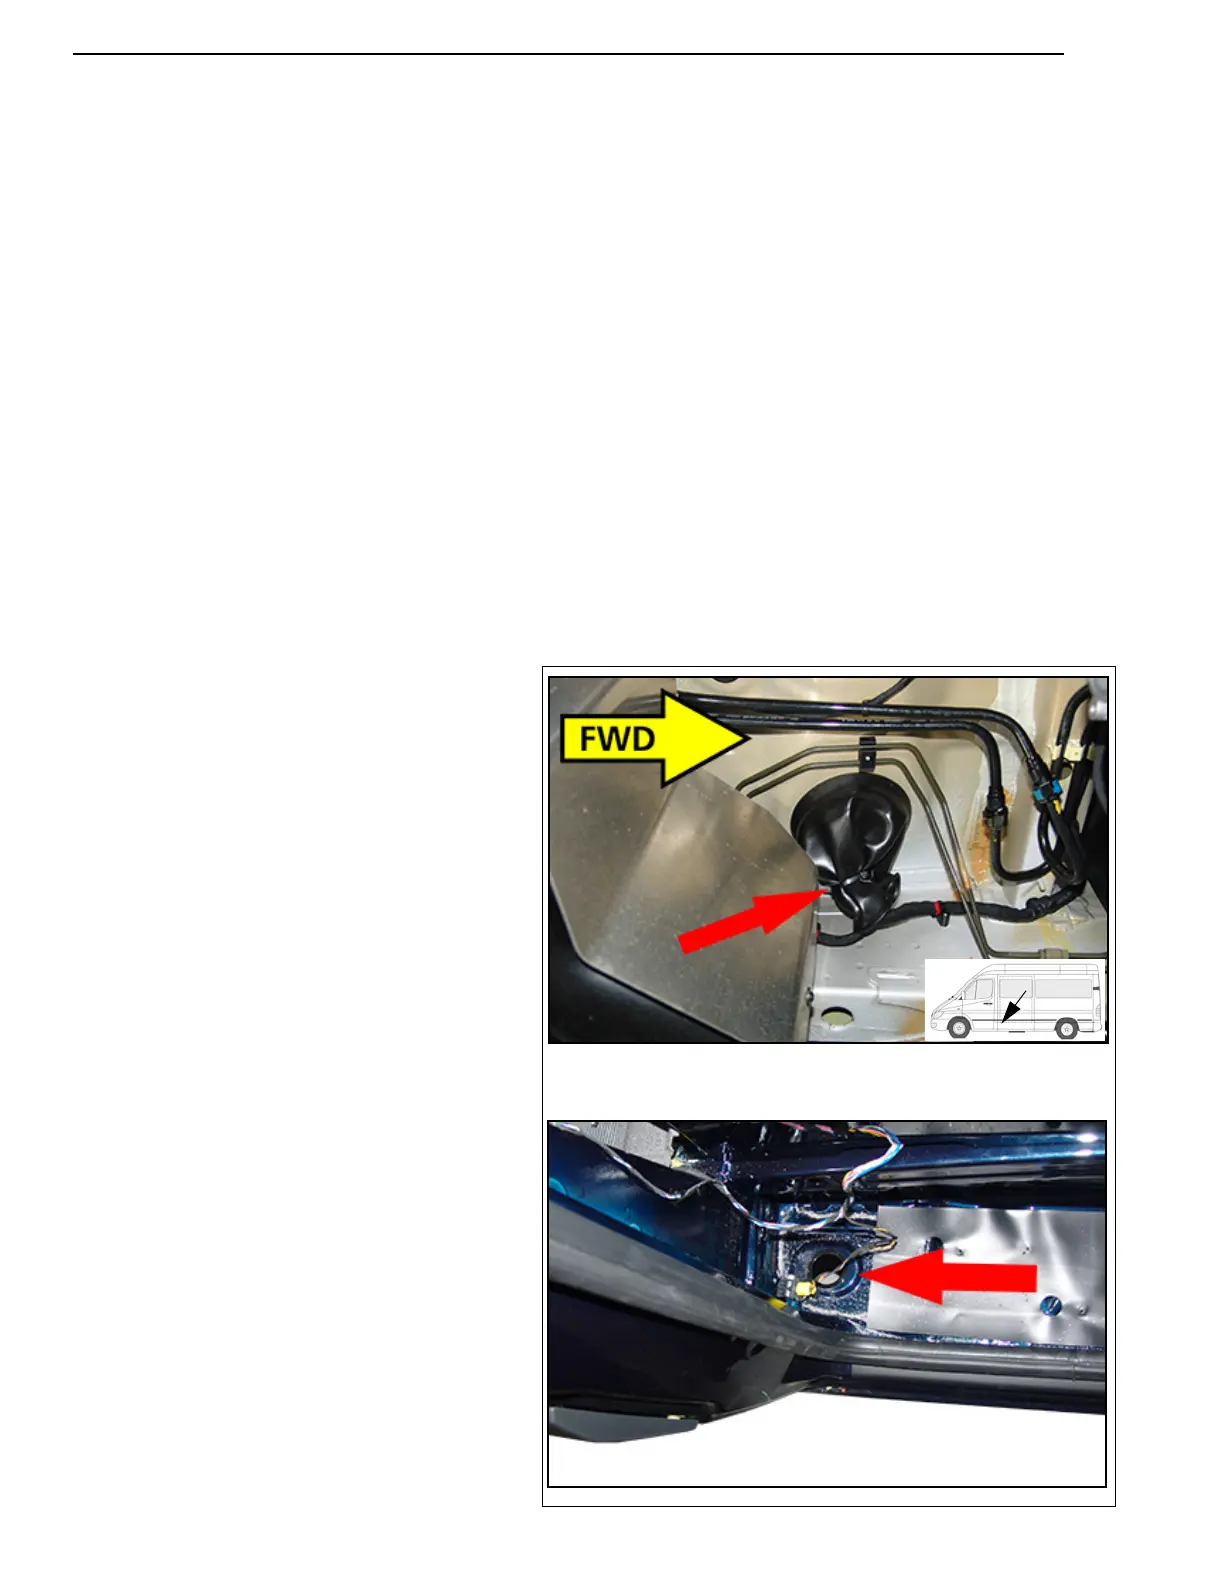
3. Remove the foam block behind the b-pillar
trim panel (if equipped) and drill a 3.5 in
(89 MM) hole in the rear of the step-well
area.
General References
• Bare body parts, for example around drilled holes, must be treated with anti-corrosive coating.
• Secure hoses, cables and wiring harnesses and fit protective hoses around them at chafing points.
• Fit edge protectors (opened fuel hose, grommet, split-loom, etc.) to sharp edges.