10
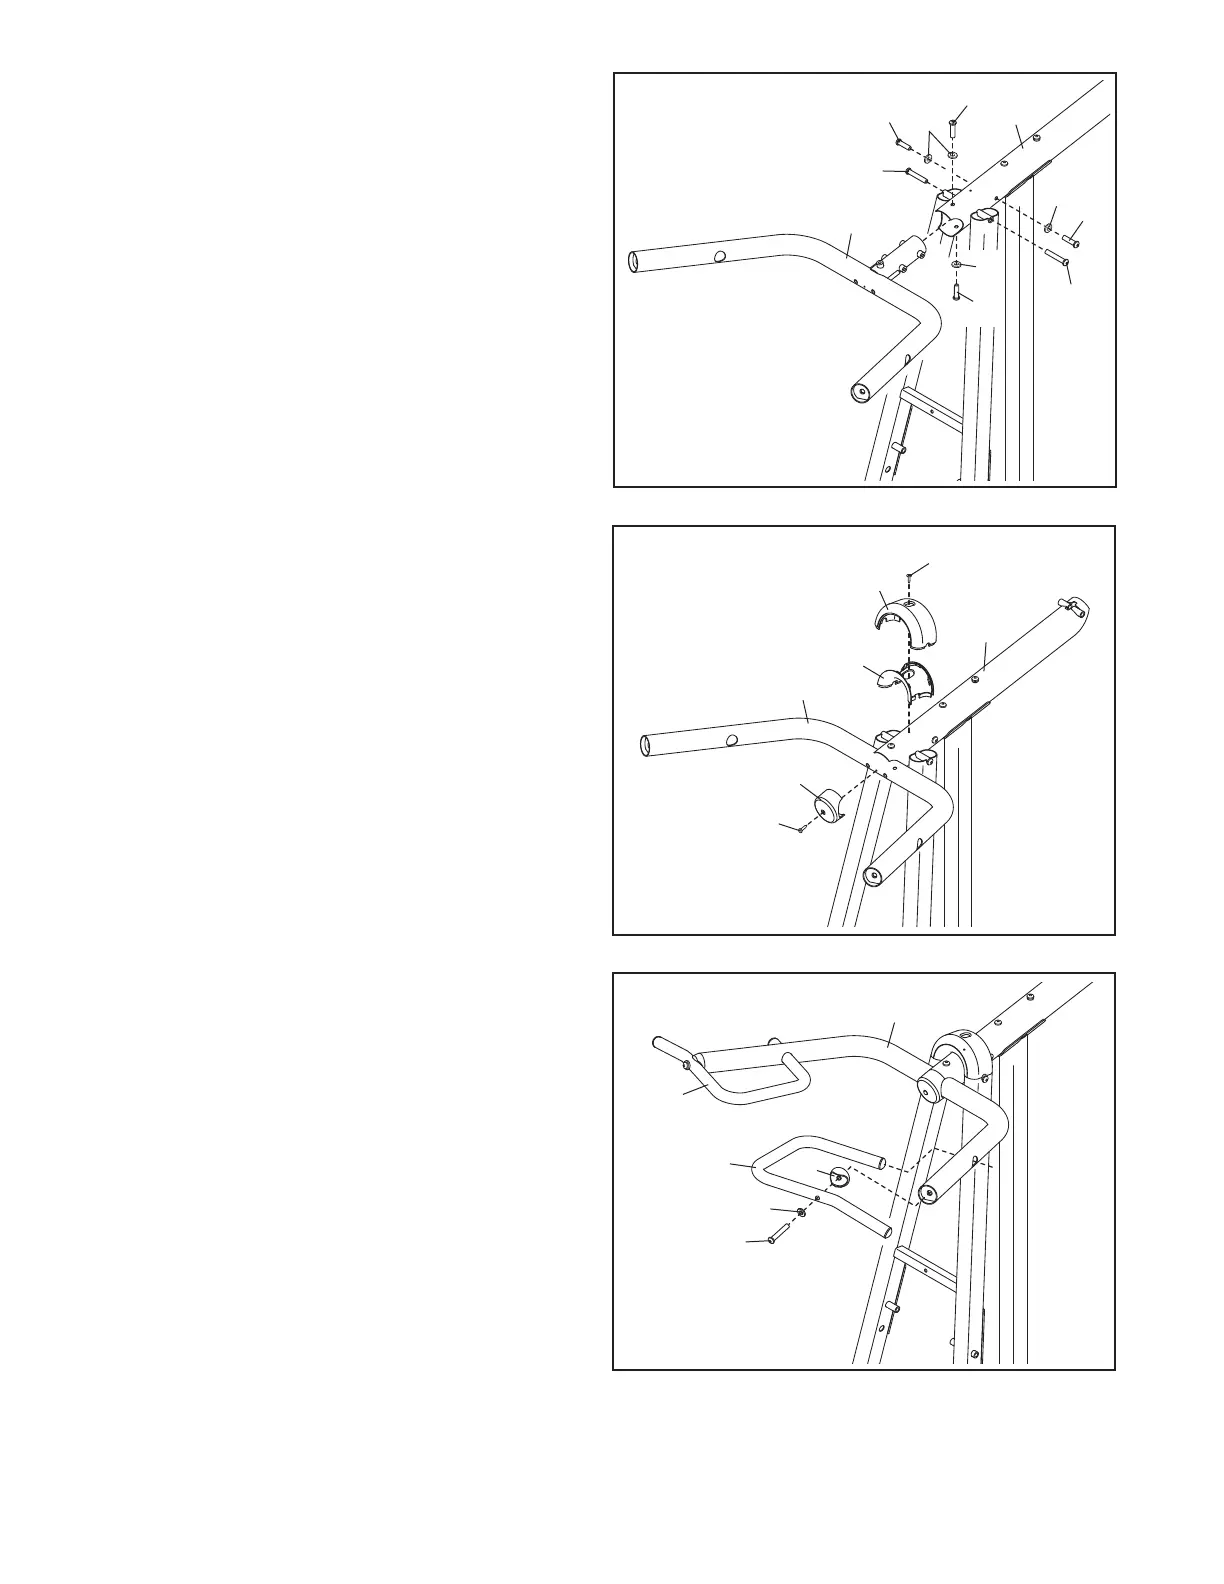
8. Insert the Pull-up Frame (7) into the Top Frame
(6).
A
ttach the Pull-up Frame (7) with two M8 x
60mm Screws (41), four M8 x 20mm Screws
(
39), and four M8 Curved Washers (44).
See steps 2 through 5. Tighten the M10
Locknuts (35).
10. Identify the Left Pull-up Handle (9), which is
marked with a “Left” sticker.
Insert the Left Pull-up Handle (9) into the Pull-
up Frame (7).
Attach the Left Pull-up Handle (9) with an M10 x
65mm Screw (38), an M10 Curved Washer (37),
and a Pull-up Handle Mount (28).
Attach the Right Pull-up Handle (12) in the
same way.
8
9
10
3
9
39
44
44
39
33
20
21
26
42
41
41
7
6
7
9
12
38
37
28
7
6
9. Attach the Front Frame Upper and Lower Caps
(20, 21) to the Top Frame (6) with an M4 x
16mm Self-tapping Screw (33).
Attach the Pull-up Frame Cap (26) to the Pull-
up Frame (7) with an M4 x 30mm Self-tapping
Screw (42).
39
44