11
11
12
13
10
16
35
35
23
29
33
13
10
13
45
27
16
4
4
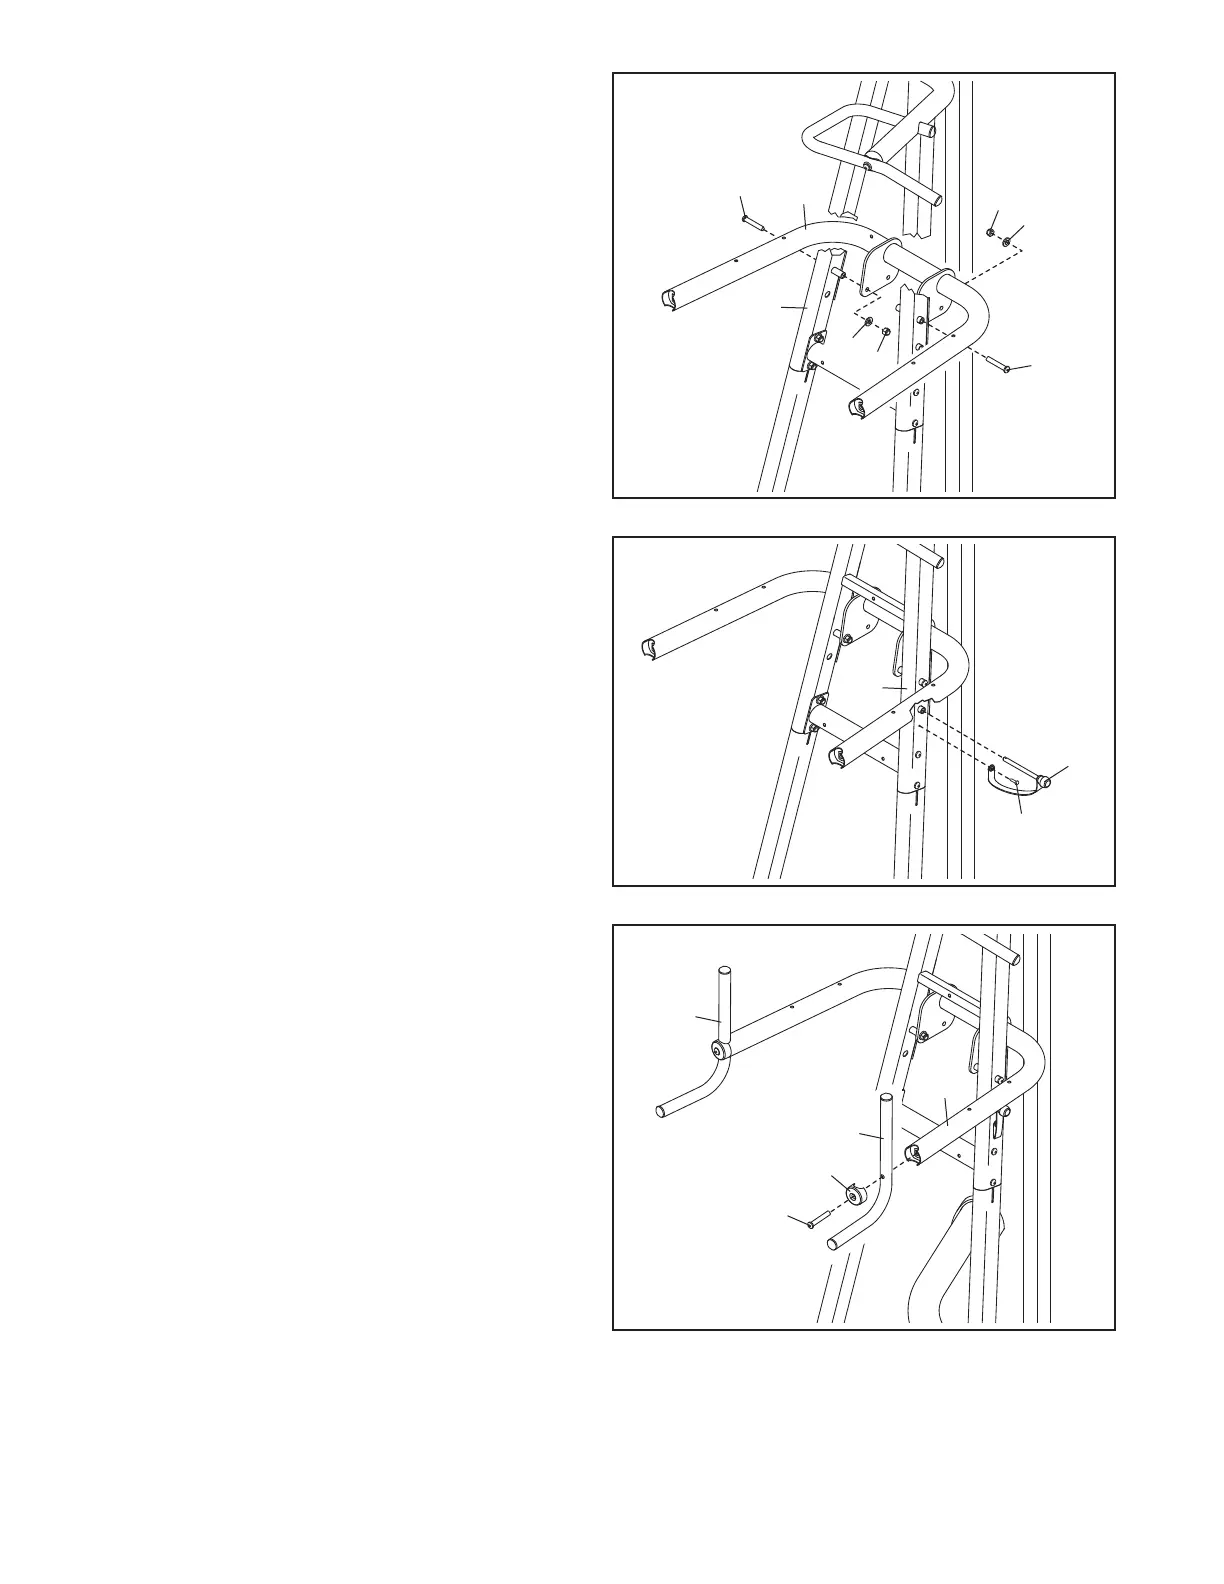
11. Hold the Dip Arm (10) behind the Front Frame
(4) as shown.
Attach the Dip Arm (10) to the Front Frame (4)
with two M10 x 105mm Bolts (16), two M10
Washers (23), and two M10 Locknuts (35). Do
not overtighten the Locknuts; the Dip Arm
must pivot easily.
12. Insert the Adjustment Pin (29) into the Front
Frame (4).
Attach the Adjustment Pin (29) to the Front
Frame (4) with an M4 x 16mm Self-tapping
Screw (33).
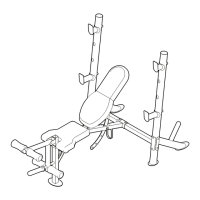
13. Attach a Dip Handle (13) to the Dip Arm (10)
with an M10 x 55mm Button Screw (45) and a
Dip Frame Cap (27).
Attach the other Dip Handle (13) in the same
way.
23