11
22
80
Rod
28
71
76
11
10
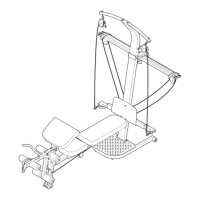
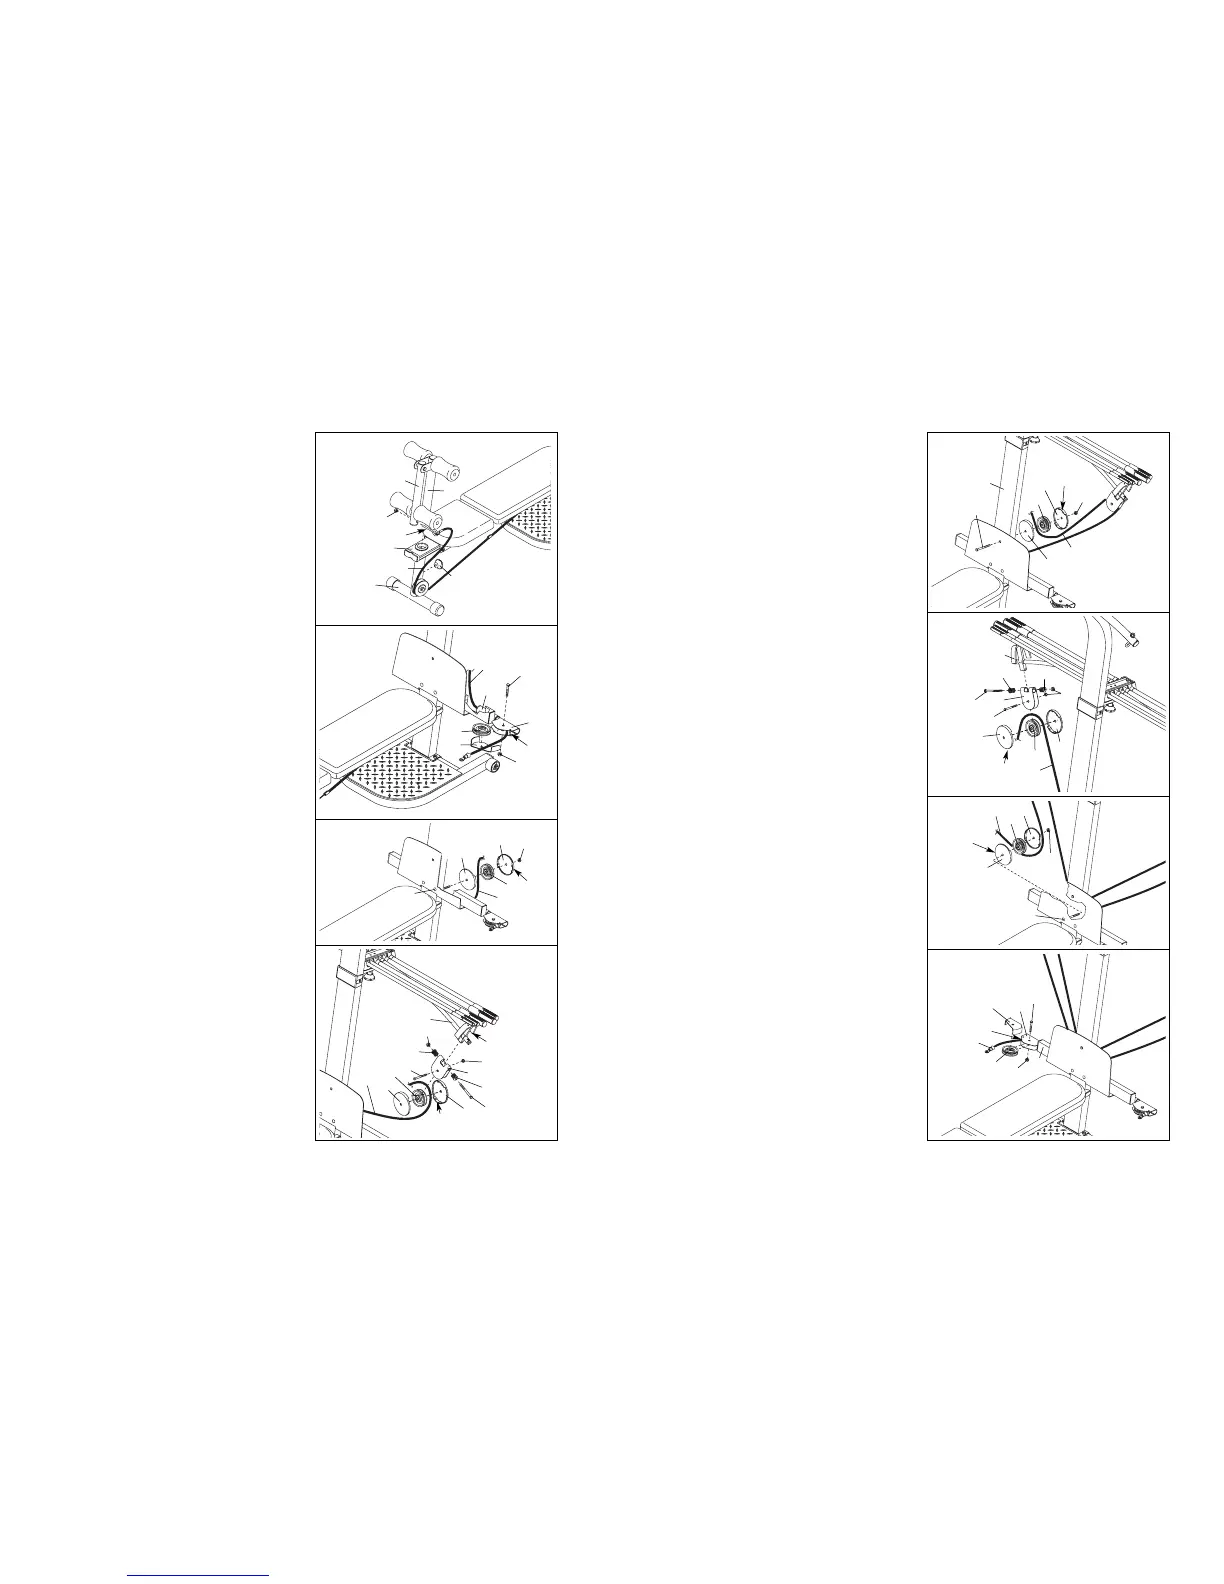
18. Attach a Pulley Housing (94) to the indicated “U”-
channel on the 10-pound centre Crossbow (44)
with an M10 x 102mm Button Head Bolt (24), two
Pivot Bushings (74), and an M10 Nylon Locknut
(76).
Wrap the Long Cable (80) over a 90mm Pulley
(28). Attach the Pulley and a pair of Pulley
Covers (29) inside of the Pulley Housing (94) with
an M10 x 47mm Button Head Bolt (71) and an
M10 Nylon Locknut (76). Make sure the small
tabs on the Pulley Covers are in the indicated
position.
20. Attach a Pulley Housing (94) to the indicated “U”-
channel on the 10-pound centre Crossbow (44)
with an M10 x 102mm Bolt (24), two Pivot
Bushings (74), and an M10 Nylon Locknut (76).
Wrap the Long Cable (80) around a 90mm Pulley
(28). Attach the Pulley and a pair of Pulley
Covers (29) inside of the Pulley Housing (94) with
an M10 x 47mm Button Head Bolt (71) and an
M10 Nylon Locknut (76). Make sure the small
tabs on the Pulley Covers are in the indicated
position.
21. Wrap the Long Cable (80) around a 90mm Pulley
(28). Attach the Pulley and a pair of Pulley
Covers (29) to the indicated M10 x 143mm
Carriage Bolt (73) with an M10 Nylon Locknut
(76). Make sure the small tabs on the Pulley
Covers are in the indicated position.
19. Wrap the Long Cable (80) under a 90mm Pulley
(28) as shown. Attach the Pulley and a pair of
Pulley Covers (29) to the Upright (3) with an M10
x 116mm Button Head Bolt (40) and an M10
Nylon Locknut (76). Make sure the small tabs
on the Pulley Covers are in the indicated posi-
tion.
18
19
20
21
24
29
94
28
29
80
44
76
76
71
74
74
80
29
29
40
28
3
76
28
29
29
74
94
74
76
80
71
28
80
29
29
76
73
24
44
17. Wrap the Long Cable (80) around a 90mm Pulley
(28). Attach the Pulley and a pair of Pulley
Covers (29) to the indicated M10 x 143mm
Carriage Bolt (73) with an M10 Nylon Locknut
(76). Make sure the small tabs on the Pulley
Covers are in the indicated position.
17
76
28
Small
Tab
Small
Tab
Small
Tab
Small
Tab
Small
Tab
80
73
29
29
22
109
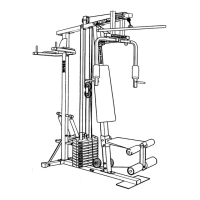
22. Make sure there are no Crossbows (not shown)
under the “U”-channels on the 10-pound centre
Crossbow (not shown). Have a second person
pull on the Long Cable (80) to create slack in the
Cable.
Insert the end of the Long Cable (80) through the
welded tube on the Cross Tube (11). If necessary,
use the tip of a screwdriver to pull the end of the
Cable out of the Swivel Arm (22). Make sure the
Cable is on the indicated side of the welded
rod in the Swivel Arm.
Wrap the Long Cable (80) around a 90mm Pulley
(28). Attach the Pulley and the Half Pulley Cover
(109) inside of the Swivel Arm (22) with an M10 x
47mm Button Head Bolt (71) and an M10 Nylon
Locknut (76).
16. Locate the Long Cable (80). Insert one end of
the Cable through the welded tube on the Cross
Tube (11). If necessary, use the tip of a screwdriv-
er to pull the end of the Cable out of the Swivel
Arm (22). Make sure the Cable is on the indi-
cated side of the welded rod in the Swivel Arm.
Wrap the Long Cable (80) around a 90mm Pulley
(28). Attach the Pulley and the Half Pulley Cover
(109) to the inside of the Swivel Arm (22) with an
M10 x 47mm Button Head Bolt (71) and an M10
Nylon Locknut (76).
16
71
22
11
109
28
80
76
Rod
“U”-Channel
15. Slide the Leg Developer (19) into the Bench Rail
(5). Align the hole in the Leg Developer with a
hole in the Front Leg (6). Tighten the Bench Knob
(42) into the hole in the Leg Developer.
Connect the eyebolt on the Leg Lever Cable (32)
to indicated side of the Leg Lever (7) with an M8
Nylon Locknut (65).
42
6
19
5
65
Eyebolt
7
32
15