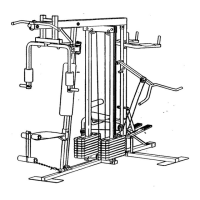
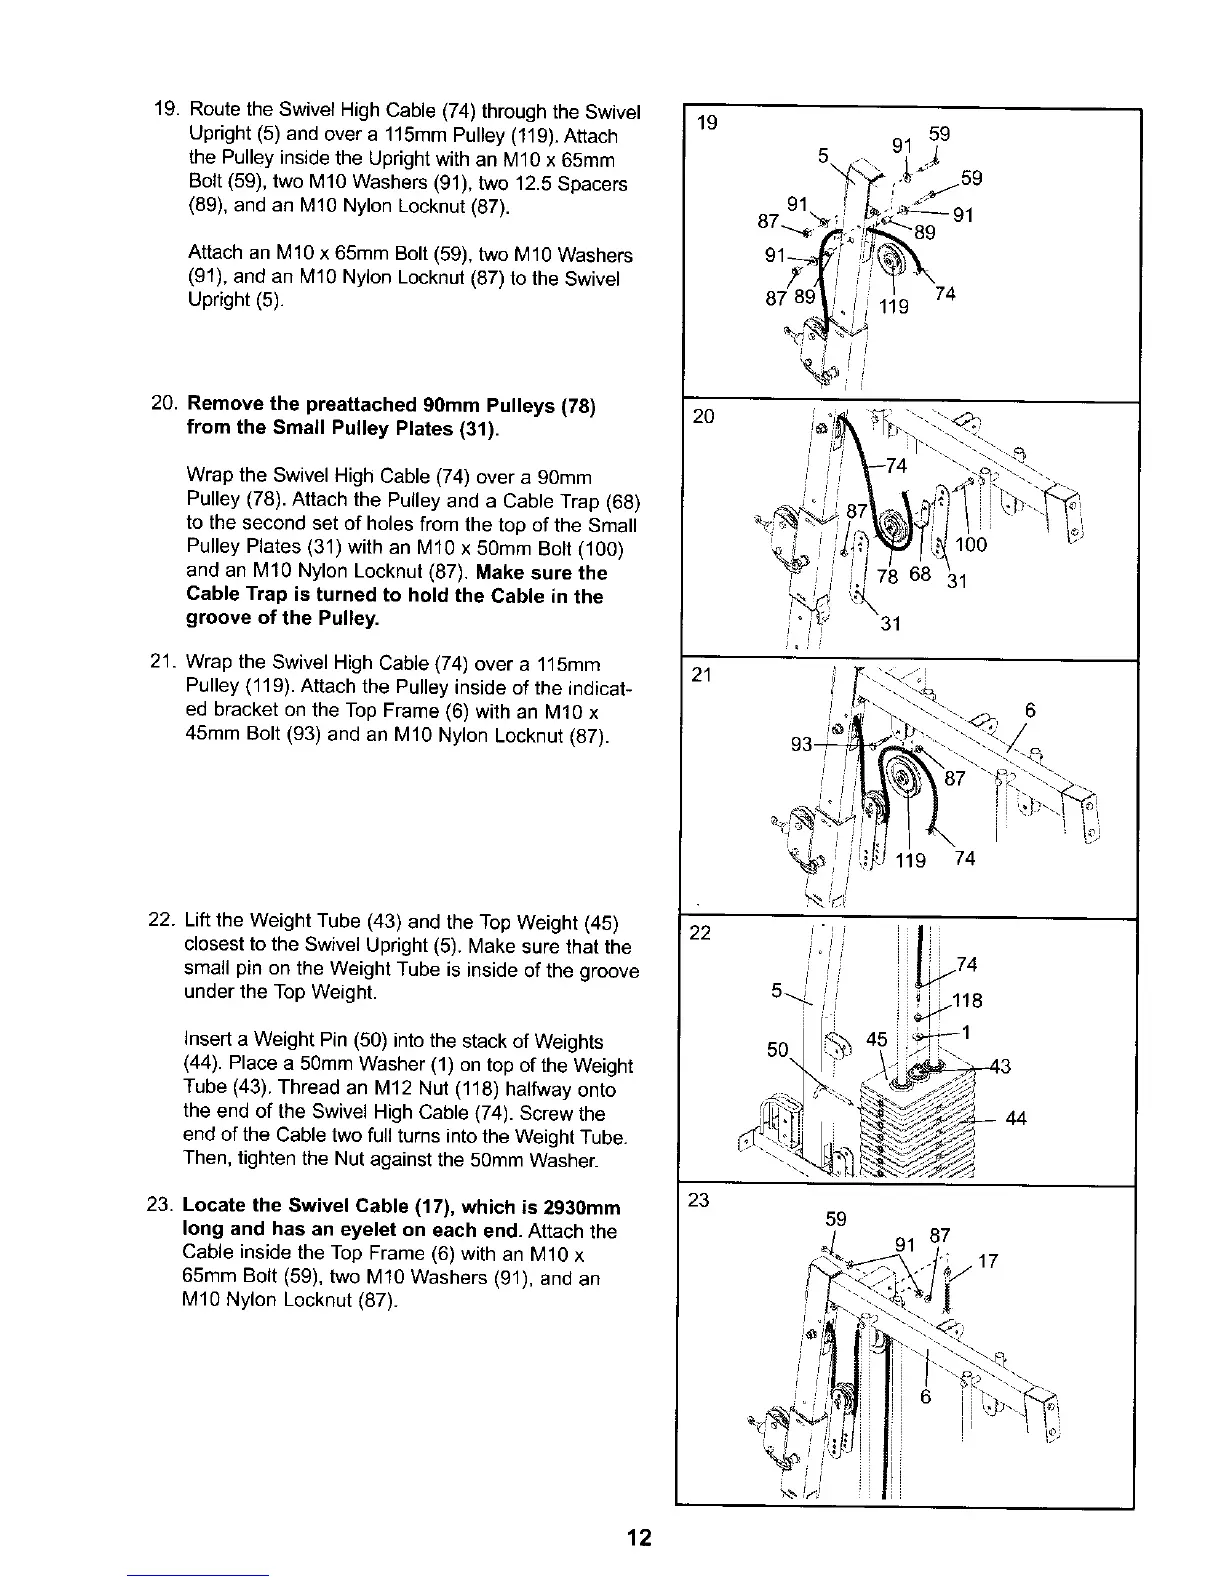
19. Route the Swivel High Cable (74) through the Swivel
Upright (5) and over a 115mm Pulley (119). Attach
the Pulley inside the Upright with an M10 x 65mm
Bolt (59), two M10 Washers (91), two 12.5 Spacers
(69), and an M10 Nylon Locknut (87).
Attach an M10 x 65mm Bolt (59), two M10 Washers
(91), and an M10 Nylon Locknut (87) to the Swivel
Upright (5).
20. Remove the preattached 90mm Pulleys (78)
from the Small Pulley Plates (31).
Wrap the Swivel High Cable (74) over a 90mm
Pulley (78). Attach the Pulley and a Cable Trap (68)
to the second set of holes from the top of the Small
Pulley Plates (31) with an M10 x 50mm Bolt (100)
and an M10 Nylon Locknut (87). Make sure the
Cable Trap is turned to hold the Cable in the
groove of the Pulley.
21. Wrap the Swivel High Cable (74) over a 115mm
Pulley (119). Attach the Pulley inside of the indicat-
ed bracket on the Top Frame (6) with an M10 x
45mm Bolt (93) and an M10 Nylon Locknut (87).
22. Lift the Weight Tube (43) and the Top Weight (45)
closest to the Swivel Upright (5). Make sure that the
small pin on the Weight Tube is inside of the groove
under the Top Weight.
insert a Weight Pin (50) into the stack of Weights
(44). Place a 50mm Washer (1) on top of the Weight
Tube (43). Thread an M12 Nut (118) halfway onto
the end of the Swivel High Cable (74). Screw the
end of the Cable two full turns into the Weight Tube.
Then, tighten the Nut against the 50mm Washer.
23. Locate the Swivel Cable (17), which is 2930mm
long and has an eyelet on each end. Attach the
Cable inside the Top Frame (6) with an M10 x
65ram Bolt (59), two M10 Washers (91), and an
M10 Nylon Locknut(87).
19
2O
21
22
23
59
91
5
74
9
100
31
31
6
119 74
12