6
Technische Änderungen vorbehalten | Technische wijzigingen voorbehouden | We reserve the right to make technical changes | Sous réserve de modifications techniques
2
1
3
4
5
6
7 10
11
12
9
8
4x
2x
13
14
15
17
16
18
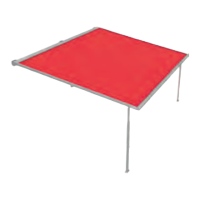
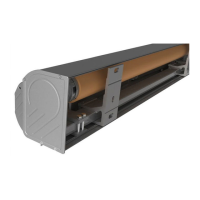
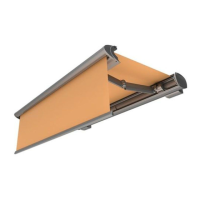
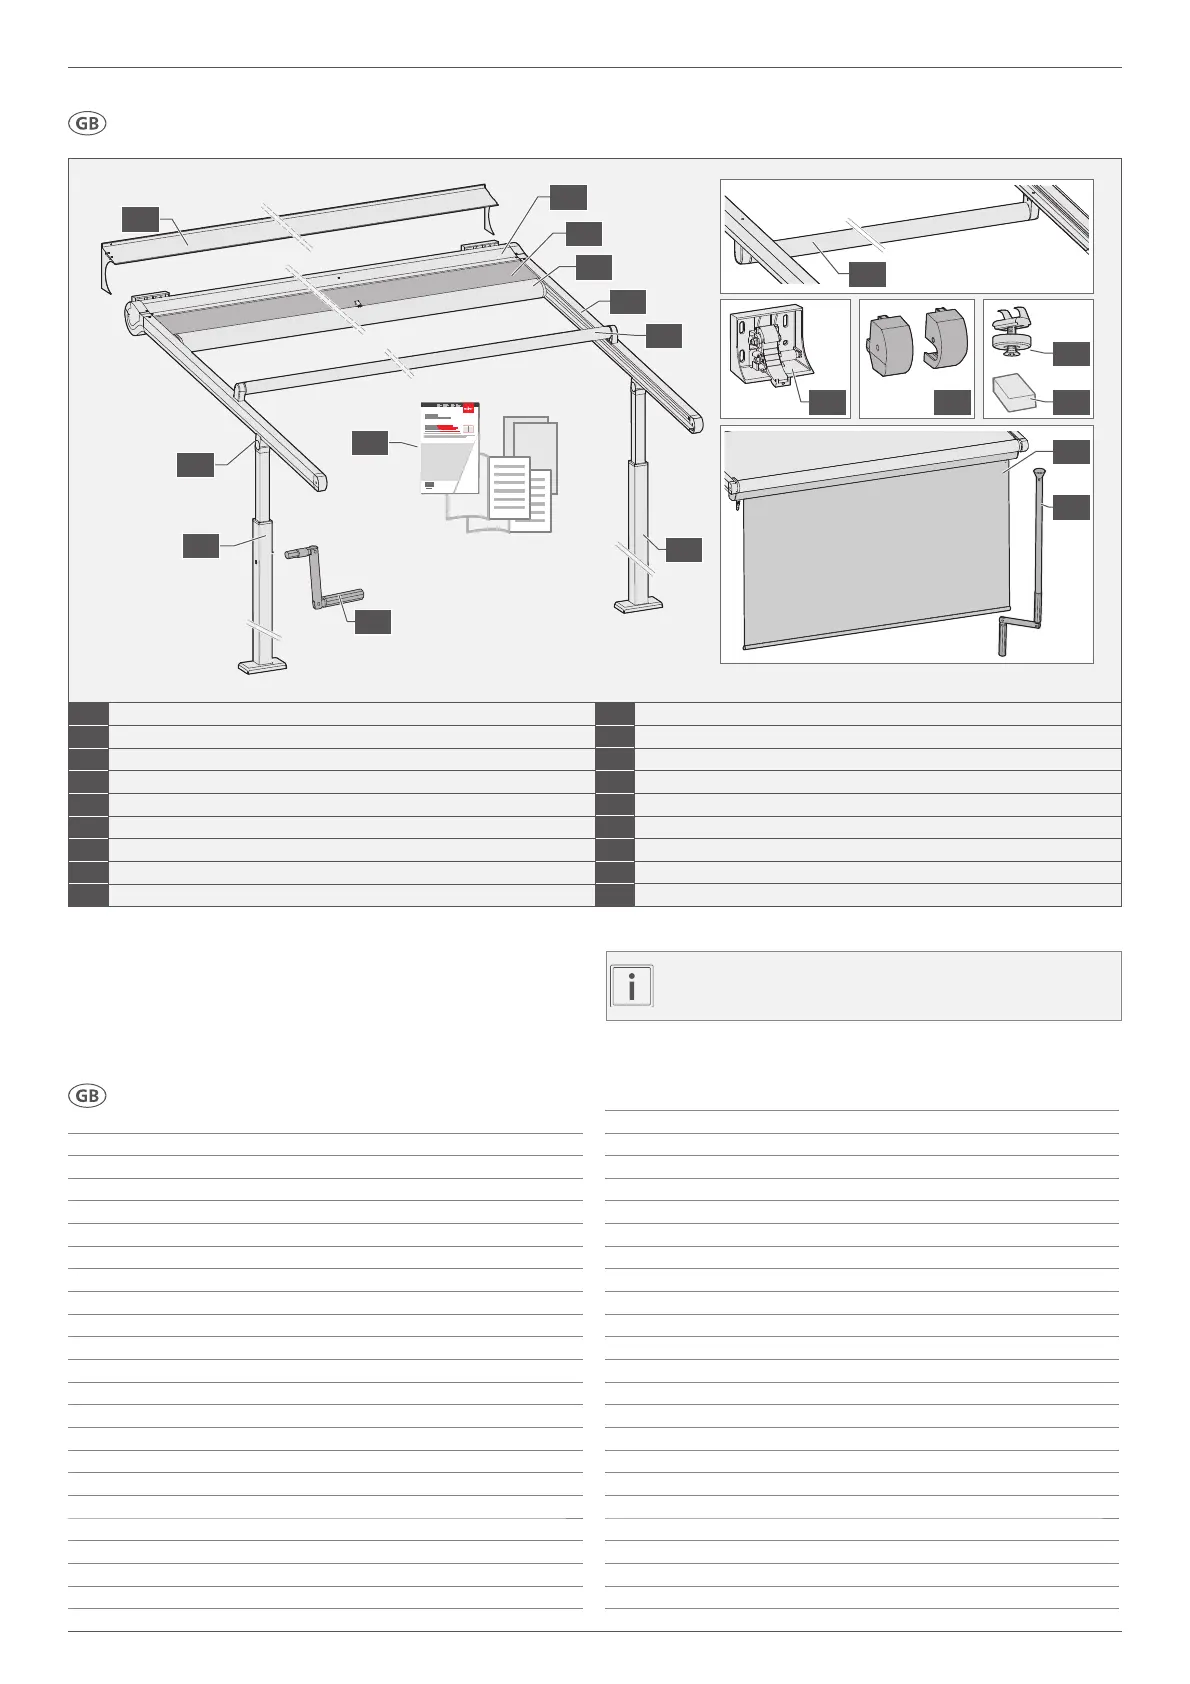
Product overview
List of contents
- Tool list → weinor download centre (DLC)
- Exploded drawing → weinor download centre (DLC)
Product overview | List of contents 6
General 7
Dimensions and spacing 10
Fitting brackets – preparation and alignment 11
Fitting brackets to the wall 12
Ceiling mounting 12
Fitting brackets to the rafter bracket (option) 13
Fitting the awning to the brackets 15
Installing the posts 16
Mounting the side channels and the projection profile 23
Order option "pre-mounted projection profile" *
(Mounting the guide profiles
)24
Connecting and tightening the flat rope using a rope clamp 25
Checking the flat rope runs correctly 26
Removing the green spring tension straps* 27
Fixing the flat rope to the rope clamp and not trimming it*
27
Order option „loose projection profile“ **
(Mounting the guide profiles
)28
Guiding the flat rope through the end caps** 29
Inserting the flat rope into the projection profile** 30
Inserting the projection profile onto side channels** 31
Attaching the fabric with beaded profile to the projection profile** 32
Connecting and tightening the flat rope using a rope clamp** 32
Checking the flat rope runs correctly** 33
Removing the green spring tension straps** 33
Preparing the flat rope for future retightening** 34
Fixing the flat rope in the projection profile** 34
Removing the assembly aid** 35
Fitting the "post arrester" to side channels 35
Tightening/loosening the housing brackets' clamping screws 36
Installing the fabric support roller 37
Fitting and screwing tight the projection profile cover with stop cams 37
Circuit diagrams 38
Adjusting the drive's end position 39
Fitting and screwing tight the wall connection roof (option) 41
Fitting the gear handle brackets (telescopic post/Valance Plus gear handle)
42
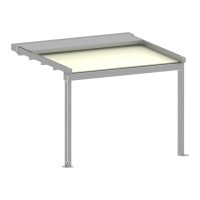
Multi-section unit option 43
Option Plaza Viva with VertiTex II vertical sun protection 44
Checking the installation 54
Handover 58
Disposal 59
Fault clearance 60
Declaration of performance 62
Declaration of Conformity 63
Symbols used 64
1
Awning (cassette)
2
Fabric
3
Projection profile
4
Side channel
5
Upper fabric support roller (standard with Valance Plus option)
6
Lower fabric support roller (depending on awning size)
7
Wall bracket
8
End caps
9
Post arrester (with telescopic post option )
10
Installation assistance (projection profile anti-fall guard)
11
Valance Plus (option)
12
Gear handle (Valance Plus order option)
13
Post with post plate and post plate cover
14
Gear handle (with telescopic post option)
15
Telescopic post (option)
16
Compensation joint (with telescopic post option)
17
Wall connection roof (option)
18
Documents accompanying the product
Please read these instructions and observe their contents
and warnings before assemble the equipment!
Plaza Viva | 127027-0000 w | v8 | 2021-03-03 | Montageanleitung | Montagehandleiding | Instructions for assembly | Instructions de montage
 Loading...