ATA-171/172/171P/171M (ATA-S1/S2/P/M)
User’s Guide
7
3 Setup the ATA by Web Browser (LAN connection)
The ATA provides a built-in web server. You can use a Web browser to configure the ATA. For more detail
instructions, please refer to the procedures below.
Step 1
Connect a straight through cable from the ATA’s LAN port to a hub or switch, while making sure that your
computer is also connected to the same hub or switch.
Step 2
Make sure you set your computer’s network setting to DHCP mode (obtain IP address automatically). This is
done in the Network Connections option that can be accessed in Control Panel.
Step 3
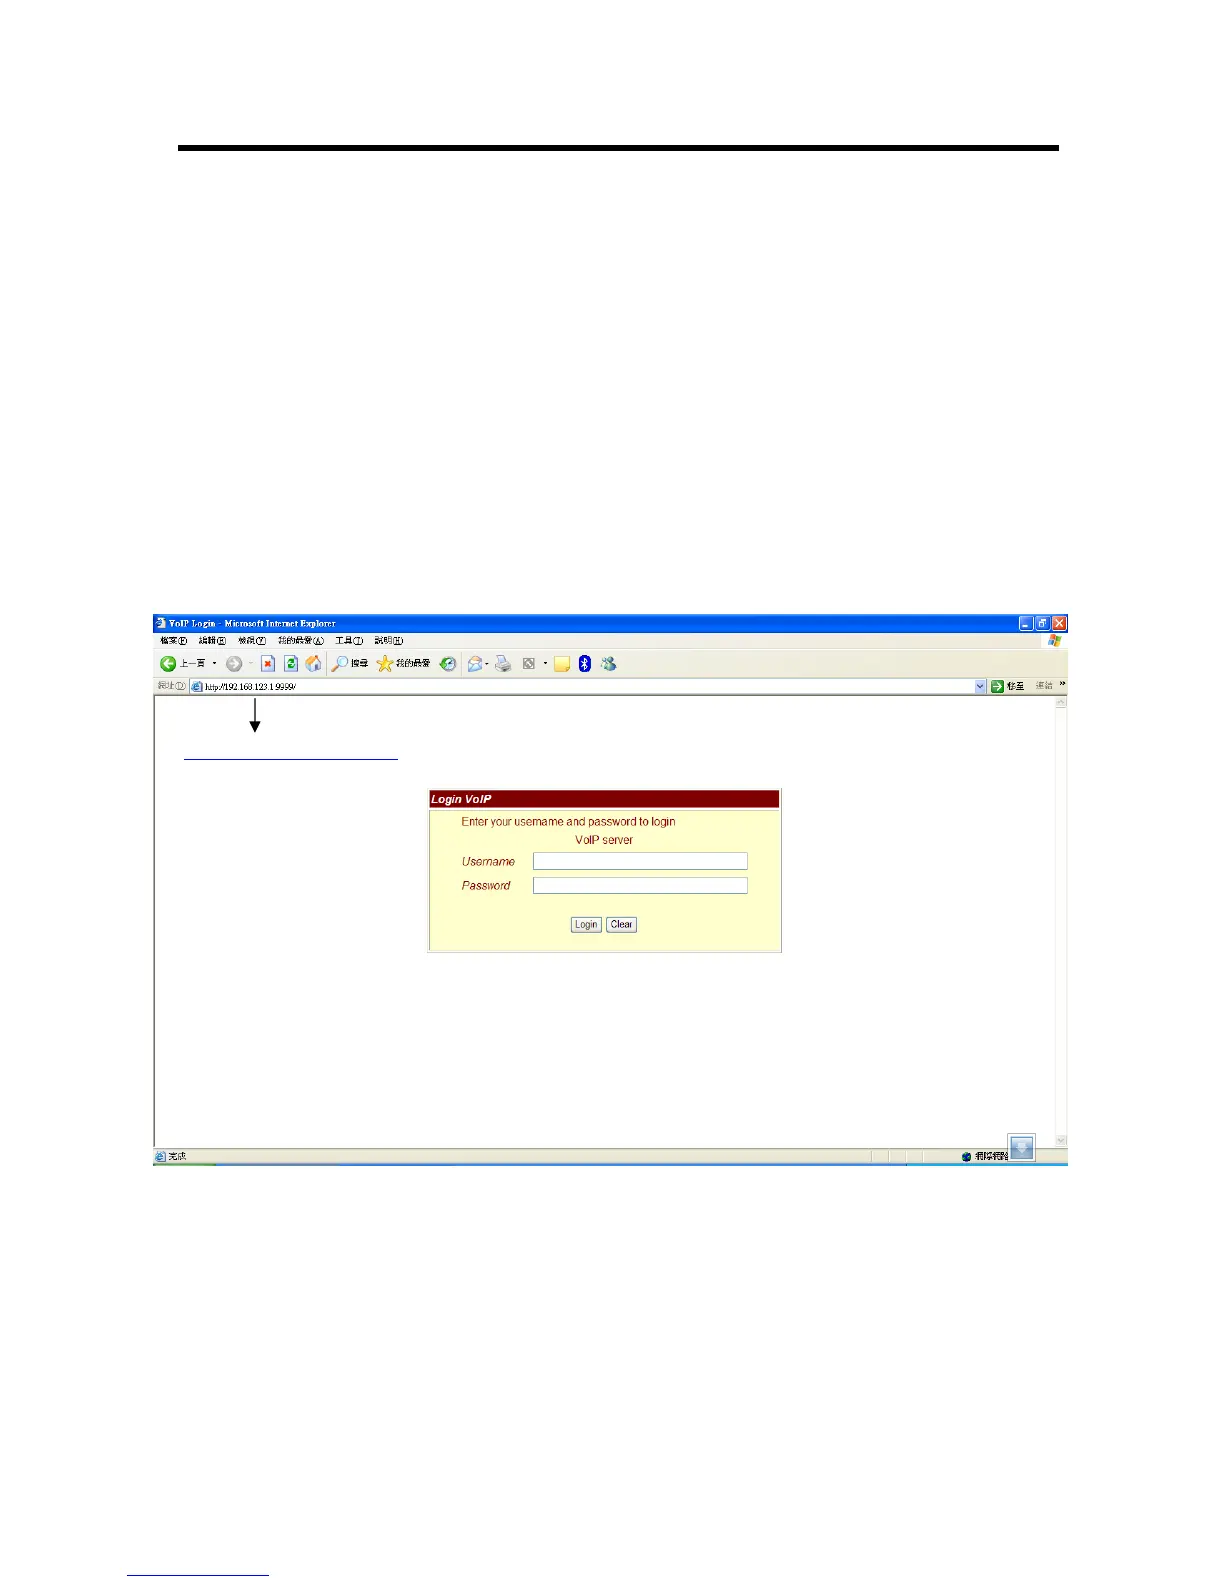
Open your web browser and in the address field, input the following IP address “http://192.168.123.1:9999”.
The diagram below will show you an example of the web page menu:
htt
Figure 1. Login Page
3.1 Login.
3.1.1 Please input the username and password into the blank field. The default setting is:
1. For Administrator, the username is: root; and the password is: test. If you use this account to
login, you can configure all the setting.
2. For normal user, the username is: user; and the password is: test. If you use this account to login,
you will not be able to configure any SIP settings due to authorization level.