7
AMPERAGE
REQUIRED GAUGE FOR EXTENSION CORDS
25 ft. 50 ft. 100 ft. 150 ft.
9A 18 gauge 16 gauge 14 gauge 12 gauge
ASSEMBLY
WARNING: Never make any adjustments or blade in-
stallations while the machine is plugged in. Make sure
that saw blades are free of fine material, such as small
slivers of metal or wood. Use protective gloves during
operation and assembly.
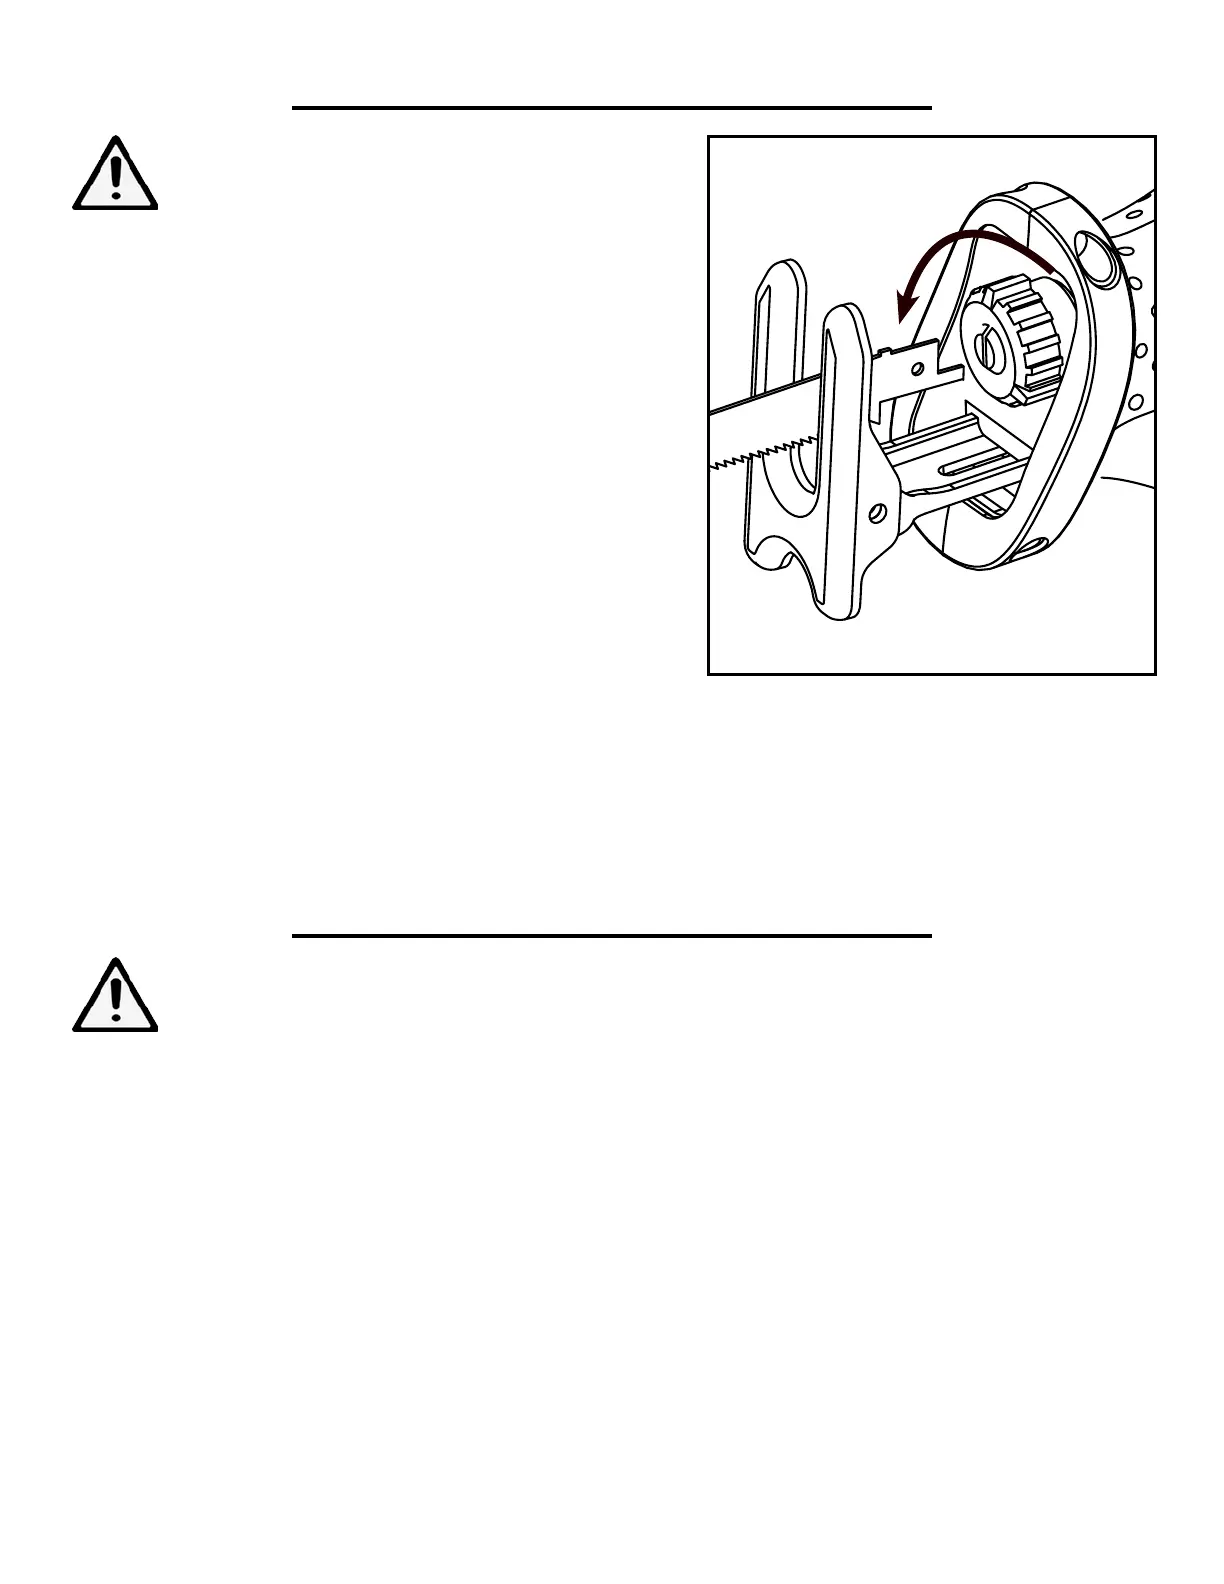
REPLACING/INSTALLING SAW BLADES
1. Select a saw blade with a 1/2-inch universal shank. If narrow
curve cuts are required, a thinner blade would be preferable. Saw
blades should never be longer than is required for the intended
cut.
2. Twist the quick release blade holder in the direction shown in
Fig. A to open up the jaws and allow room for sliding in a blade.
3. Place the shank of the blade into the jaws as far as it can go. Re-
lease the blade holder, allowing it to snap back in position.
4. Check the blade’s security by tugging lightly to confirm that it
has locked into position.
Fig. A
5. If you are changing a saw blade, always make sure that it has cooled down completely before attempting to remove
it. Friction from various workpiece materials can cause the blades to get very hot directly after operation. To re-
move, twist the blade holder in the direction demonstrated in Figure A and carefully slide the blade out of position.
Note: If the blade is hot, just twist the quick release and hold it upside down so the blade falls out without any phisi-
cal contact.
WARNING: Dusts from certain materials can be harmful to your respriatory health. Always use this tool
in an area with good ventilation. Wear a dust mask during operation to prevent inhalation of unwanted
particulates. Prevent dust accumulation, as piles of dust and debris can easily ignite and cause a fire.
OPERATION
ADJUSTING THE FOOTPLATE
1. Loosen the footplate adjustment screw found on the underbelly of the saw using the onboard hex wrench.
2. Once the screw is loose, position the footplate to meet the needs of your workpiece.
3. Retighten the footplate adjustment screw, making sure that the footplate is no longer free to move.
STARTING THE MACHINE
To start the machine, first make sure the blade has been properly installed. After checking the blade, plug the ma-
chine into a power source.
Pull the trigger switch to power the machine on. Always keep one hand on the back handle and one hand on the
front during operation, making sure all body parts and cords are not in contact If you would like to keep the saw
running without needing to constantly be holding down the trigger, press the lock-on switch while the saw is running.
This will keep the trigger engaged until you press on the trigger again to release it.