11
ADJUSTMENTS
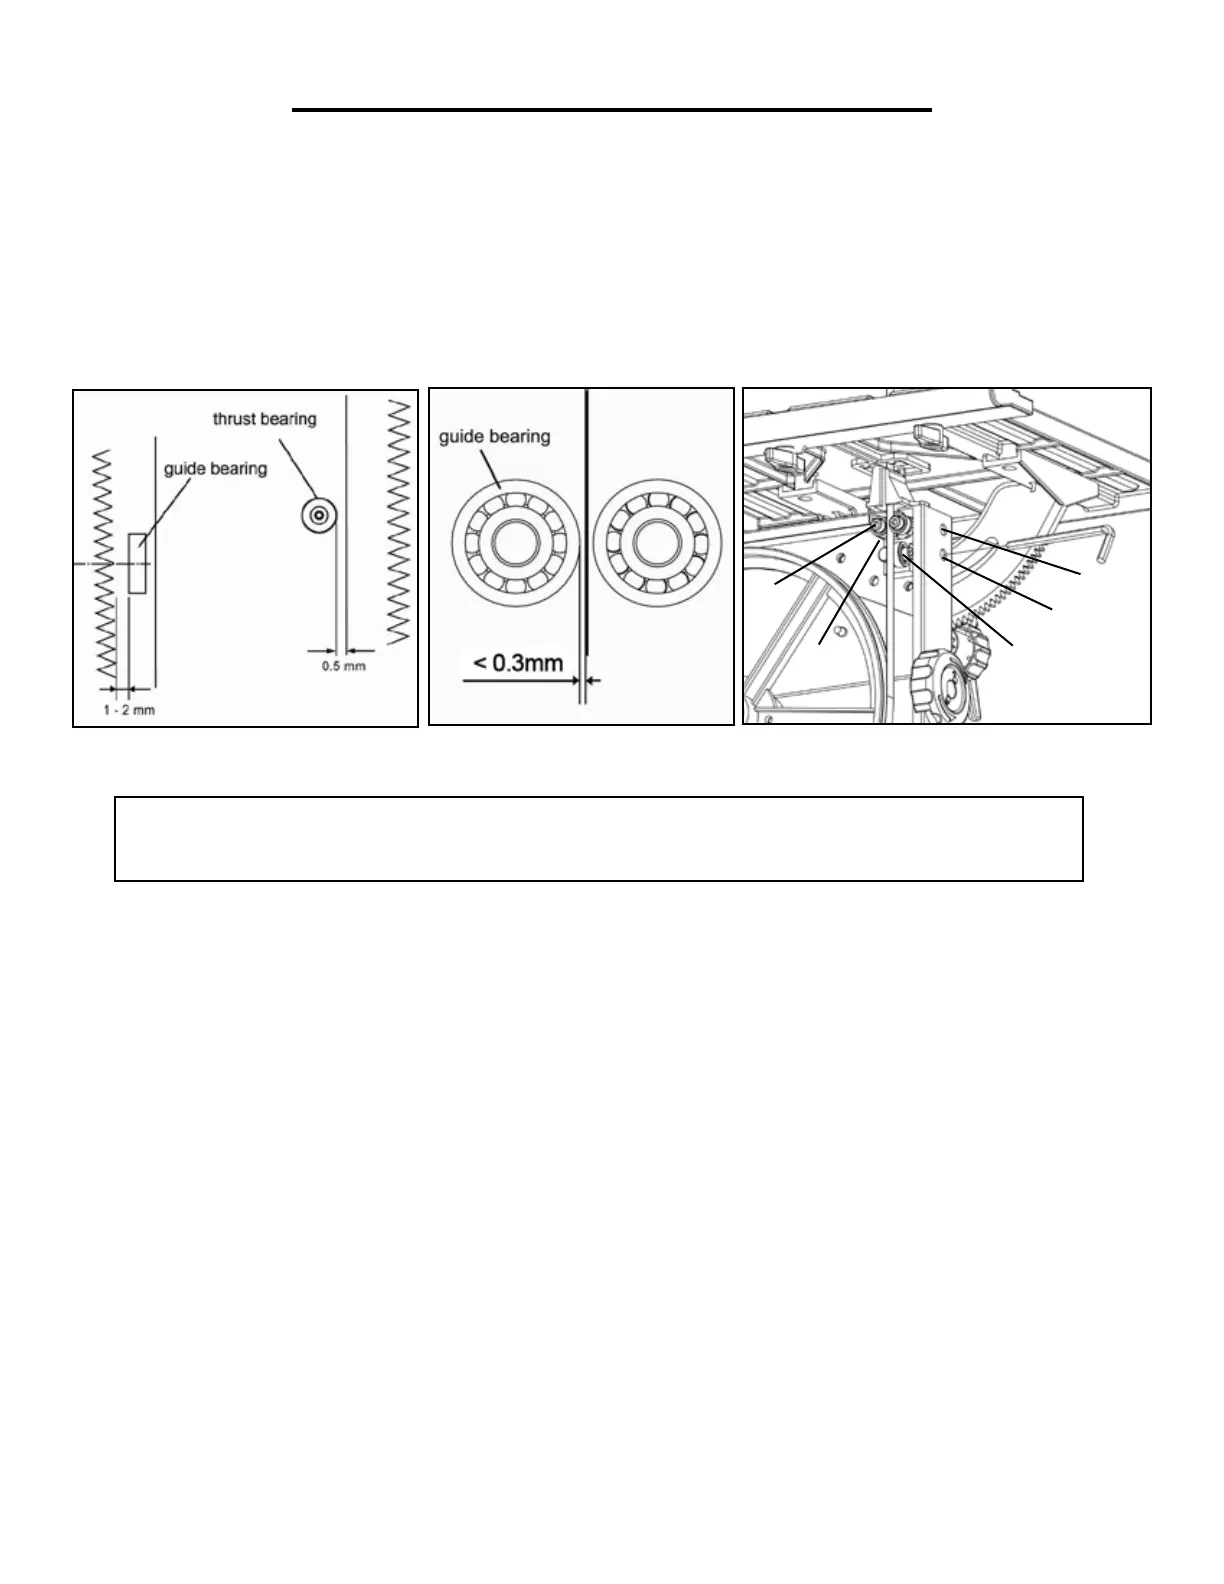
Fig. L
Fig. K
LOWER BLADE GUIDE ADJUSTMENT
The lower blade guide needs to be readjusted after every band saw blade change or tracking adjustment.
1. Use a hex wrench to loosen the socket bolts in Holes 1 & 2 (Fig. M - 1, 2). Adjust the guide block (Fig. M - 4)
and thrust bearing (Fig. M - 3) in the same manner that you adjusted the upper blade guide.
2. Loosen Screw 1 (Fig. M - 5) and adjust the guide bearing to a position of 1/4 mm away from the blade. Retight-
en Screw 1 (Fig. M - 5).
Fig. M
1
2
34
5
CHANGING THE BAND SAW BLADE
WARNING: Saw blades are dangerous. Be sure to always wear gloves while handling the blade or
removing it from packaging.
1. Remove the D-nut (Fig. B - 1), washers (Fig. B - 2) and wing screw (Fig. B - 3) from the saw’s table assembly
(Fig. B).
2. Open the upper and lower blade covers (Fig. G).
3. Set the upper blade guide to its lowest position, minimizing the space between the bottom of the upper blade
guide and the table assembly.
4. Open the cover of the upper guide assembly
5. Loosen the tension knob (Fig. H - 1) until you can remove the blade from the machine.
6. Fit the fresh blade in the center of the rubber tires of the band saw wheels. Retighten the tension knob (Fig. H -
1).
7. Replace the D-nut (Fig. B - 1), washers (Fig. B - 2) and wing screw (Fig. B - 3) from the saw’s table assembly
(Fig. B).
8. Close the upper and lower covers along with the cover of the upper guide assembly.
9. Adjust the alignment of the blade, the blade tension, and the upper and lower blade guides as needed.