ASSEMBLY & ADJUSTMENTS
11
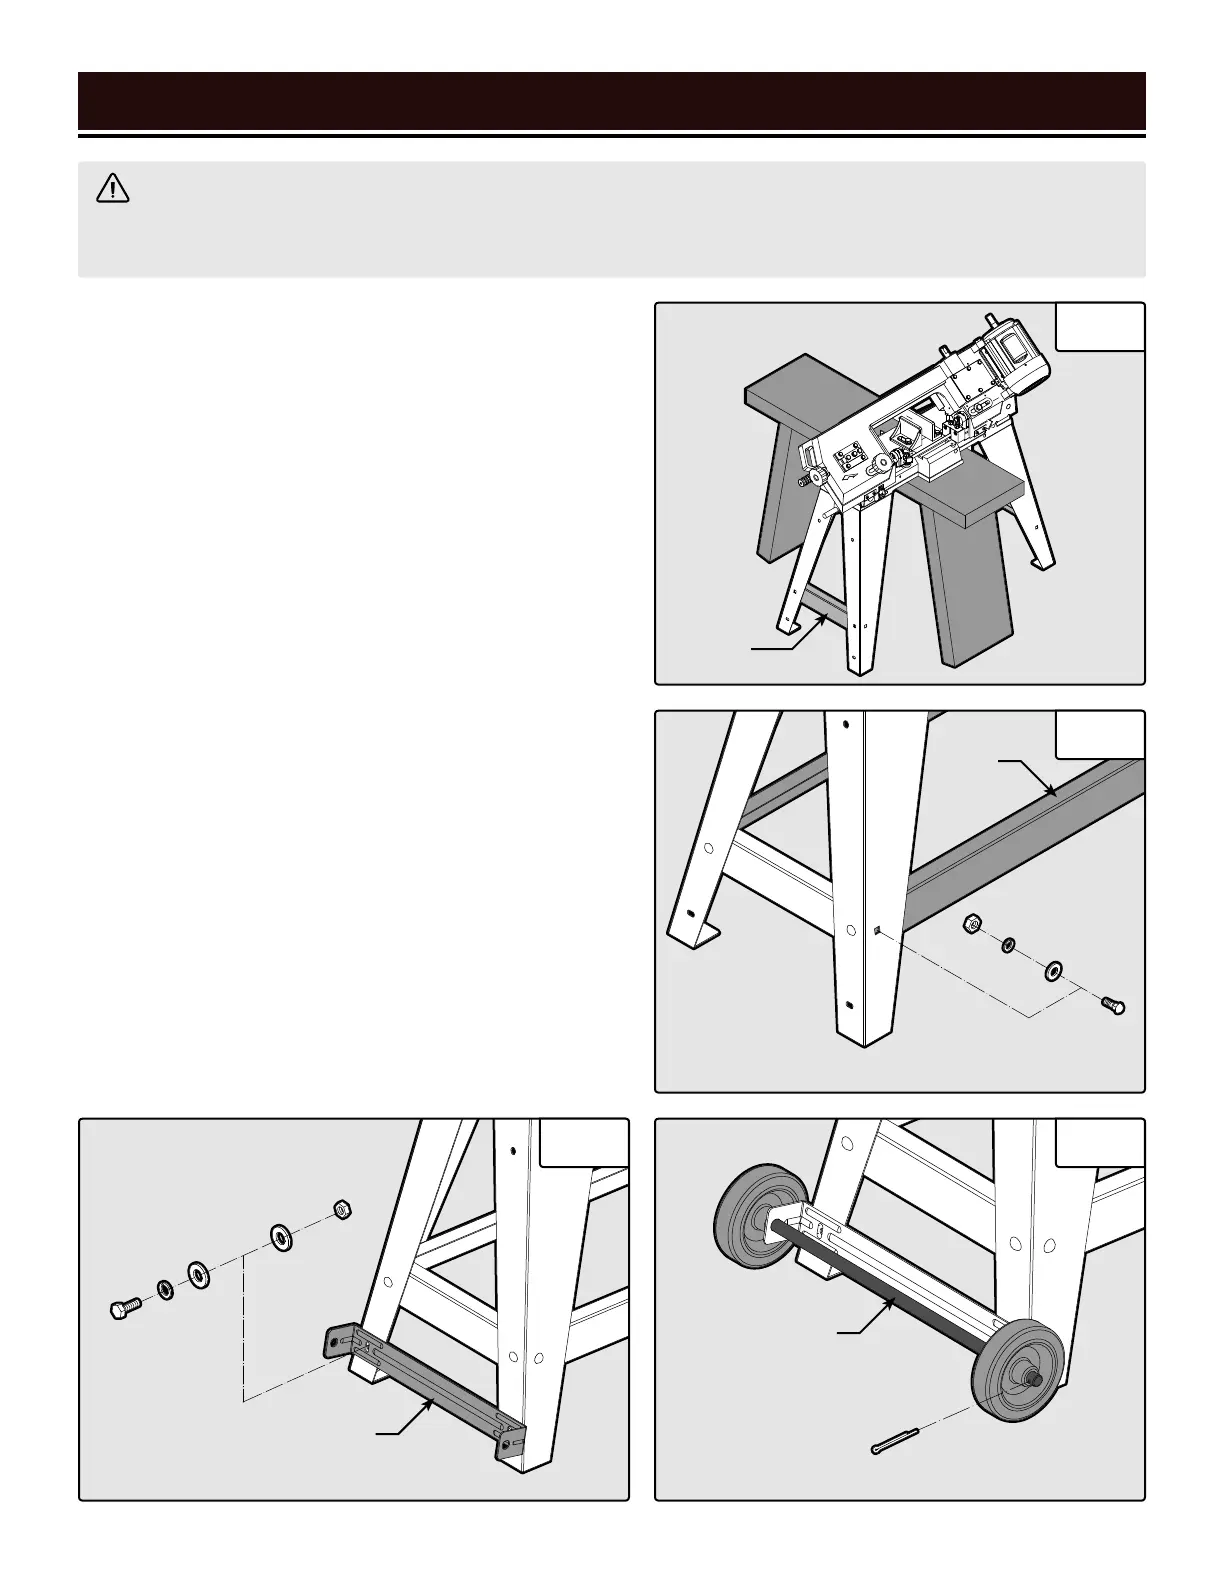
ASSEMBLING THE STAND
1. With the help of an assistant, lift the bandsaw onto a
suitable support (Fig. 2).
2. Attach the legs to the bandsaw with the M8-1.25x25 hex
bolts, 8mm flat washers, 8mm lock washers, and the M8-
1.25 hex nuts. Hand tighten.
3. Attach the short braces (Fig. 2) to the legs with the M6-
1.0x16 carriage bolts, 6mm flat washers, 6mm lock wash-
ers, and M6-1.0 hex nuts. Hand tighten.
4. Lift the bandsaw off of the support and onto the floor.
Attach the long braces (Fig. 3) to the legs with M6-1.0x16
carriage bolts, 6mm flat washers, 6mm lock washers, and
M6-1.0 hex nuts. Hand tighten.
5. Use the M6-1x12 hex bolts, M6-1 hex nuts, 6mm lock
washers, and the 6mm flat washers to install the wheel
mounting brackets (Fig. 4) onto the legs. Hand tighten.
6. Slide the shaft through the holes in the wheel mounting
bracket. Slide the wheels onto the shaft on the outside of
the mounting bracket and secure them with the cotter pins.
See Fig. 5.
7. Check to see if the bandsaw is relatively level, then the
tighten all of the nuts using the proper wrenches.
Instructions continue on the next page.
WARNING! Do not plug in or turn on the tool until it is fully assembled according to the instructions. Read
through and become familiarized with the following procedures of handling and adjusting your tool. Failure to
follow the safety instructions may result in serious personal injury.
Fig. 2
Short
Brace
Long
Brace
Wheel
Mounting Bracket
Shaft
Fig. 3
Fig. 4 Fig. 5