ASSEMBLY AND ADJUSTMENTS
13
WARNING: To avoid injury, make sure the chuck key is removed from the chuck before starting any drilling
operation.
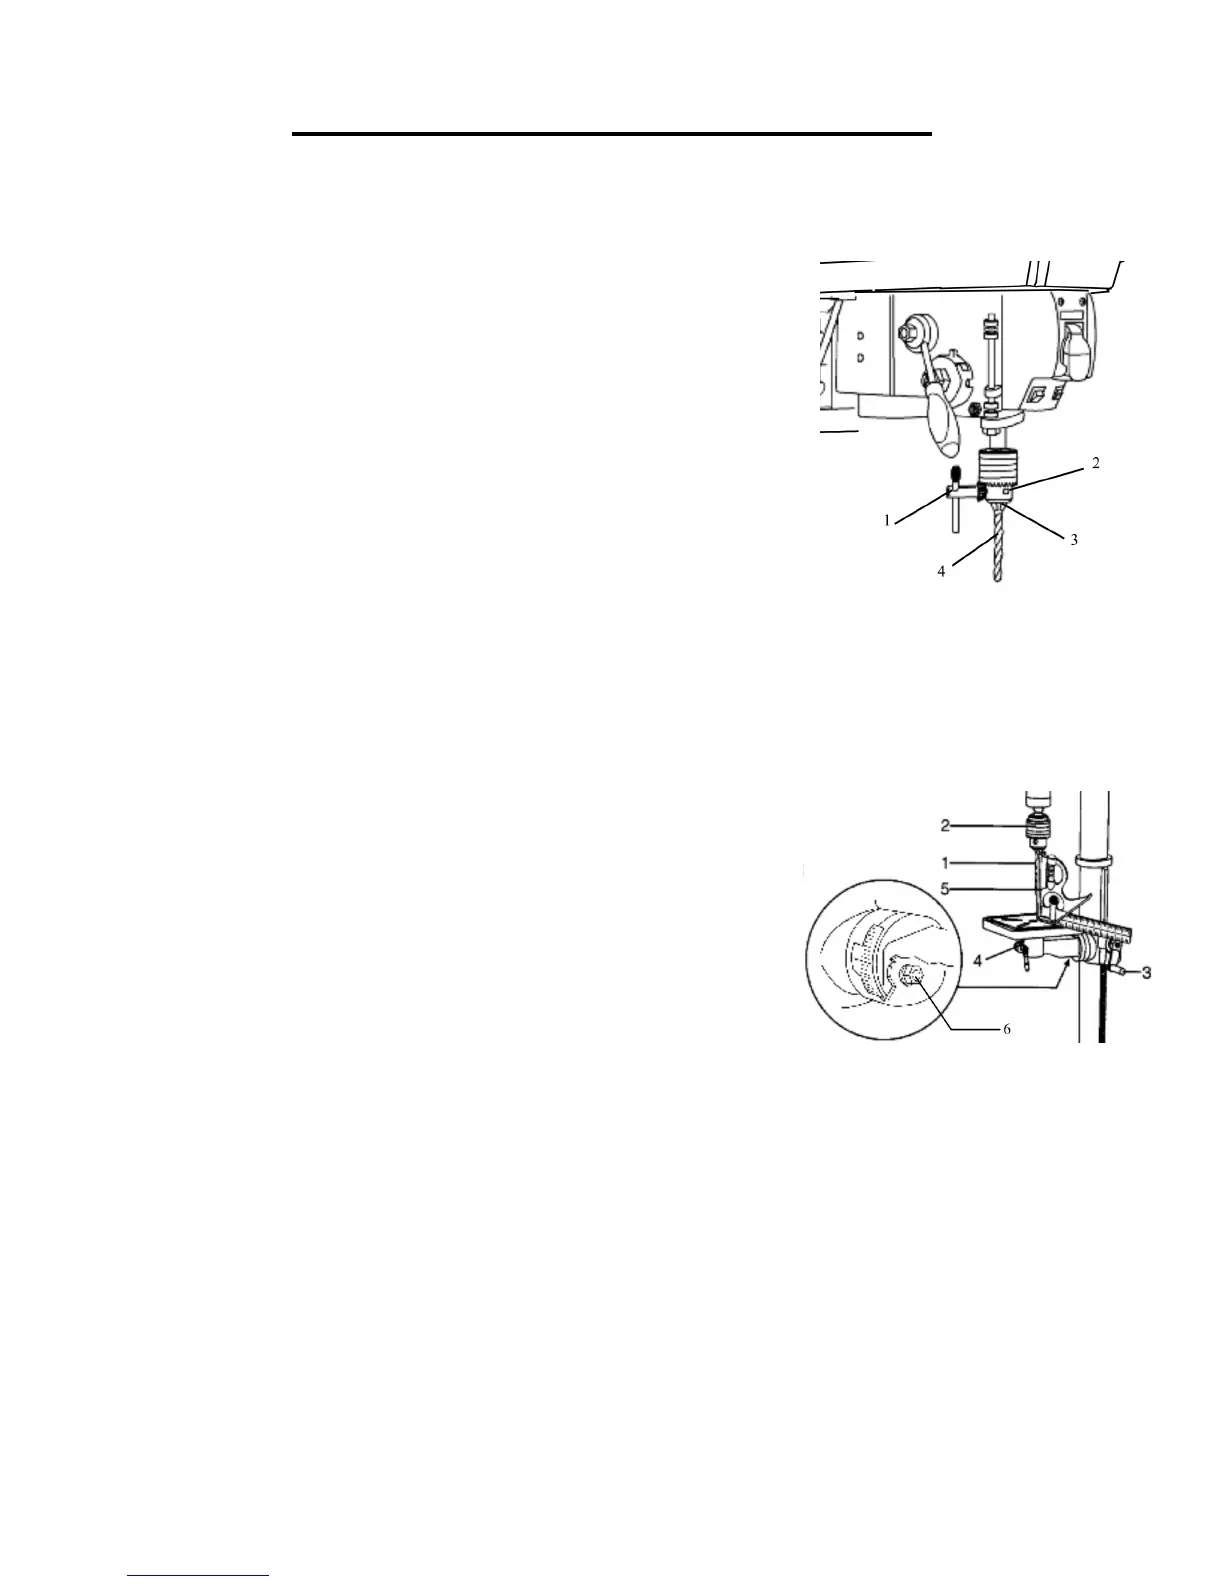
INSTALLING A DRILL BIT (Fig. 13)
1. Place the chuck key (1) into the side keyhole of the chuck (2), meshing
the key with the gear teeth.
2. Turn the chuck key counterclockwise to open the chuck jaws (3).
3. Insert a drill bit (4) into the chuck far enough to obtain the maximum
grip of the chuck jaws.
4. Center the drill bit in the chuck jaws before the final tightening of the
chuck.
5. Tighten the chuck jaws using the chuck key to ensure that the drill bit will not slip while drilling.
6. Remove the chuck key.
SQUARING THE TABLE TO THE DRILL BIT (Fig. 14)
1. Insert a 3” long drill bit (1) into the chuck (2) and tighten the jaws with
the chuck key.
2. Raise the table with the crank handle (3). Lock the table (4) approxi-
mately 1” below the drill bit.
3. Place a combination square (5; not included) on the table as shown,
placing the long straight edge of the combination square against the drill
bit. Make sure the drill bit is parallel/aligned exactly to the straight edge
of the square.
4. If an adjustment is needed, loosen the bevel lock bolt (6) with a wrench.
5. Tilt the table slightly, until the combination straight edge is aligned perfectly with the drill bit.
6. Tighten the bevel lock when square.
Note: Adjustments for the correct function of your drill press return spring have been done by the factory. Please
do not modify them. However, prolonged use of the drill press may make some readjustments necessary.
Fig. 14
Fig. 12
Fig. 13

 Loading...


