CHARGING INFORMATION
10
CHARGING YOUR SCREWDRIVER
1. Inspect the screwdriver, battery charger and power cord for
any signs of damage.
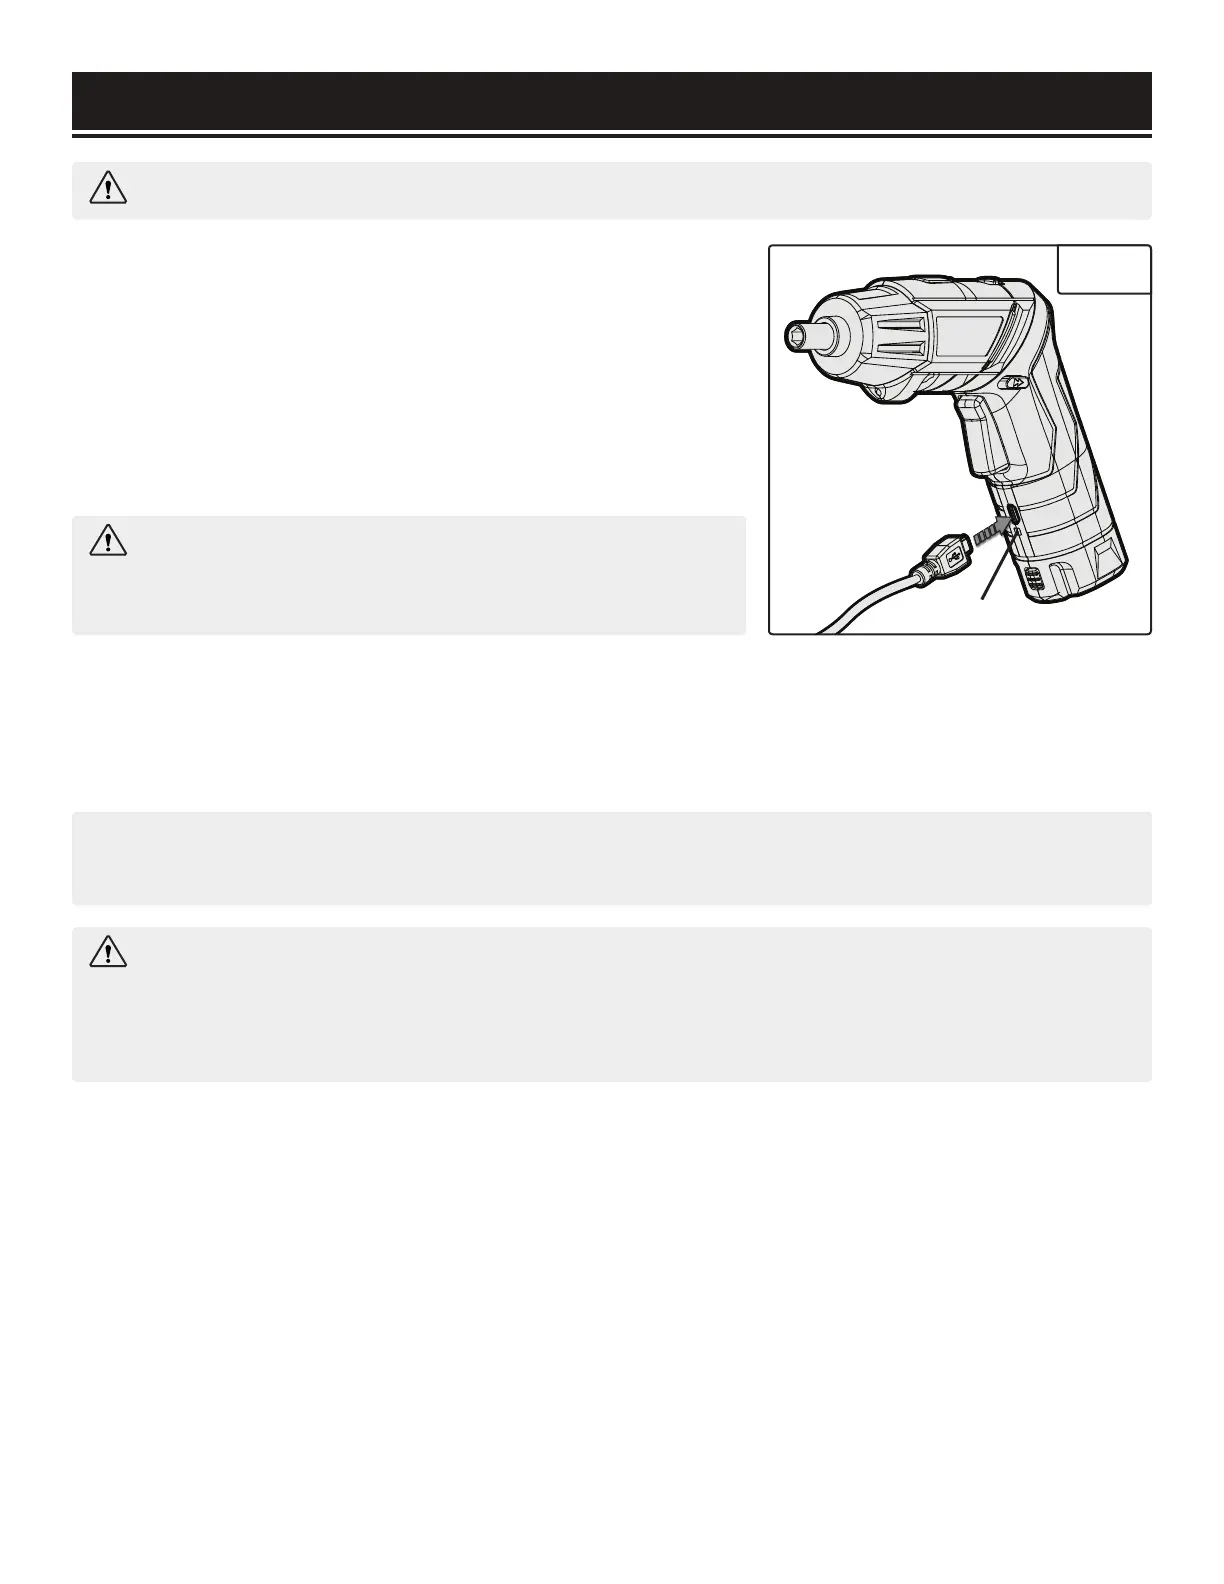
2. Plug the micro USB end of the charging cable into the
charging port (Fig. 1) on the screwdriver.
3. Connect the USB end of the charging cable into any USB
port with a maximum output of 5V.
WARNING: The battery must be charged fully before the first time use.
WARNING: Always allow the power tool to cool down
to room temperature before charging. This will extend the
life of your battery.
NOTE: A battery that has not been used for an extended period of time will have reduced battery
capacity. A substantial drop in operating period per charge indicates that the battery is worn out.
WARNING: The charging cable and battery are specifically designed to be compatible. Do
not attempt to use any other cords to charge the screwdriver or use the cable for any use besides
charging the screwdriver. Never insert or allow metallic objects into the charging cable or charg-
ing port as an electrical failure or other hazards may occur.
Fig. 1
4. The power indication light (Fig. 1 - 2) indicates the power level during charging. If the light is red,
the battery is being charged. If the light is green, the battery is fully charged.
5. Upon full charge, disconnect the charger from the outlet, then disconnect the charger from the
tool.
1

 Loading...