OPERATION
12
WARNING: Do not plug in or turn on the tool until it is fully assembled according to the
instructions. Failure to follow the safety instructions may result in serious personal injury.
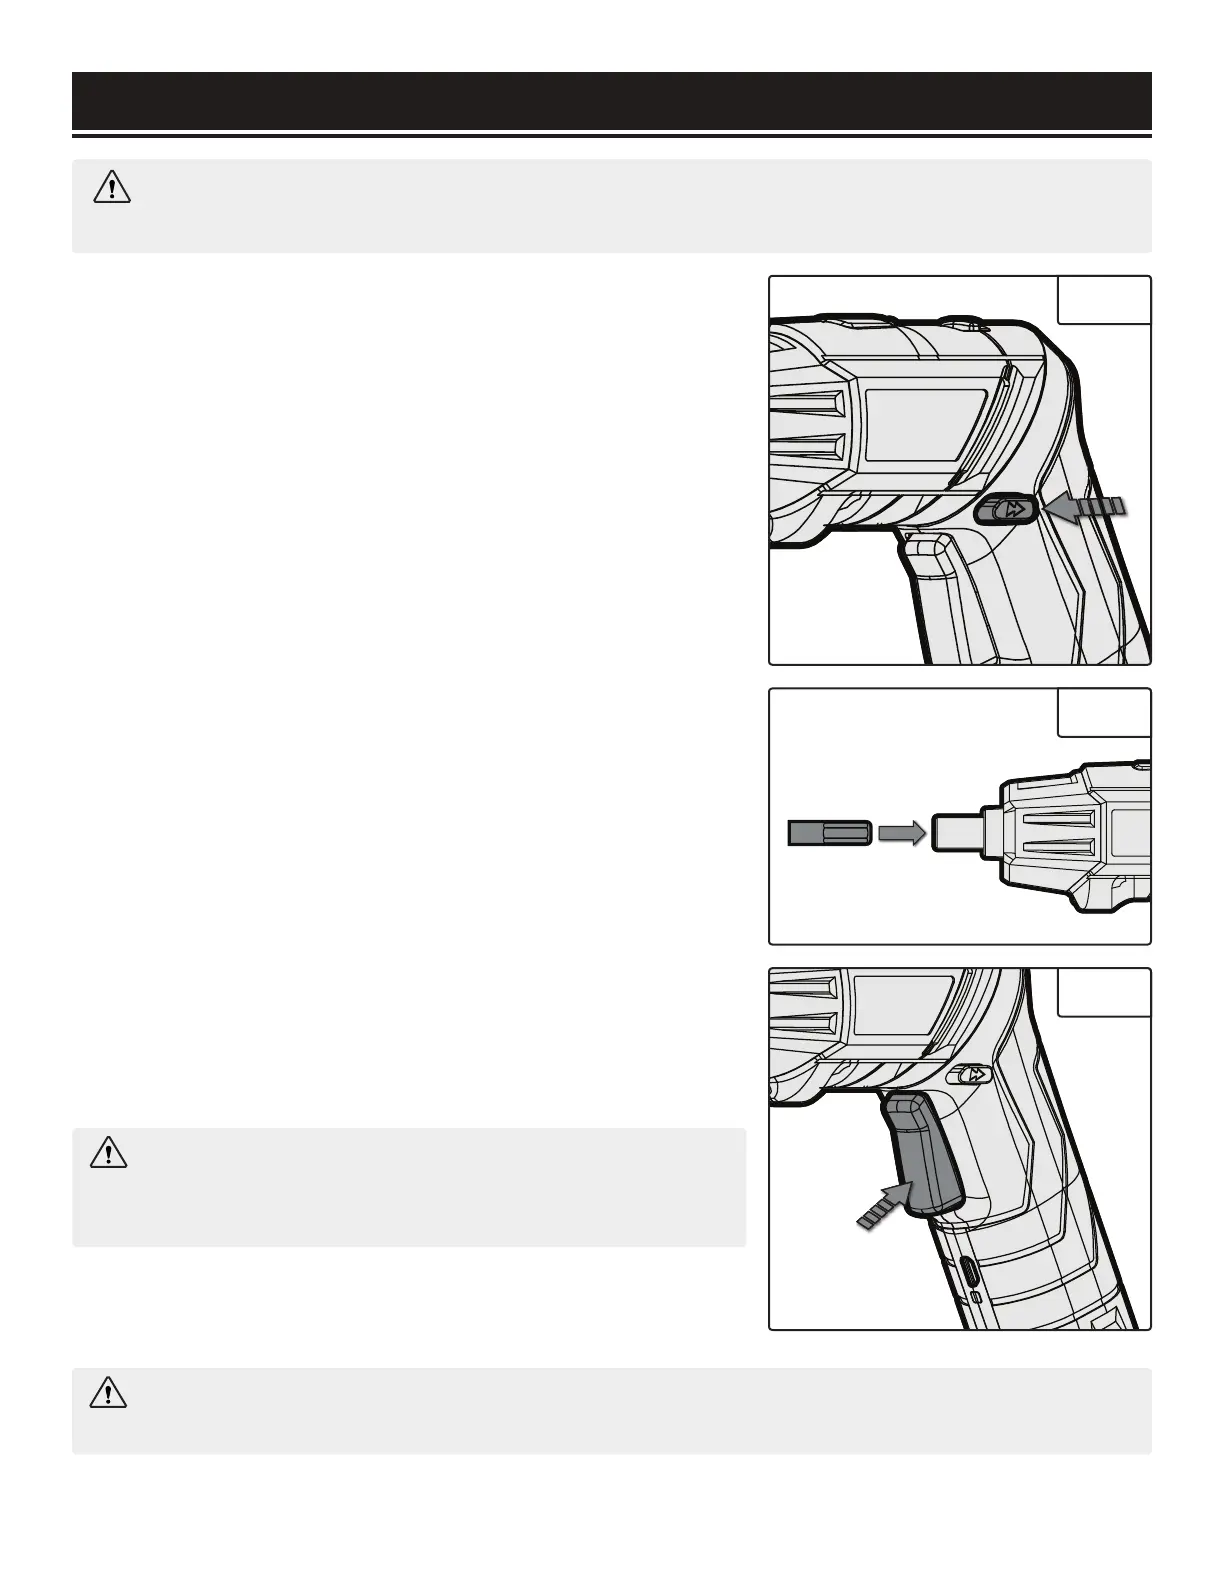
CHANGING THE DIRECTION
The direction and safety switch also determines the direction
of the chuck rotation.
LOCKING THE POWER SWITCH
Before installing bits or making any adjustments, make sure to
lock the power switch in the center position to prevent acci-
dental starting.
1. To lock the power switch, place the direction and safety
switch (Fig. 2 - 1) in the center position.
2. Check that the screwdriver does not turn on when the
power switch is pressed.
INSTALLING AND REMOVING BITS
1. Lock the power switch by placing the direction and safety
switch in the center position. Do not engage the trigger when
changing bits.
2. Select your 1/4" bit and place it into the magnetic chuck; it
will click into place (Fig. 3). Check to make sure that the bit is
securely installed.
3. To remove a screwdriver bit, lock the power switch by plac-
ing the direction and safety switch in the center position and
pull the bit out.
TURNING ON
1. To turn on the screwdriver, use the direction and safety
switch to choose the direction of rotation, then press down on
the power switch (Fig. 4).
2. Stop the tool by releasing the power switch.
Fig. 2
Fig. 4
Fig. 3
WARNING: Do not touch the bit during or immediately
after operation. Always wait for the bit to stop and cool
down.
WARNING: Never change the direction of rotation while the trigger is pressed down. Release
the switch and wait for the chuck to stop first.
Directions continue on the next page.

 Loading...