10
OPERATION
SPINDLE SANDING
Spindle sanding is the preferred method of removing material from inside curves and irregular edges. The oscillat-
ing spindle moves up and down as it rotates to help smooth surfaces more quickly and evenly than a non-oscillating
sander. To use the spindle sander, you must first configure the machine for spindle sanding by installing the appro-
priate sanding drum/sleeve for your operation.
INSTALLING A SANDING DRUM AND SLEEVE
To ensure the workpiece is supported during spindle sanding operations, make sure to use the table insert and
throat plate that best matches the drum and sleeve that you’ll be working with. The following table can help ensure
that you are using the proper sizes of throat plates, drums and washers for each respective sanding sleeve. Keep in
mind the smallest size sanding sleeve does not include a drum. It instead goes directly onto the bare spindle.
SANDING
SLEEVE
SANDING
DRUM
THROAT
PLATE
SPINDLE
WASHER
1/2 in. N/A 1/2 in. 5/8 in.
3/4 in. 3/4 in. 3/4 in. 7/8 in.
1 in. 1 in. 1 in. 7/8 in.
1-1/2 in. 1-1/2 in. 1-1/2 in. 7/8 in.
2 in. 2 in. 2 in. 1-3/4 in.
1. Disconnect the machine from the power source.
2. Use the table to the right to select the required size
of components for the sanding drum and sleeve size
you have chosen.
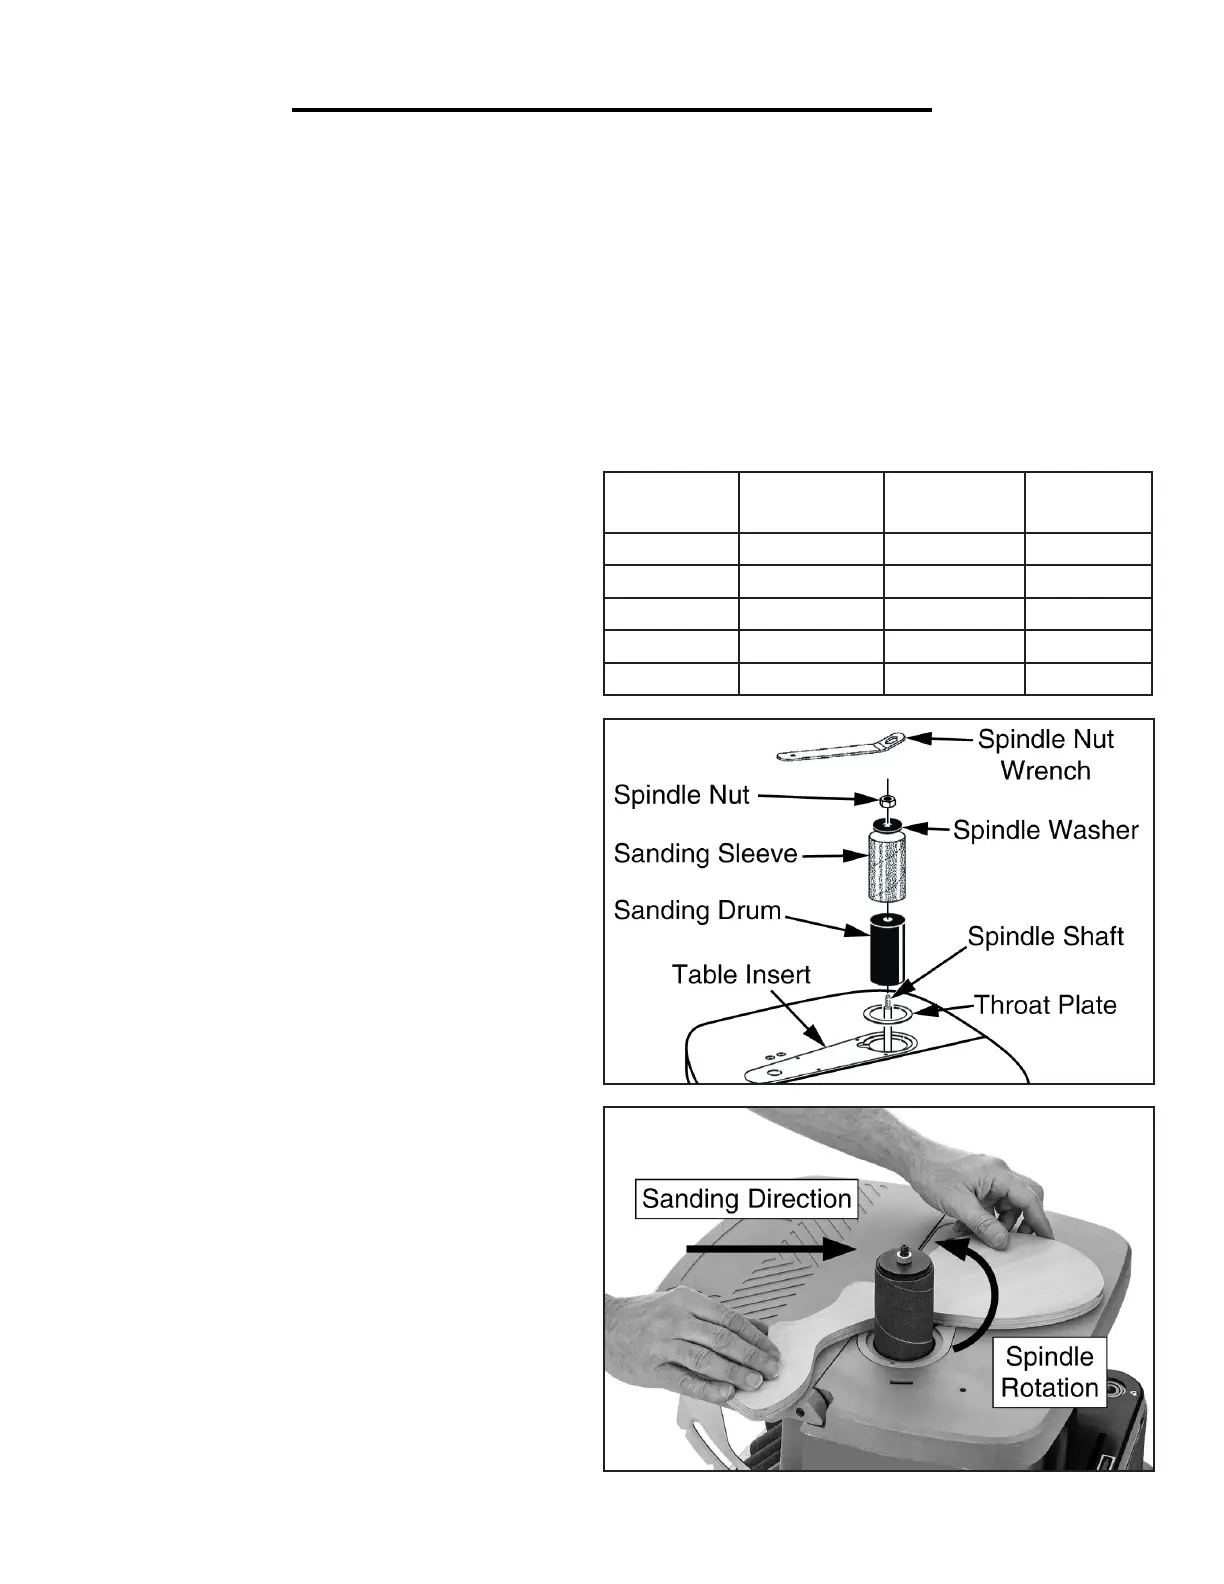
3. Place the table insert into the table opening. Install
the preferred drum onto the spindle shaft, followed
by the corresponding sanding sleeve and throat plate
(Fig. F).
4. Secure the sanding drum in place with the cor-
responding washer and nut (Fig. F). Tighten the nut
until the sanding drum creates equal pressure to all
sides of the sanding sleeve. The sleeve should not be
able to freely rotate without also rotating the sanding
drum.
USING SPINDLE SANDER
1. Turn the sander ON and allow it to reach full
speed.
2. Maintain a firm grip with both hands on the work-
piece for maximum control. Guide it against the ro-
tation of the spindle as shown in Fig. G. Do not force
the workpiece against the sanding sleeve. Allow the
machine to do the work.
3. When you are finished, turn off the sander.
Fig. F
Fig. G

 Loading...