OPERATION
13
ADJUST THE TRACKING OF THE SANDING BELT
1. Install the belt sanding attachment and remove all tools from the sander.
2. Connect the sander to a power source and turn it ON. Immediately turn the machine OFF, checking to see if
the sanding belt rides centered on the drums, and does not move toward the top nor the bottom edge of the belt
sanding attachment.
3. If the sanding belt moves toward the top of the belt sanding attachment, rotate the tracking control knob (see
Fig. M) counterclockwise a quarter of a turn.
4. If the sanding belt moves toward the bottom of the belt sanding attachment, rotate the tracking knob clockwise
a quarter of a turn.
5. Turn the machine ON, then immediately turn the machine OFF. The sanding belt should be centered on the
drums. If it is, then the belt is tracking properly and no further adjustments need to be made. Otherwise, repeat
steps 3 or 4 as necessary.
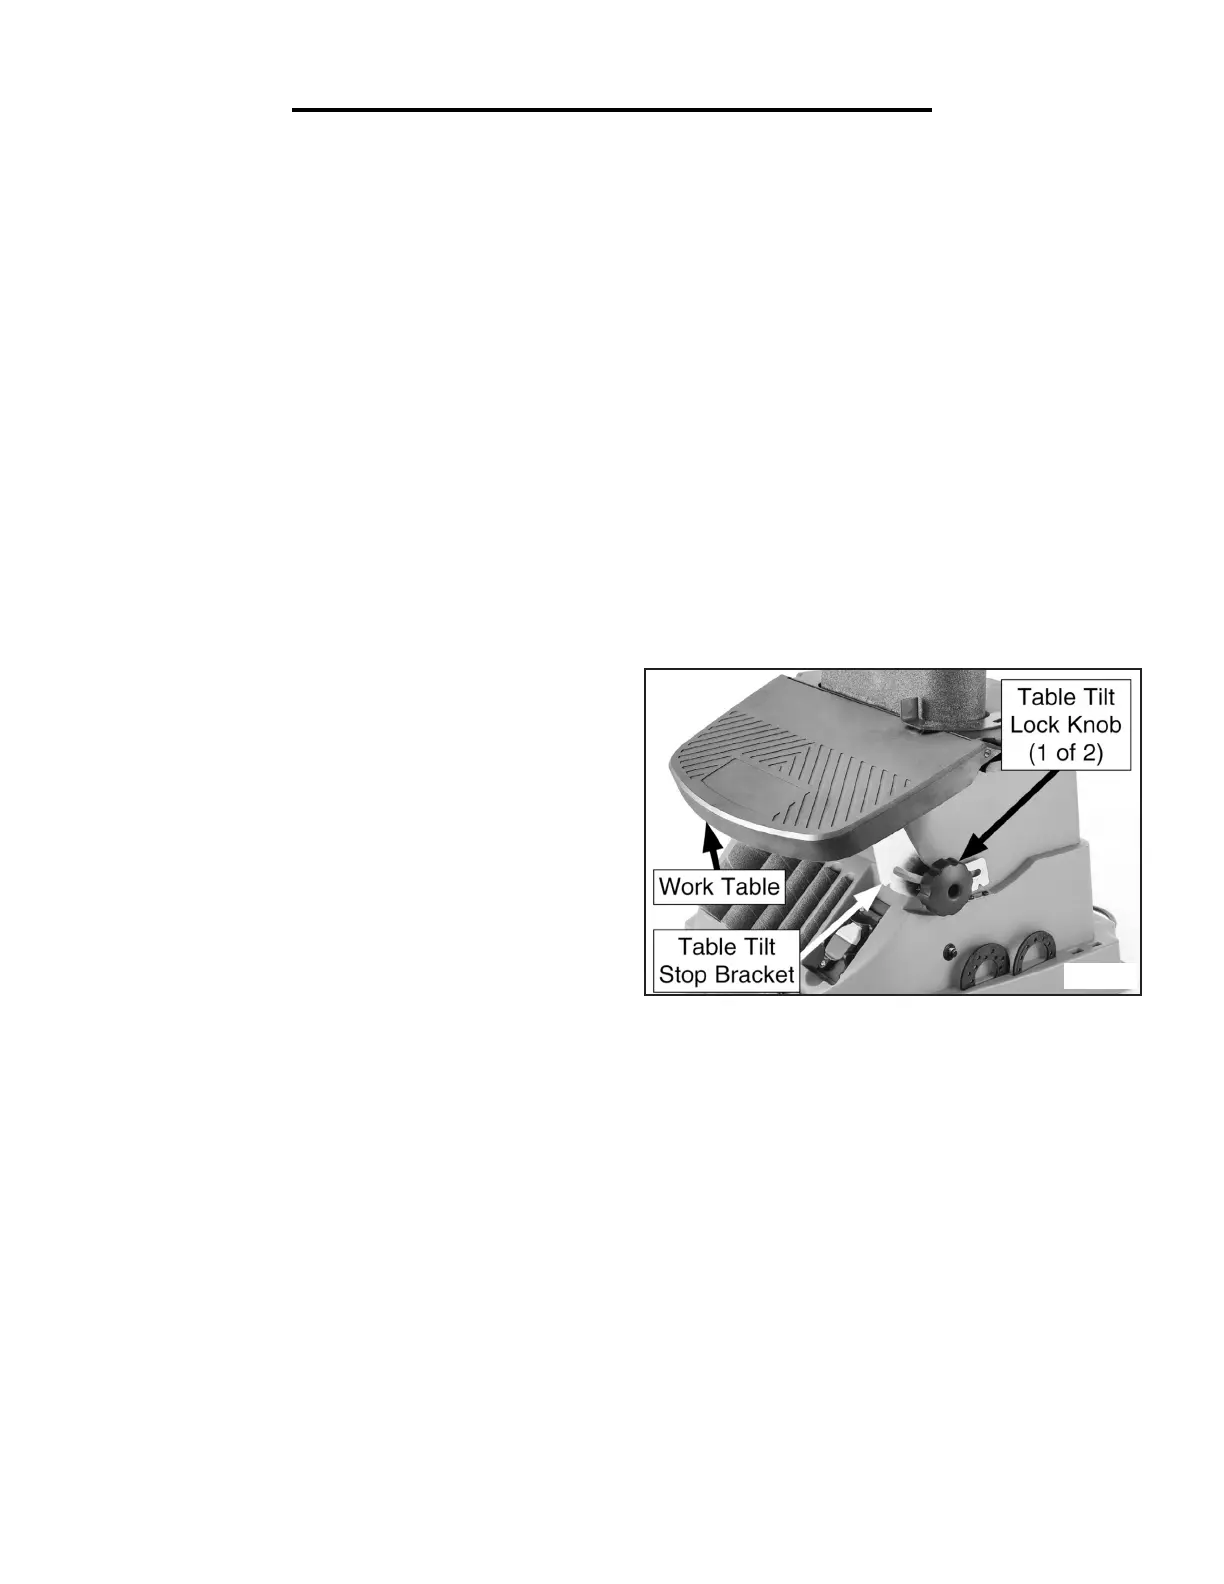
BEVEL SANDING (Fig. N)
The work table has the capacity to tilt from 0 to 45 degrees
for sanding bevels on your workpiece. The table tilt stop
bracket has stops for quickly setting the most common
angles: 0°, 15°, 22.5°, 30°, and 45°.
1. Unplug the sander from its power source.
2. Install the spindle sander or the belt-sanding attachment.
3. Loosen both table tilt lock knobs.
4. Tilt table to the desired angle.
Fig. N
5. Tighten both lock knobs to secure the table’s tilt.
OVERLOAD PROTECTION
To protect the motor, your sander is equipped with a circuit breaker, located on the right side of the unit near the
power switch. If the motor is overloaded, the circuit breaker will trip. To reset the breaker, wait a moment and
then press it in to reset it. Do not press too hard on the sandpaper, or the motor may overload.
REPLACEMENT SANDPAPER
Replacement sandpaper can be purchased from wenproducts.com, or by calling 1-800-232-1195 M-F 8-5 CST.