15
ASSEMBLY & ADJUSTMENTS
2. Follow step “2.1” if you are using the track, follow
step “2.2” if you are not using the track.
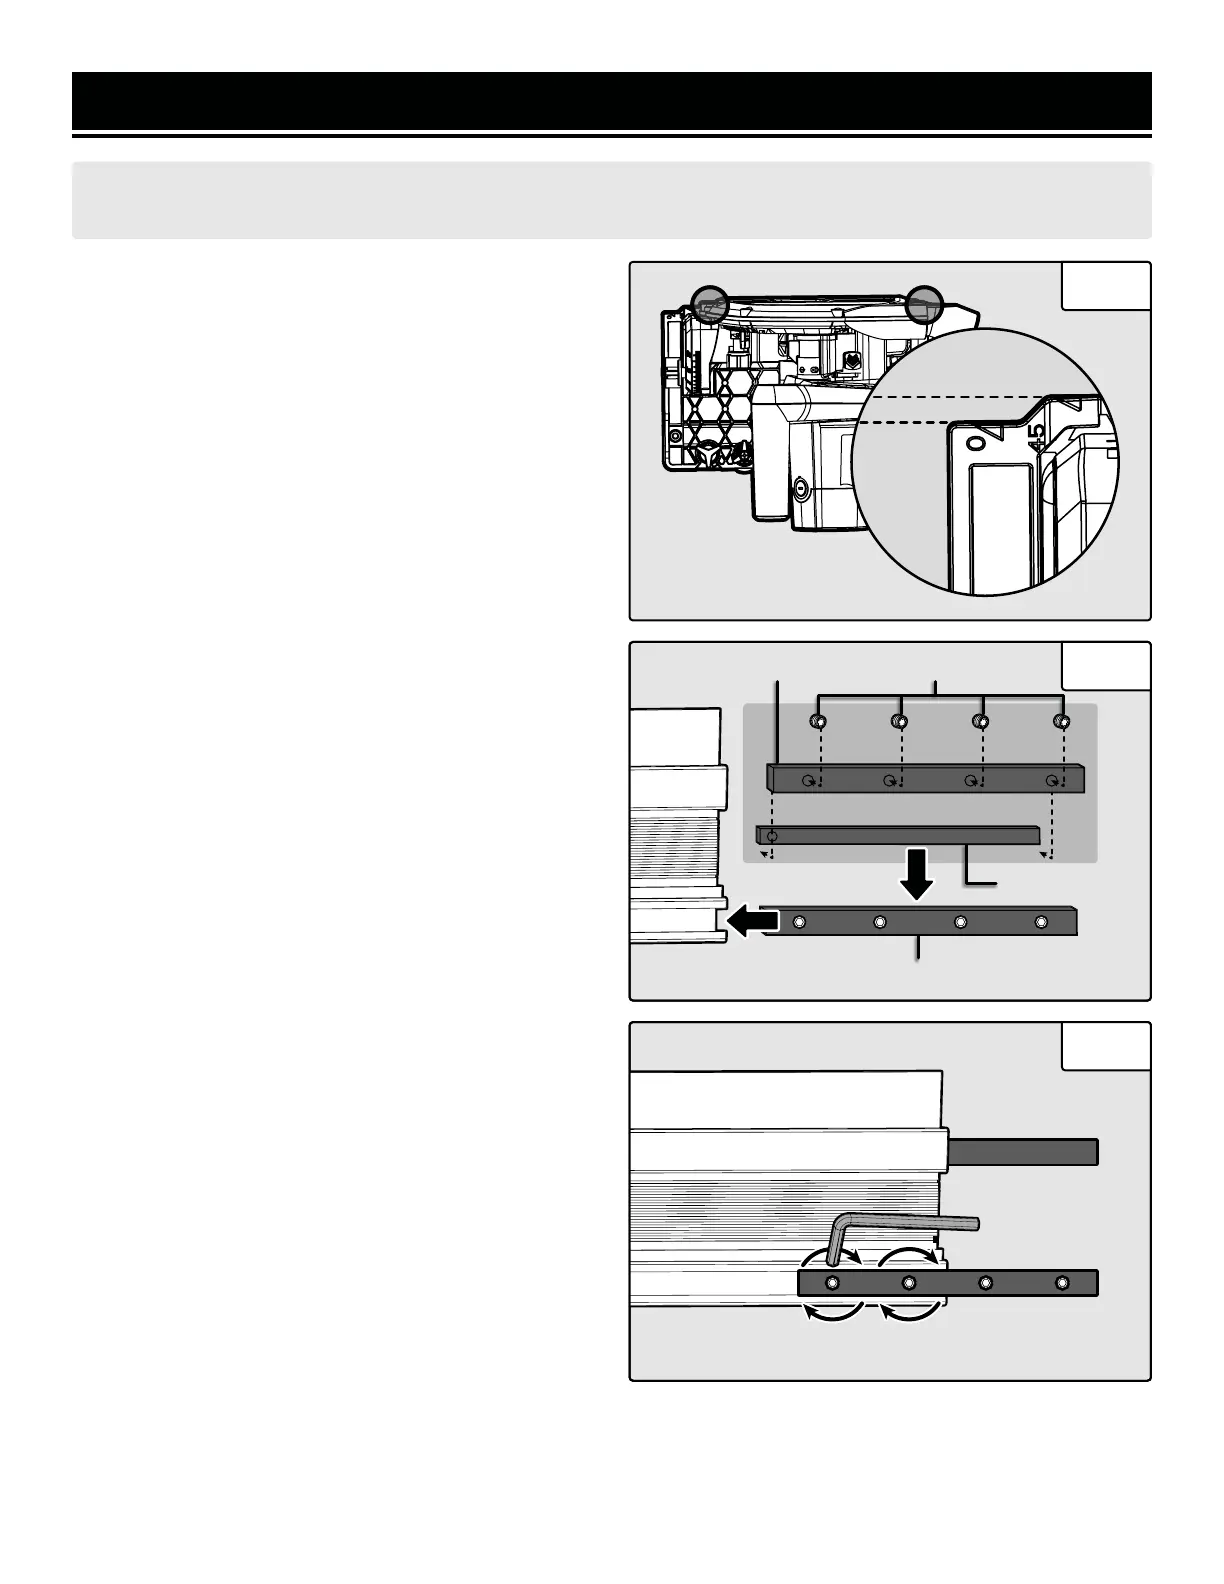
2.1) When using the saw with the track, always align
position A (the “0” mark on the base plate) with your
marked cutting line.
2.2) When using the saw without the track, align posi-
tion A (the “0” mark on the base plate) with your marked
cutting line for straight cuts. Align position B (the “45”
mark on the base plate) with your marked cutting line for
45° bevel cuts.
NOTE: Since blade thicknesses vary, it is necessary to
make test cuts along a guide line on a piece of scrap ma-
terial to determine the proper alignment of the guideline
within the notch. This will help to obtain an accurate cut
with blades of various thicknesses.
SETTING UP THE TRACK
NOTE: You will need to remove the protective sleeves
from the ends of each track before using the track. To
help your saw glide smoothly along the track, do not
allow dust, shavings, or other debris to build up on the
track.
1. Each track adapter assembly is made up of 6 pieces:
a spacer, a sleeve, and four hex screws. Assemble the
track adapter by fitting the spacer into the sleeve, op-
posite the hex screws. See Fig. 8.
2. Slide the track adapter assembly into the groove on
the front face of the track. Half of the adapter should
be in the groove and half should hang off the track. The
hex screws should be accessible. Tighten the two hex
screws that are within the track with a 3mm hex wrench
(Fig. 9).
3. Repeat step 2 with the second adapter and the groove
on the underside of the track. Be sure to tighten the two
hex screws that are within the track.
4. Guide the two free halves of the track adapters onto
another piece of track (Fig. 10) and tighten the hex
screws on the face side and the underside (Fig. 11).
Instructions continue on the next page.
NOTE: The track, track adapters, clamps, and 3mm hex wrench are not included. These items can be purchased
separately at wenproducts.com.
Fig. 7
Fig. 8
Fig. 9
AAA
BBB
Track
Hex ScrewsSleeve
Spacer
Track Adapter Assembly

 Loading...