NOTE: Grounding wire and grounding rods are not
included with the generator. A generally acceptable
grounding wire is a No. 12 AWG (American Wire
Gauge) stranded copper wire. Grounding codes
can vary by location. Contact a local electrician to
check the area codes.
ABOUT THE BATTERY (CONT.)
4. AVOID DAMAGE AND SHOCKS. Immediately replace batteries that have been dropped from a height of more than
one meter (3 feet) or those that have been exposed to violent shocks, even if the housing of the battery appears to
be undamaged. The battery cells inside the battery may have suffered serious damage. In such instances, please
read the waste disposal information on p. 31 for proper battery disposal.
5. DO NOT CRUSH, DROP OR DAMAGE BATTERY. Do not use the battery if it has sustained a sharp blow, been
dropped, run over or has been damaged in any way (e.g. pierced with a nail, hit with a hammer, stepped on, etc.).
6. DO NOT DISASSEMBLE. Incorrect reassembly may pose a serious risk of electric shock, fire or exposure to toxic
battery chemicals. If the battery or charger are damaged, call WEN customer service at 1-800-232-1195 for as-
sistance.
7. DO NOT SHORT CIRCUIT. Batteries will short circuit if a metal object makes a connection between the positive
and negative contacts on the battery. Do not place the battery near anything that may cause a short circuit, such as
paper clips, coins, keys, screws, nails and other metallic objects. A short-circuited battery poses a risk of fire and
severe personal injury.
NOTE: The safe temperature range for charging the battery is 25°F – 104°F. The generator is shipped with the lith-
ium-ion battery’s negative (-) terminal disconnected to maximize safety. To start the generator using electric start,
the battery must be connected.
GENERATOR PREPARATION
To connect the battery:
1. Remove the black battery bracket by removing the two
bolts that hold the battery bracket in place. Pull out the bat-
tery for easier access.
2. Pull back the protective cover from the red (+) lead near
the battery.
3. Attach the red (+) lead to the positive (+) terminal on the
battery, using the nut and bolt.
4. Repeat for the black (-) battery lead. Secure it to the
negative (-) terminal on the battery.
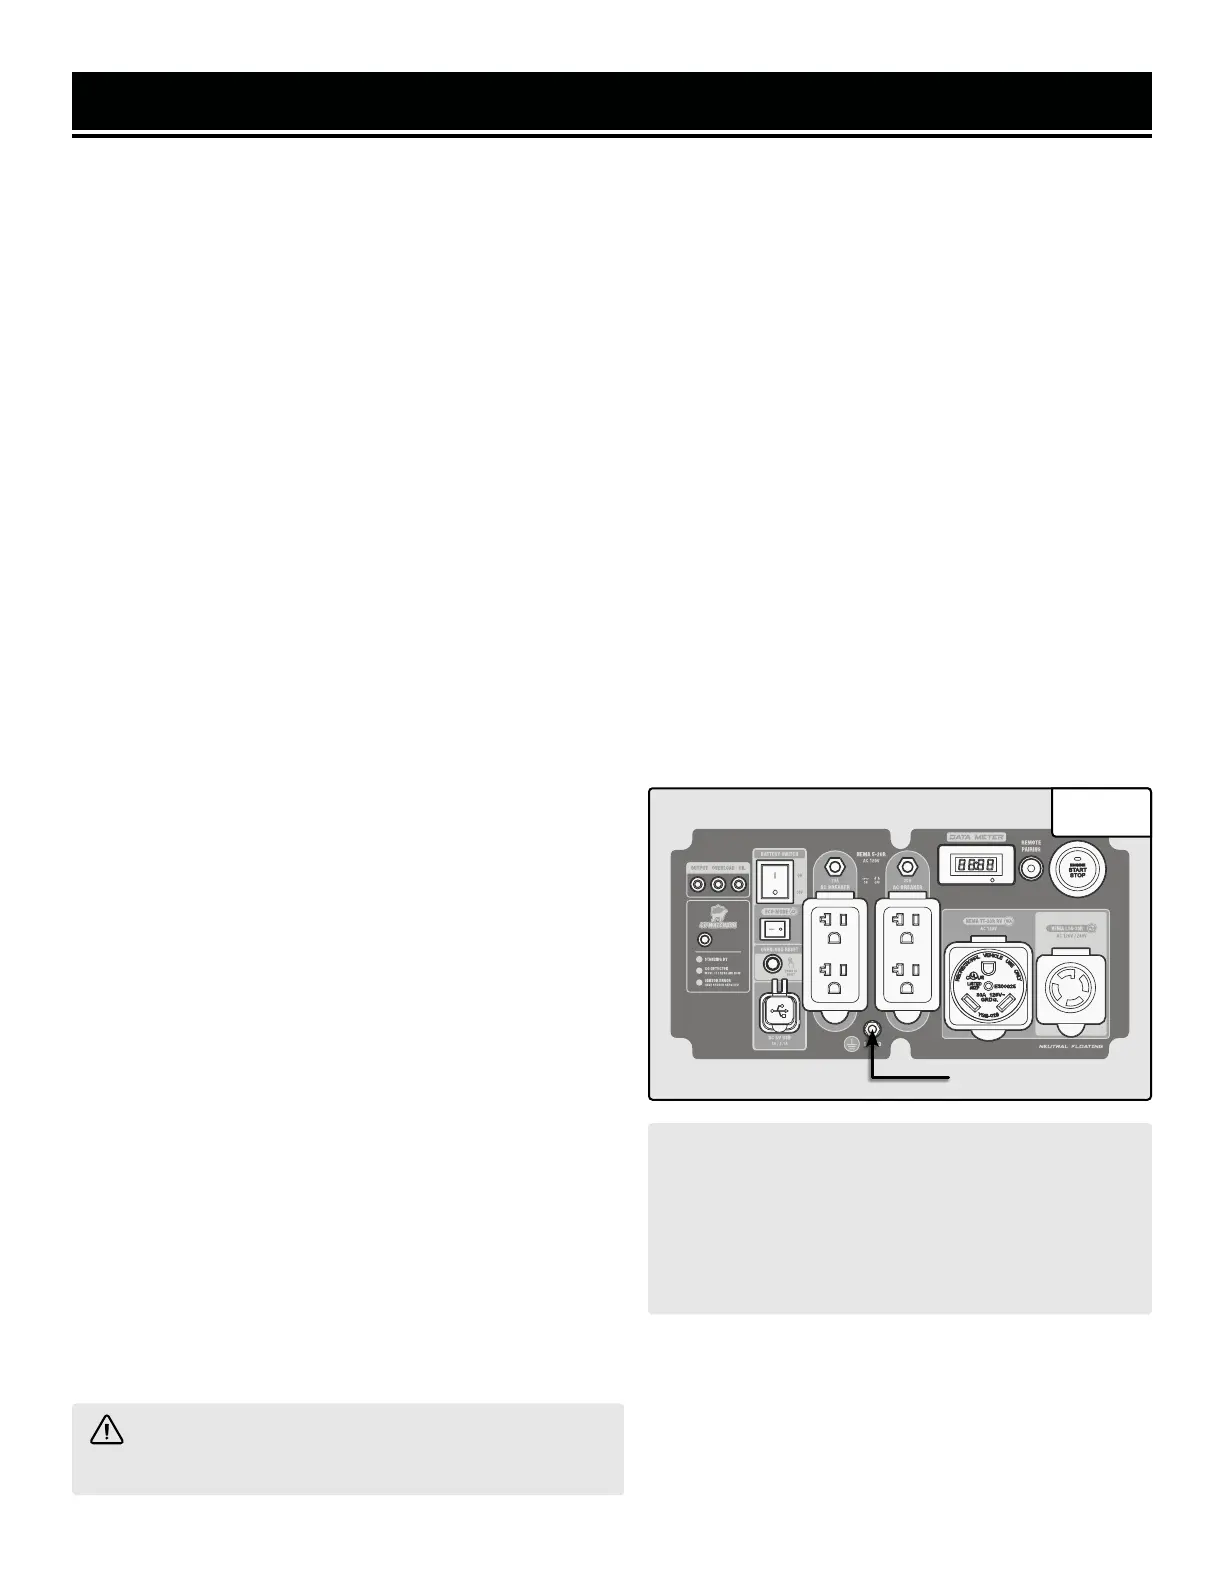
STEP 4 - GROUNDING THE GENERATOR
To reduce the risk of electric shock and to maximize safety,
the generator should be properly grounded.
1. Attach one end of the grounding wire to the grounding
nut (Fig. 10). Tighten the nut to secure the grounding wire.
2. Connect the other end of the grounding wire to a copper,
brass, or steel-grounding rod that is driven into the earth.
WARNING! Failure to properly ground the generator
increases your risk of electric shock.
Grounding Nut
Fig. 10
18