18
Replacing the Heating Element (Electric Dryers)
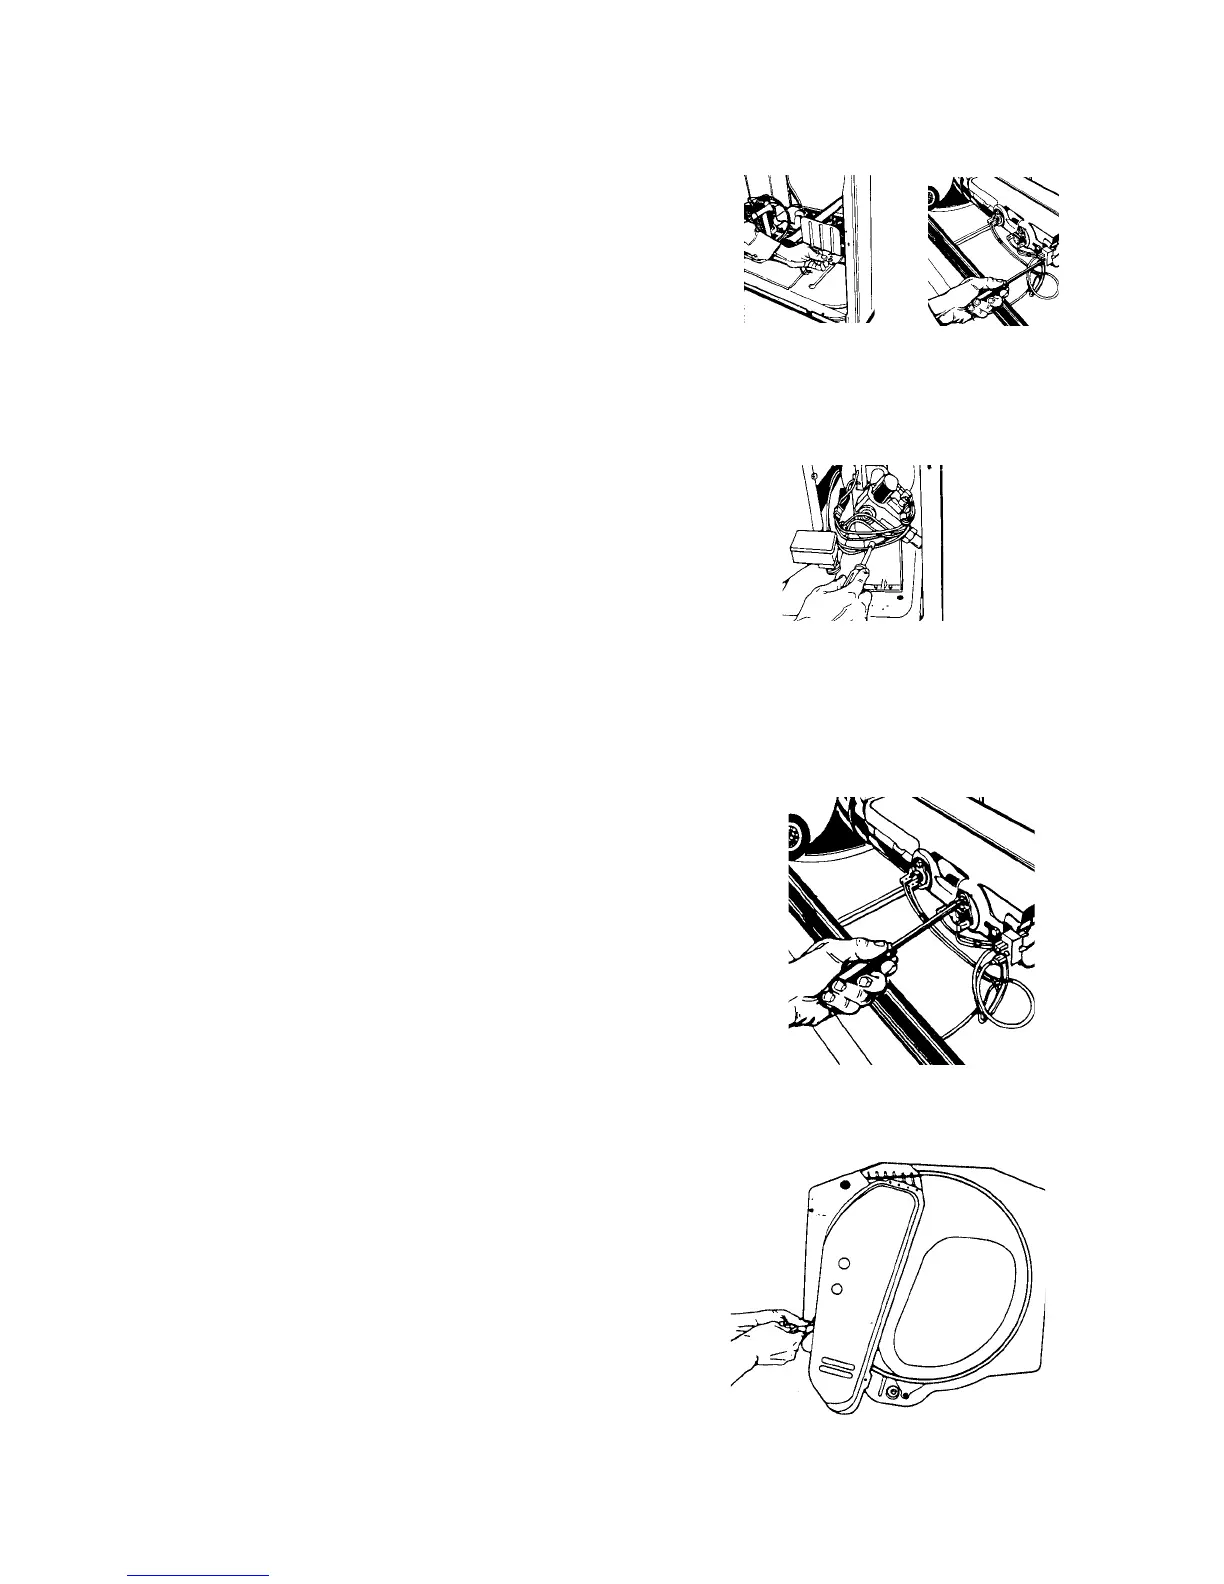
1. Remove the screw from heat shield. (Fig. 31) Remove
the wires to the heat element.
2. Remove the screw from side of heater box (Fig. 32)
and slide the heat element out of dryer.
3. Slide new heat element into dryer and reattach screw
on side of heater box.
4. Reattach the heat element wires. Replace heat shield.
Fig. 32
Removing the Burner Assembly (Gas Dryers)
1. Turn off the gas supply to the dryer.
2. Disconnect the gas supply pipe from the burner
assembly.
3. Disconnect the wiring harness connectors from
the flame sensor and burner assembly.
4. Remove the two (2) screws securing the burner assembly to the mounting bracket. (Fig. 33)
Fig. 31
Fig. 33
Replacing the High Limit Thermostat and Thermal Cutoff
1. Remove screw holding heat shield.
2. Disconnect wires to heat element, high limit thermostat
and thermal cutoff.
3. Remove two screws from heat element bracket.
4. Remove heat element assembly (heat duct) from dryer.
5. Remove screws to high limit thermostat or thermal cut-
off. (Fig. 34) Remove high limit thermostat or thermal cutoff.
6. Attach new high limit thermostat or thermal cutoff.
7. Reattach heat shield.
Fig. 34
Replacing the Heat Duct Assembly
1. Remove two screws attaching heat duct to rear
bulkhead assembly. (Fig. 35) Remove heat duct.
2. Attach new heat duct to rear bulkhead assembly
using the rear bulkhead assembly screws.
3. Slide rear bulkhead assembly into place. Align
top two screw holes in new rear bulkhead assembly
with top two screw holes in back of dryer.
Fig. 35