PAGE 2
FOR SERVICE TECHNICIAN’S USE ONLY
DO NOT REMOVE OR DESTROY
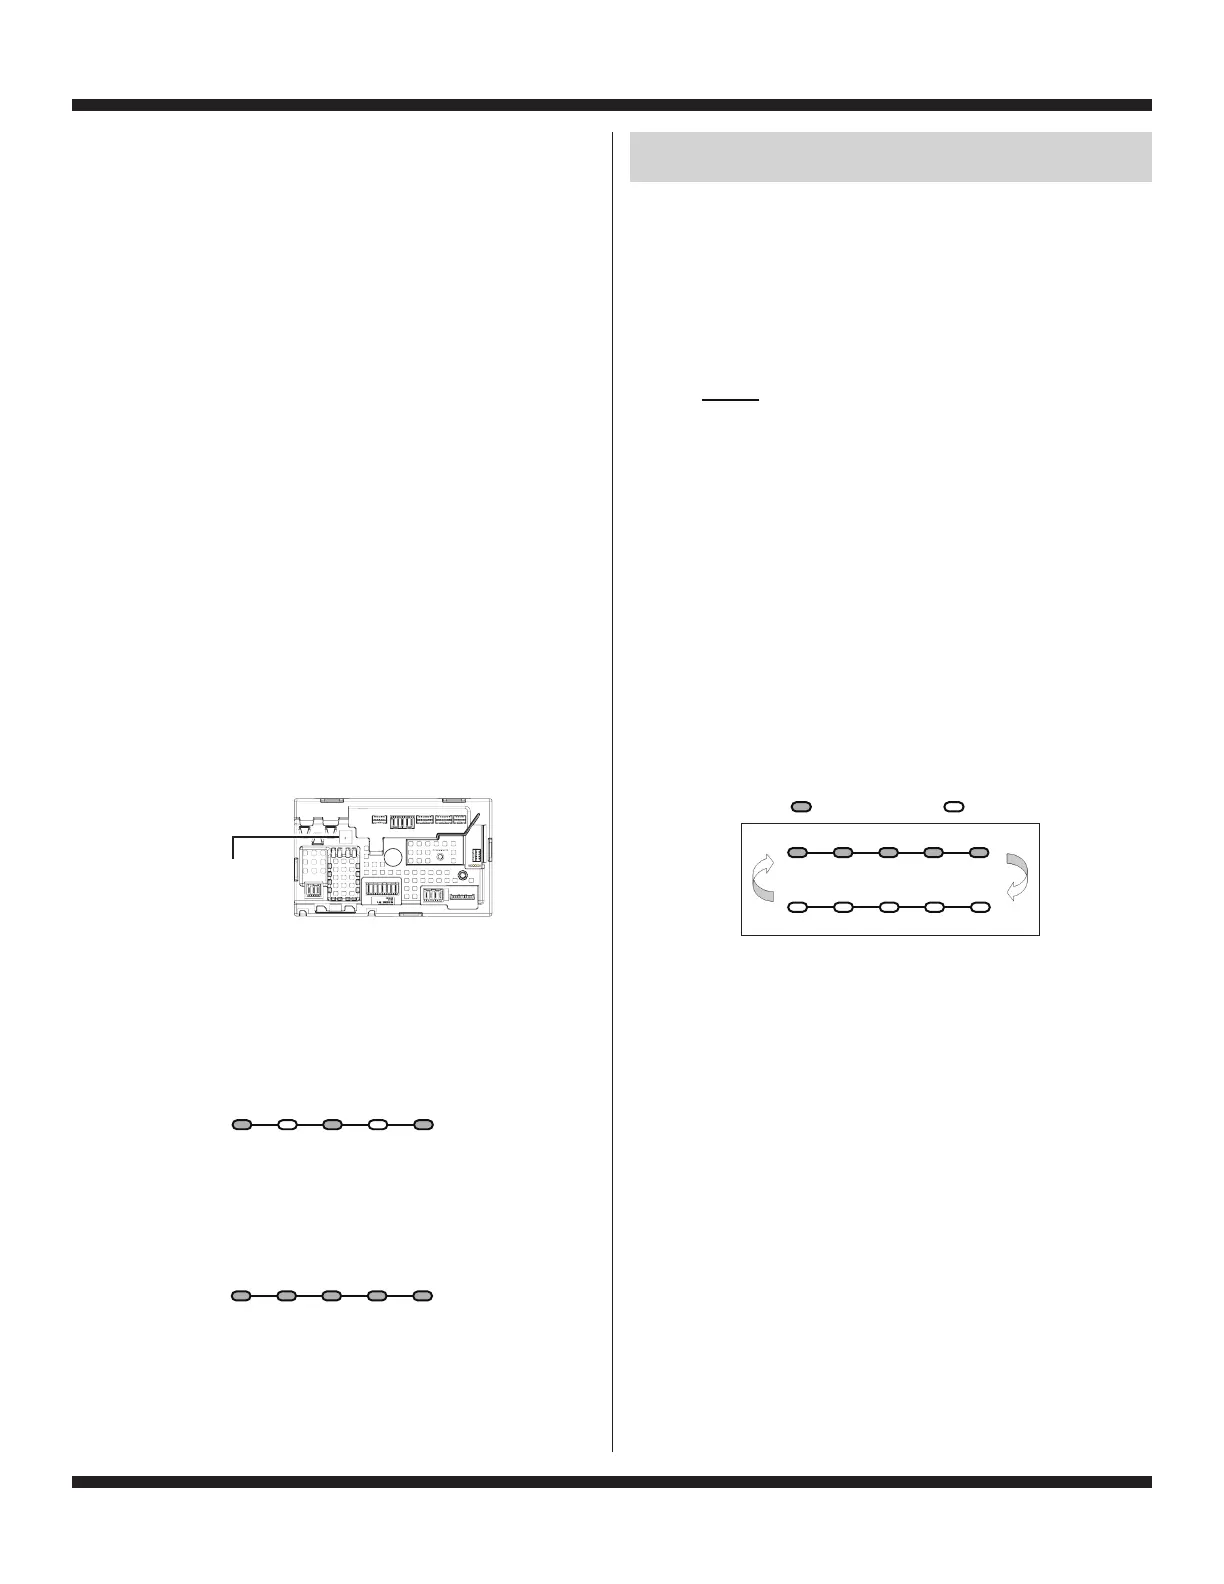
ACTIVATING THE SERVICE DIAGNOSTIC
TEST MODES
1. Be sure the washer is in standby mode (plugged in with all
indicators off).
2. Perform the following sequence of movement using the cycle
selector knob.
NOTE: AFTER RESET, sequence “a” through “e” must be
completed within 6 seconds, stopping just briefly between each
click (resulting in the following sequence: Left - Right - Right -
Left - Right, as indicated below).
RESET - Place cycle selector knob pointer at 12 o’clock
position and wait 3–4 seconds before proceeding.
a. Rotate cycle selector knob counterclockwise one click.
b. Rotate cycle selector knob clockwise one click.
c. Rotate cycle selector knob clockwise one click.
d. Rotate cycle selector knob counterclockwise one click.
e. Rotate cycle selector knob clockwise one click.
Successful activation of Diagnostic Test Modes will be
indicated by all status LEDs (except for Lid Locked)
flashing ON and OFF in half-second intervals. NOTE:
LED names may vary between makes and models.
Legend: = ON = OFF
Figure 2 - Status LEDs flashing ON and OFF
If the status LEDs do not display as described above, the
sequence may not have been completed within 6 seconds.
Repeat step 2 to ensure this was not the cause. If still
unsuccessful, see Unsuccessful Entry, page 3.
In Soak/ Final
Use Wash Rinse Spin Done
0.5 Seconds ON
0.5 Seconds OFF
L
L
R
R
R
DIAGNOSTIC GUIDE
Before servicing, check the following:
Make sure there is power at the wall outlet.
Has a fuse blown or circuit breaker tripped? Was a regular
fuse used? A time-delay fuse is required.
Are both hot and cold water faucets open and water supply
hoses unobstructed?
All tests/checks should be made with a VOM (volt-ohm-
milliammeter) or DVM (digital-voltmeter) having a sensitivity
of 20,000 Ω per volt DC or greater.
Resistance checks must be made with washer unplugged
or power disconnected.
IMPORTANT: Avoid using large diameter probes when
checking harness connectors as the probes may damage
the connectors upon insertion.
Check all harnesses and connections before replacing
components. Look for connectors not fully seated, broken
or loose wires and terminals, or wires not pressed into
connectors far enough to engage metal barbs.
A potential cause of a control not functioning is corrosion
or contamination on connections. Use an ohmmeter to check
for continuity across suspected connections.
DIAGNOSTIC LED – MAIN CONTROL
A troubleshooting tool has been implemented onto the main
control board—a diagnostic LED.
LED ON – The Control is detecting correct incoming line voltage
and the processor is functioning.
LED OFF – No power to control or control malfunction. Perform
TEST #1: Main Control, page 12, to verify main control functionality.
FAILURE MODE
If the incoming water supply is restricted or off, the cycle will
end and the following 3 LEDs will be lit. Opening and closing the
lid will reset the control to the beginning of a new cycle. Money
from the cancelled cycle will be lost. The incoming water supply
needs to be corrected prior to starting the next cycle or the risk
of another cancelled cycle is high.
“In Use, Rinse, & Done” LEDs On
All 5 LEDS lit and not flashing indicates that the washer is out
of service. Enter the Service Diagnostic Test Modes and then
enter Fault Code Display Mode to determine the mode of failure
and to reset the control.
All 5 LEDs On and Not Flashing
SERVICE DIAGNOSTIC TEST MODES
These tests allow factory or service personnel to test and verify all
inputs to the main control board. Utilize these performance tests
before continuing to specific component troubleshooting tests.
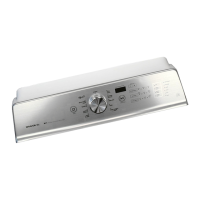
LED Location
Figure 1
In Soak/ Final
Use Wash Rinse Spin Done
In Soak/ Final
Use Wash Rinse Spin Done