This document is an Operation Guide for a Coolerator Dehumidifier, manufactured by Whirlpool Corporation, with a publication date of 9/92 (September 1992). It provides comprehensive instructions for installation, operation, maintenance, and troubleshooting, along with warranty information.
Function Description
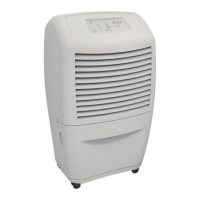
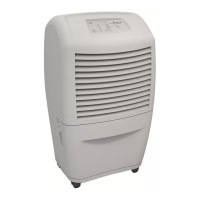
The Coolerator Dehumidifier is designed to remove excessive moisture from the air, helping to prevent moisture damage and maintain a comfortable environment in various areas of a home. It operates by drawing in humid air, passing it over cooling coils to condense the moisture, and then expelling drier air. The collected water is stored in a pan, which can be emptied manually or drained continuously. The unit features an automatic humidistat that controls its operation based on the desired humidity level, and an automatic shut-off mechanism when the water pan is full.
Important Technical Specifications
- Electrical Supply: 115 volts, 60 Hz, AC only, 15 or 20 ampere fused electrical supply is recommended. A separate circuit is recommended, and an extension cord should not be used.
- Grounding: The appliance requires electrical grounding and is equipped with a 3-prong grounding plug.
- Operating Temperature: The dehumidifier should not be operated in temperatures below 65°F (18.3°C) to prevent the coil from icing over.
- Water Pan Capacity: 24 pints (11.3 L).
- Water Pan Weight (Normal Fill): Approximately 16 lbs (7.2 kg) when ½ full.
- Water Pan Weight (Maximum Fill): Approximately 24 lbs (10.8 kg) when ¾ full.
- Clearance: At least 12 inches (30.5 cm) of space around the unit is required for good air circulation.
Usage Features
Installation:
- The unit has two rollers for easier movement. To move, the water pan should be removed, the unit tilted forward, and then rolled.
- Proper clearance of 12 inches (30.5 cm) around the unit is essential for good air circulation.
- All outside doors, windows, and other openings should be closed during operation to prevent humid outdoor air from increasing the operating load.
- The water pan must be correctly positioned on its hangers inside the cabinet for the automatic shut-off to function properly.
Operation:
- Humidistat Control: The unit features an automatic humidistat. To start, turn the Humidistat Control to OFF, then plug in the dehumidifier. Turn the control clockwise towards "DRYEST" for normal operation. The dehumidifier automatically starts when room humidity increases and stops when it reaches the selected level.
- PAN FULL Light: A light indicates when the water pan is full and needs emptying.
- Water Level Adjustment: A Water Level Control Switch allows setting the automatic shut-off at two fill levels:
- Normal Fill Position: Water pan fills to ½ capacity (approx. 16 lbs/7.2 kg).
- Maximum Fill Position: Water pan fills to ¾ capacity (approx. 24 lbs/10.8 kg).
- The adjustment is made by loosening a screw, moving the lever, and retightening the screw.
- Stopping the Unit: Manually turn the Humidistat Control to OFF.
Water Disposal:
- Manual Emptying: When the pan is full, remove it, empty it into a large sink or tub, and replace it properly. Ensure the pan is correctly replaced for the automatic shut-off to work.
- Direct Over Drain: The pan has a threaded hose connection. An opening can be cut out (using a knife or ¾-inch/19 mm wood drill) to allow continuous drainage directly over a drain.
- Garden Hose Connection: A garden hose can be attached to the threaded hose connection (after cutting out the opening) to carry water to a drain. The hose must lie flat and not be kinked or bent.
Maintenance Features
Annual Inspection and Cleaning:
- Safety Precaution: Always disconnect the power supply cord from the receptacle before performing any maintenance to prevent electrical shock or personal injury.
- Coil Inspection: Coils should be inspected annually. Brush them clean with warm water and a mild detergent if necessary, then rinse and dry thoroughly. Be careful as the fins are sharp.
- Fan Motor Oiling: The fan motor is prelubricated and typically does not require further oiling under normal operating conditions. However, if the dehumidifier operates under severe environmental conditions (dust, dirt, high temperatures), the fan motor should be oiled annually.
- Oil is applied through provided tubes.
- An easy-to-use capsule of recommended oil (Part No. 10943) is available from authorized Whirlpool service companies, or SAE #20 non-detergent oil can be used.
- Plastic Parts Cleaning: Wash all plastic parts with a soft cloth, warm water, and a mild detergent. Rinse and dry with a soft cloth.
- Cabinet Removal (for inspection/cleaning):
- Remove the plastic front grille by removing two screws at the bottom-front, dropping the grille down, and pulling it out.
- Remove socket-head screws on each side of the cabinet and top flange screws.
- Remove the rear grille by pulling it out at the bottom and dropping it down.
- Lift the cabinet from the unit.
- Reassembly: Replace the cabinet and grille(s), then reconnect the dehumidifier to the power supply.
Troubleshooting:
The guide provides a troubleshooting section for common issues:
- Unit won't operate: Check if plugged in, Humidistat Control setting (not OFF), and house fuses/circuit breakers.
- Unit blows fuses/trips breakers: Check for correct time-delay fuses, extension cord usage (not recommended), and iced/clogged coils.
- Unit ices up: Check for low humidity or room temperature below 65°F (18.3°C).
- Water collects on the floor: Check if the unit is level, if the hose is kinked/drain clogged, and if the water pan is overflowing or improperly positioned.
- Special dehumidifier needs: Annual inspection (clean coils, inspect drain/hoses, oil fan motor) and keeping the unit upright when moving.
Warranty Information:
- Full One-Year Warranty: Covers FSP® replacement parts and repair labor for defects in materials or workmanship from the date of purchase.
- Full Five-Year Warranty: Covers FSP® replacement parts and repair labor for defects in materials or workmanship in the sealed refrigeration system (compressor, evaporator, condenser, drier-strainer, connecting tubing) from the date of purchase.
- Exclusions: Service calls for installation correction, user instruction, fuse replacement, pickup/delivery, damage due to accident/misuse/fire/flood/acts of God/unapproved products, or unauthorized modifications are not covered.
- Service must be provided by an authorized Whirlpool service company. Whirlpool Corporation is not liable for incidental or consequential damages.