10
INSTALLATION
LOCATION
The air conditioner should be placed on a hard and level surface strong enough to support the unit. The unit has
casters and it should only be rolled on smooth, flat surfaces. Use caution when rolling on carpet surfaces. Do not
attempt to roll the unit over objects. Never place any obstacles around the air inlet or outlet and allow at least 20
inch of clearance for efficient air-conditioning.
EXHAUST HOSE INSTALLATION
When you use this air conditioner unit, hot air must be exhausted out of the room to complete the air exchange of
the condenser. When the unit is operating in DEHUMIDIFY or FAN only mode, installation of the exhaust hose is
optional.
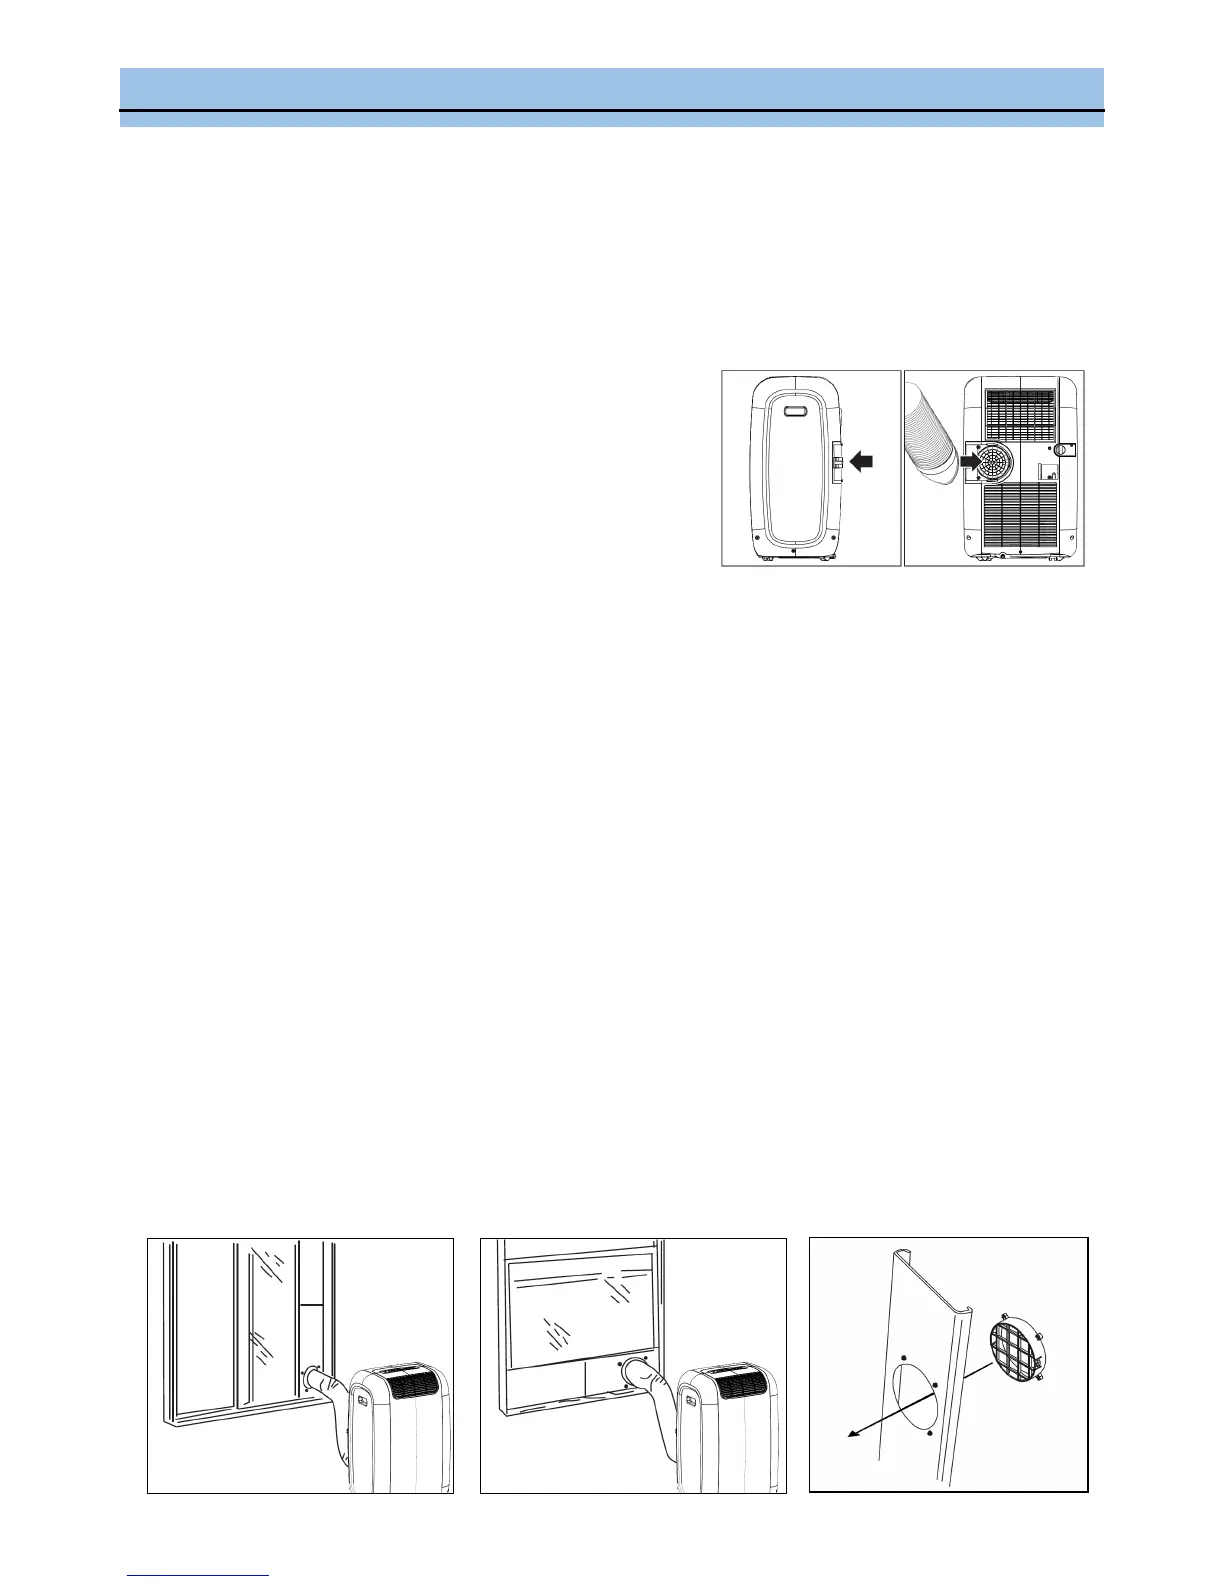
1. Pull out about 6” of one end of the exhaust.
2. Install the hose connectors onto the exhaust hose by turning
counter-clockwise.
3. Fix one end of the hose connectors by pressing the clip onto
the rear outlet of the unit. Slide the connector into each slot.
(Fig. 3)
4. Pull the clip to secure the hose connector.
Only extend the both hoses to the necessary length. We do not recommend extending more than 9' long. If you
are interested in purchasing an additional 5’ exhaust hose, please contact info@whynter.com for retail sales infor-
mation.
WINDOW KIT INSTALLATION
When you use this air conditioner unit, hot air must be exhausted out of the room to complete the air exchange of
the condenser. When the unit is operating in fan-only mode, installation of the exhaust hose is optional.
Your window kit has been designed to fit most standard vertical and horizontal windows (Fig. 4a and Fig. 4b). How-
ever, it may be necessary for you to modify the installation procedures for your window.
NOTE:
If your window opening is less than the mentioned minimum length of the window slider kit, cut the slide bar with
holes to fit window opening. Never cut out the holes on the window slide bar.
When using the window kit on a window or sliding door it will cause the window or sliding door not to be properly
closed and locked. Additional security measurements maybe needed.
Open window approximately 5”.
Adjust the length of the window bars to the same length and width of the opening of the window. Cut the window
piece if necessary to fit the length of your window.
Insert the fixture through the back grooved side of the window slide bar with hole. Line up the 4 holes and tight-
en the fixture with 4 screws from the front. (Fig. 4c)
Close the window on the window slide bars. For long term installation, you may screw the window kit into your
window frame.
Move the unit to the window, extend the hose and attach the other end of the hose to the window slide bar.
Align the slots on the hose connector to the tabs on the fixture and snap the hose to the window slide bar.
Fig. 3
Fig. 4a Fig. 4b
Fig. 4c
 Loading...