Disassembly / Reassembly
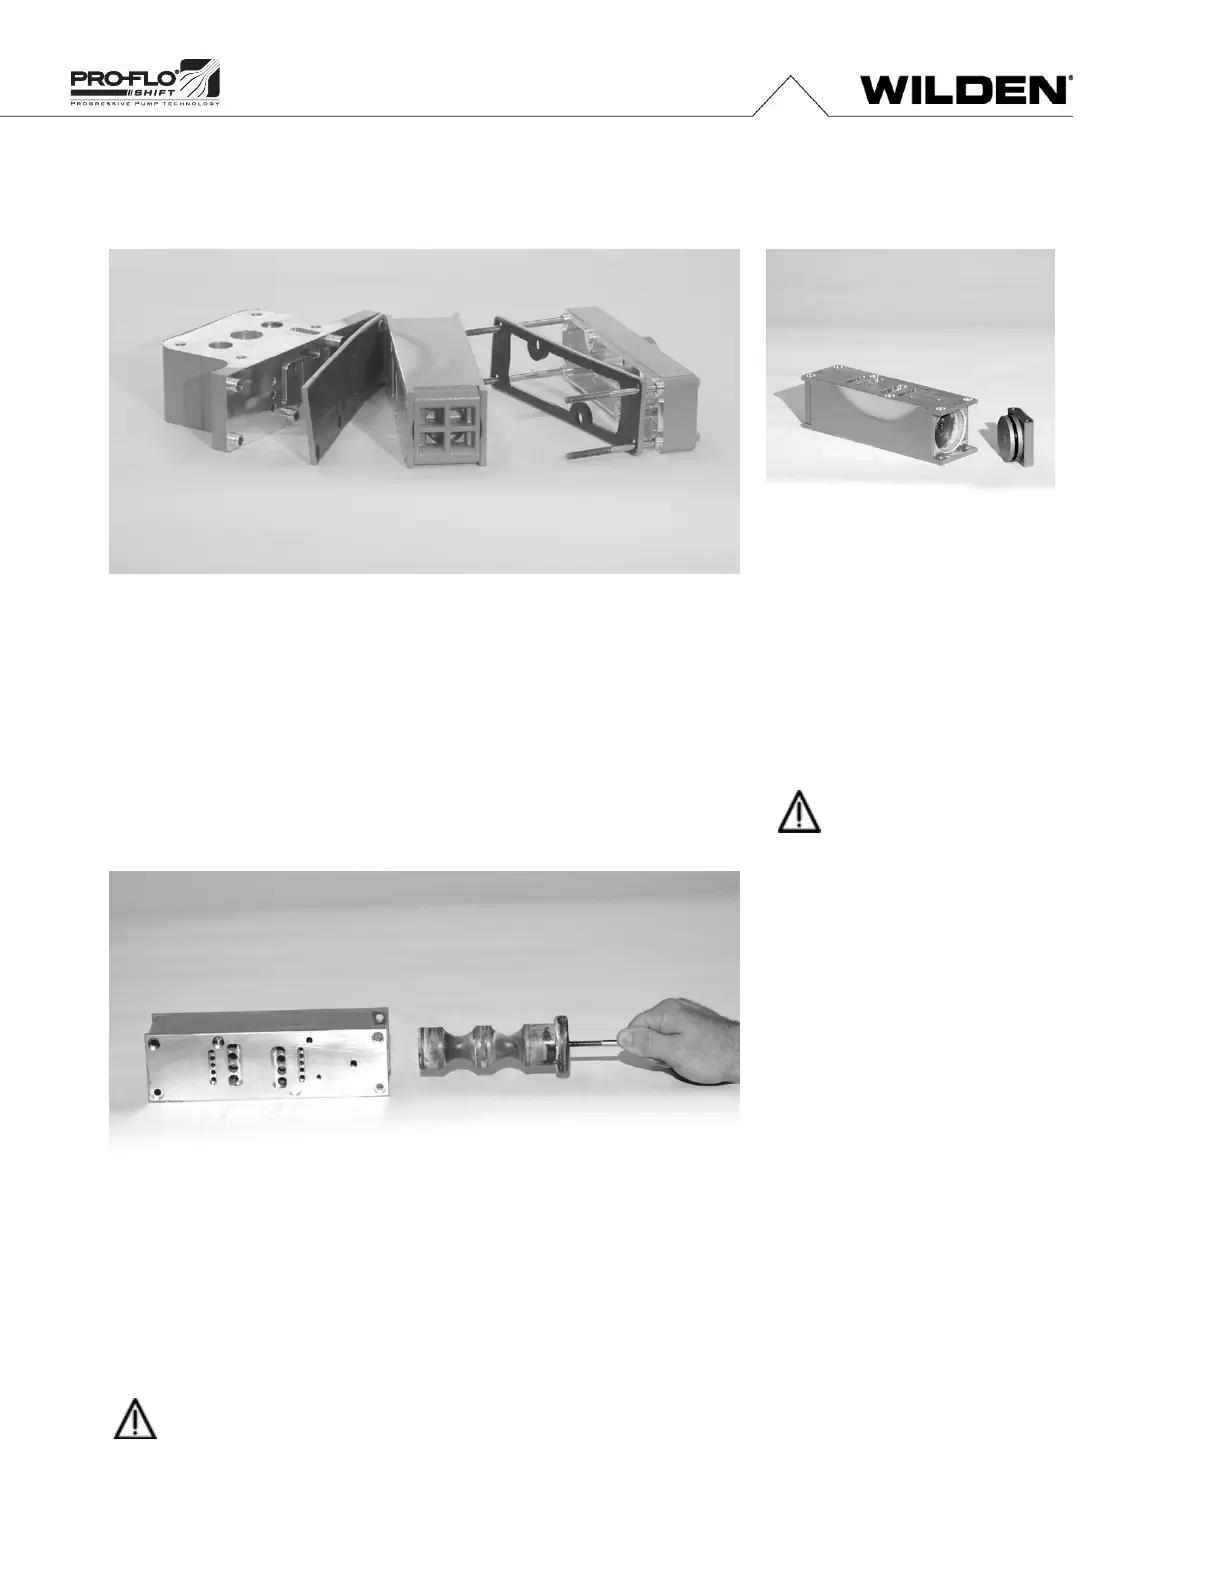
Step 13
Loosen and remove the four (4) air valve bolts from the center section assembly.
Lift the muffler plate and muffler plate gasket away from the center block. Inspect for
wear and replace, if necessary.
Lift the air valve assembly and remove the air valve gasket. Inspect the gasket and
replace, if necessary.
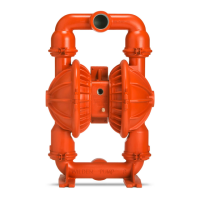
Step 14
Remove the air valve end cap to
expose the air valve spool by lifting
up on the end cap.
Inspect the O-ring on the end cap
using an O-ring pick. Replace the
O-ring(s), if necessary.
NOTE: The Pro-Flo SHIFT air
valve incorporates an end cap
at both ends of the air valve.
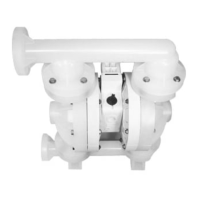
Step 15
Remove the air valve spool from the air valve body by threading one air valve bolt into
the end of the air valve spool and gently sliding the spool out of the air valve body.
Inspect seals for signs of wear and replace the entire air valve assembly, if necessary.
Re-insert the spool immediately into the air valve body after inspection because the
seals expand and cannot be reinserted after a length of time.
NOTE: Do not remove seals from the assembly. Seals are not sold separately.