en
Installation and operating instructions Wilo-Rexa MINI3 23
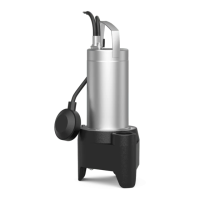
8.1 Clean pump
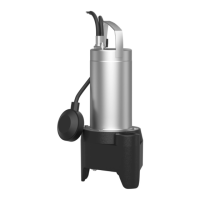
‡ Pump removed.
‡ Disinfectant is available.
1. Ensure that the plug or bare cable end is packed and
stored in a watertight manner!
2. Rinse the pump and cable with clean, running water.
NOTICE!When using disinfectants, strictly observe the
manufacturer’s specifications and instructions for use!
3. To clean the impeller and the pump interior, guide the
water jet inside through the pressure port.
4. Rinse attachments such as the discharge pipe and pres-
sure hose with clean, running water.
5. Flush any dirt residue on the floor into the sewage drain.
6. Allow the pump to dry out.
7. Only clean the plug or bare cable end with a damp cloth!
▶ Pump has been cleaned. Pack and store the pump.
NOTICE!If the suction port is very contaminated, remove
the cover plate for thorough cleaning!
8.2 Cleaning the pump interior
WARNING
Sharp edges on the impeller and suction
port!
Sharp edges can form on the impeller and suc-
tion port. There is a danger of cuts and similar
injuries! Wear protective gloves!
In the case of severe dirt and encrustations, remove the
cover plate on the suction port and clean the pump interior.
1. Horizontally position the pump on a firm surface.
WARNING!Risk of hands being crushed. Make sure
that the pump cannot slip away!
2. Unscrew the 3 fastening screws on the cover plate.
3. Remove the cover plate.
4. Rinse the pump interior with clean, running water. Re-
move solids by hand.
5. Check the O-ring on the suction port. If the O-ring is
damaged (cracks, porosity, crushed areas), replace the
O-ring.
6. Position the cover plate on the suction port.
7. Fully screw in the 3 fastening screws. NOTICE!Replace
worn screws!
 Loading...