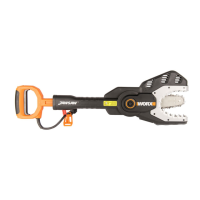
INTENDED USE
This JawSaw has been designed for pruning
branches and cutting small logs up to 4 inches
(10cm) in diameter. (See Fig. A)
ADJUSTMENT AND
ASSEMBLY
WARNING: Before touching
the chain or making any other
adjustments, make sure that the tool is
switched off and unplugged.
CHAIN TENSION
ADJUSTMENT
All saw chains wear and become loose from
operation. Periodically check the chain, if there
is any visible gap between the chain and the
guide bar, it must be re-tensioned.
WARNING: Unplug JawSaw from
power source before adjusting saw
chain tension.
WARNING: Cutting edges on chain
are sharp. Use protective gloves
when handling chain.
This product comes fully assembled. However,
we recommend that you check the chain
tension before use and readjust if necessary.
ADJUSTING THE CHAIN
TENSION
1. Push the handle until the bar is in the
middle of the jaw opening as shown. (See
Fig. B) Lock the bar in the middle position
by inserting the lock pin (17) found on the
power cord into the lock pin receptacle (18)
located under the handle.
2. Open the chain access cover (12) by
using the supplied wrench. To open turn
the access cover bolt 1/4 turn counter-
clockwise. (See Fig.C)
3. Release tension on the chain by loosening
the chain tensioner bolt. Turn the chain
tension bolt (15) counter clockwise 2 or
more times. (See Fig. D)
4. Re-tighten the chain tensioner bolt by
turning the chain tensioner bolt. When
tightening the chain tension bolt the
automatic chain tensioning system will set
the tension to the chain at the same time.
5. Check that the correct chain tension has
been set. It should be possible to pull
the chain away from the side of the bar
approximately 1/8” (3mm) and it should
snap back. (See Fig. E)
If tension is incorrect, repeat step 3,
ensuring the bar is free to move when the
tensioner is released.
CHANGING THE GUIDE BAR
AND CHAIN
WARNING: Laceration hazard.
Always wear protective gloves when
installing or removing the saw chain. The saw
chain is sharp and can cut you even when it is
not running.
WARNING: Burn hazard. The chain
guide bar and chain may become hot
during use. Allow to cool before adjustment or
removal.
1. Ensure the operation is carried out on a
firm surface.
2. Disconnect the power, install the lock
pin and open the chain access cover as
described in the previous section.
3. Use only WORX replacement bar and
chain.
4. Loosen and remove the chain tensioner
bolt.
5. Lift the guide bar (10) and chain (11) out
through the jaw, angling the bar to clear
the two bar locating pins.
6. If replacing the bar, remove the mounting
plate (a), which is retained by a single
screw and fit to the new bar. The bar is
symmetrical and may be mounted with
either face outward (can be reversed if the
lower working edge is worn) (see Fig. F).
7. Before re-fitting the bar, check that the
small oil hole (b) and chain slot (c) are not
blocked by dirt or sawdust, use a small
toothpick to clean if necessary (see Fig. G).
8. Refit the chain to the bar. Note the correct

 Loading...