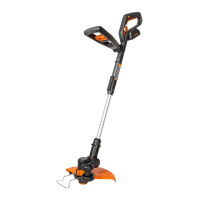
trimming mode and edging mode, unlock the Pivot
Head Locking Knob by hand, and using adequate force,
pull the trimmer head into the desired position, then
lock the Pivot Head Locking Knob.
9. FLOWER GUARD/EDGER GUIDE
Pull the Flower Guard/Edger Guide out before
trimming, as shown in Fig. I1.
When edging, pull Flower Guard/Edger Guide out also,
and keep to a side (See Fig. I2).
Before trimming or edging make sure the flower guard
is locked firmly in position.
OPERATION
WARNING: Always wear the eye protection.
Never lean over the trimmer head. Rocks or
debris can ricochet or be thrown into eyes and face and
cause blindness or other serious injury. When operating
unit, check for the following:
Wear eye protection and heavy clothing. Hold front
handle with one hand and Auxiliary Handle with the
other hand. Keep unit below waist level. Work only from
your right to your left to ensure debris is thrown away
from you. Without bending over, keep line near and
parallel to the ground (perpendicular when edging) and
not crowded into material being cut.
WARNING: Make sure that line is fed out
before operation. Make sure motor is up to
full speed before trimming or edging.
WARNING: Only use 1.65mm diameter cutting
line. Other sizes of line will not feed properly and
will result in improper cutting head function or can
cause serious injury. Do not use other material such as
wire, string, rope, etc. Wire can break off during cutting
and become a dangerous projectile that can cause
serious injury.
EDGER/TRIMMING SUPPORT WHEELS
There are three optional positions for the Edger/
Trimming Support Wheels to attach when assisting in
Trimming and Edging.
POSITION 1: USING THE GUIDE WHEELS WHEN
TRIMMING IN A FORWARD OR REVERSE
DIRECTION (See Fig. J1)
Position the Grass Trimmer in the trimming position.
Underneath the Safety Guard there is a metal plate
that the Edger/Trimming Support Wheels will attach to.
Slide the Support Wheels horizontally onto the metal

 Loading...