EasyManua.ls Logo

Wow SparkMaker User Manual

Wow SparkMaker
59 pages
To Next Page IconTo Next Page
To Previous Page IconTo Previous Page
Page #38 background imageLoading...
Page #38 background image
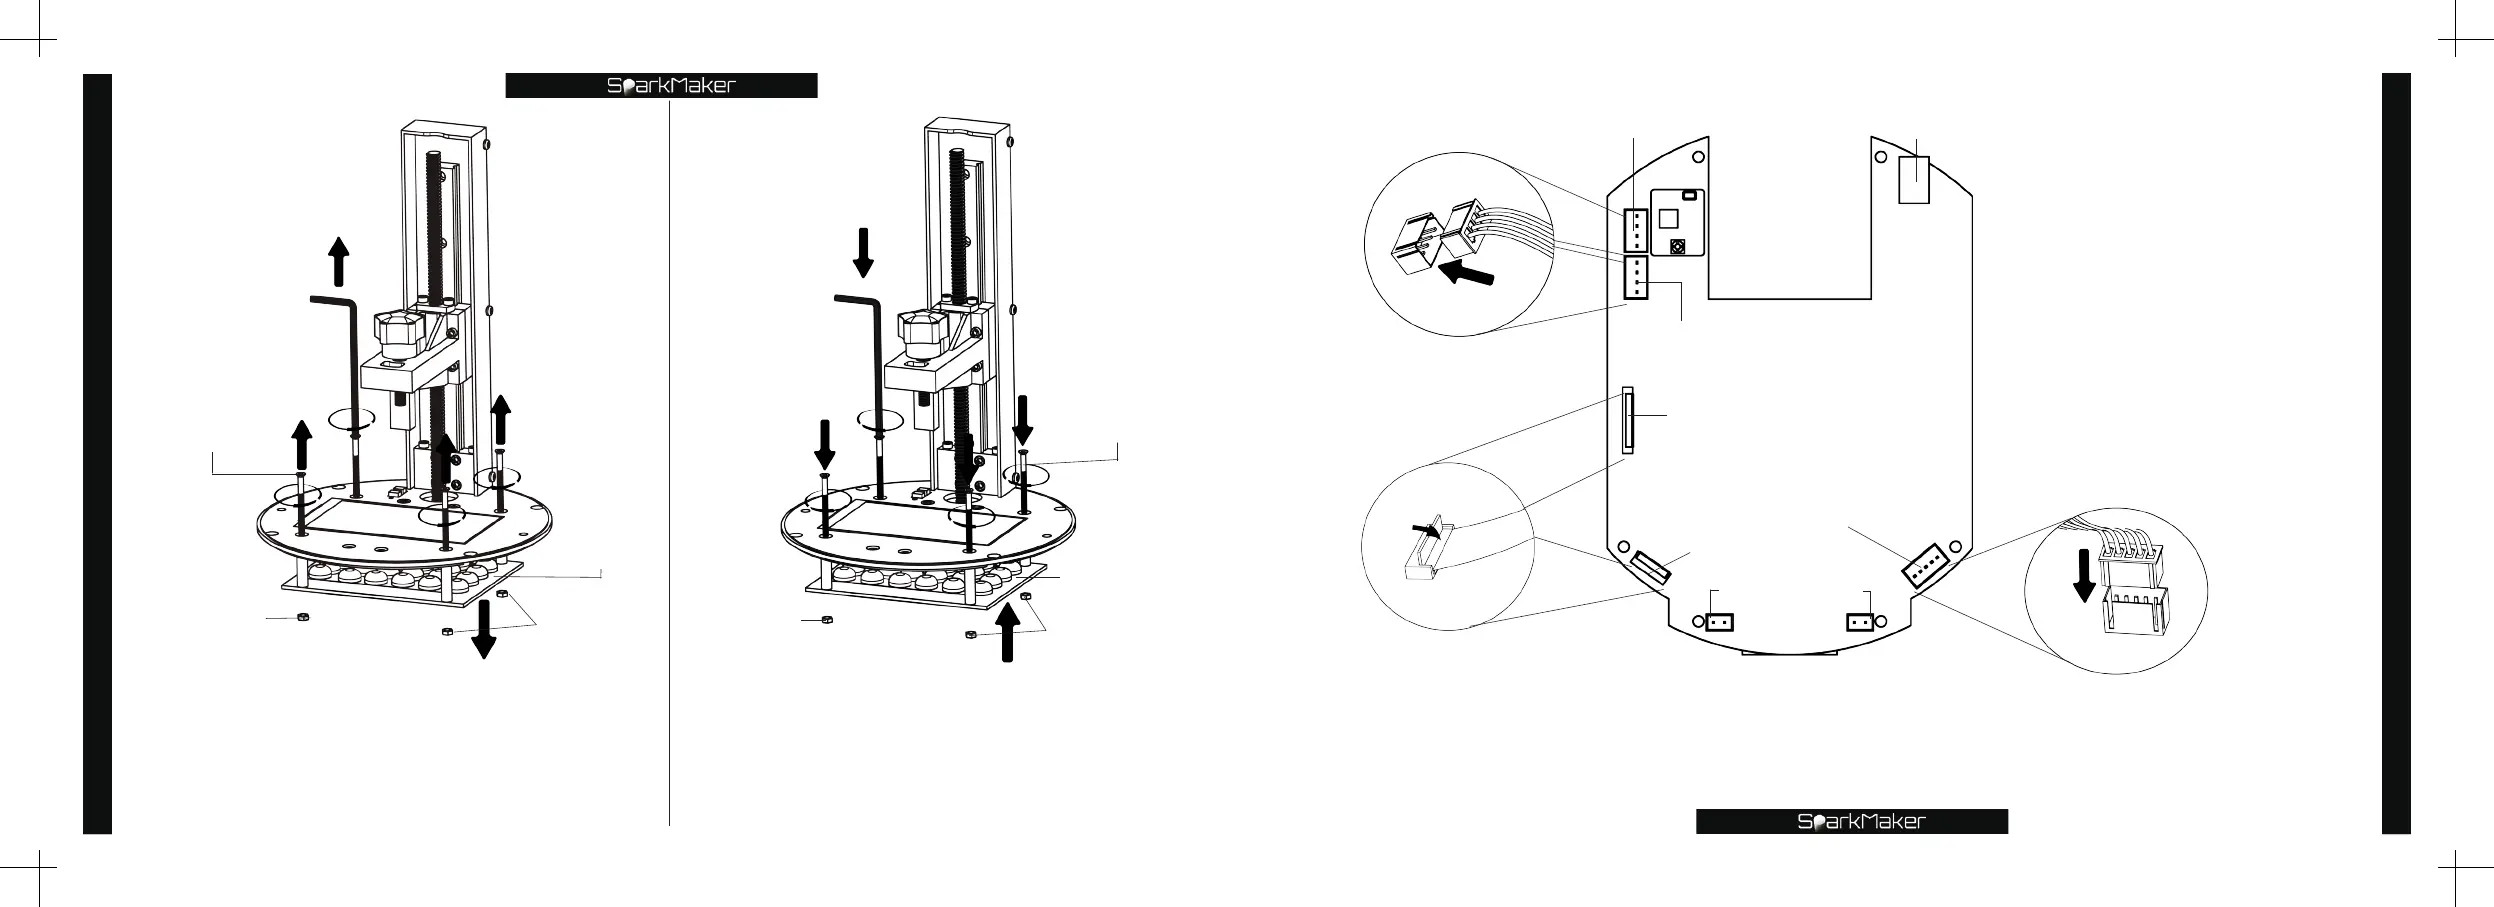
Use the small hex wrench to turn
counterclockwise to unscrew the flat
head screws of the four fixed light board
around the LCD screen and remove the
light board from below.
Small hex wrench
Flat head screw
M3 nut
M3 nut
Light board
Installation of the new light board
,
use the
small hex wrench to turn clockwise
,
and
use the M3 nut at the lower end of the
light board to screw the four flat head
screws around the LCD screen.
Small hex wrench
Flat head screw
Light board
M3 nut
M3 nut
72
Replace the light board
73
Replace the light board
(
As shown) Press down
on the LCD screen and
the knob FPC cable
,
insert down the four-
wire plug of the limit
switch and screw
motor
,
and insert the
five-hole plug of the
light board down.
Motor interface
DC input
FPC cable
Four-wire plug
Photoelectric
switch interface
LCD interface
Light board interface
Knob interface
Fan interface
Notice:
Please carefully open the FPC
interface and carefully pull out the
plug
,
do not tear the cable.
Five-wire plug
SparkMarker
Mainboard
Question and Answer IconNeed help?

Do you have a question about the Wow SparkMaker and is the answer not in the manual?

Wow SparkMaker Specifications

General IconGeneral
BrandWow
ModelSparkMaker
Category3D Printers
LanguageEnglish

Summary

OPERATING GUIDE

Introduction and Safety First

Welcome message and crucial instruction to read the guide before operation.

Important Safety Notices

General Safety Precautions

Essential safety measures to prevent injury, fire, and electric shock during printer use.

Precautions for Resin Handling

Guidelines for safe handling, storage, and use of photosensitive resin.

Component Identification

Printer Components Overview

Visual identification and listing of main printer parts and accessories included in the package.

Initial Printer Setup

Resin Information

Preparing for Printing

Pre-Printing Checklist

Essential checks to ensure the printer and environment are ready before starting a print.

Quick Start Guide

Printing Platform Leveling

Leveling Procedure

Step-by-step instructions on how to correctly level the printing platform.

Starting the Printing Process

Loading Print Files and Starting

Instructions for preparing print files, inserting the SD card, and initiating the print job.

Ending the Printing Process

Printer Maintenance

How to Replace FEP Film

How to Replace LCD Screen

How to Replace Light Board

Z-Axis Adjustment Guide

Model Preparation

Operational Concepts