14 World Precision Instruments
Storing Data
1. Press and hold the Store button on the main screen for 2 seconds or press
Store
Screen
on the
Setting
screen to congure your stored data les.
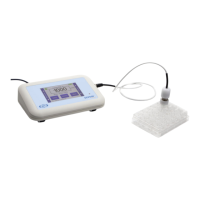
Fig. 23—Use the Store Options screen to save a data le.
2. Press
New Plate
to clear any recorded data on the preview screen and from
memory.
CAUTION: This will clear any readings saved in the preview grid.
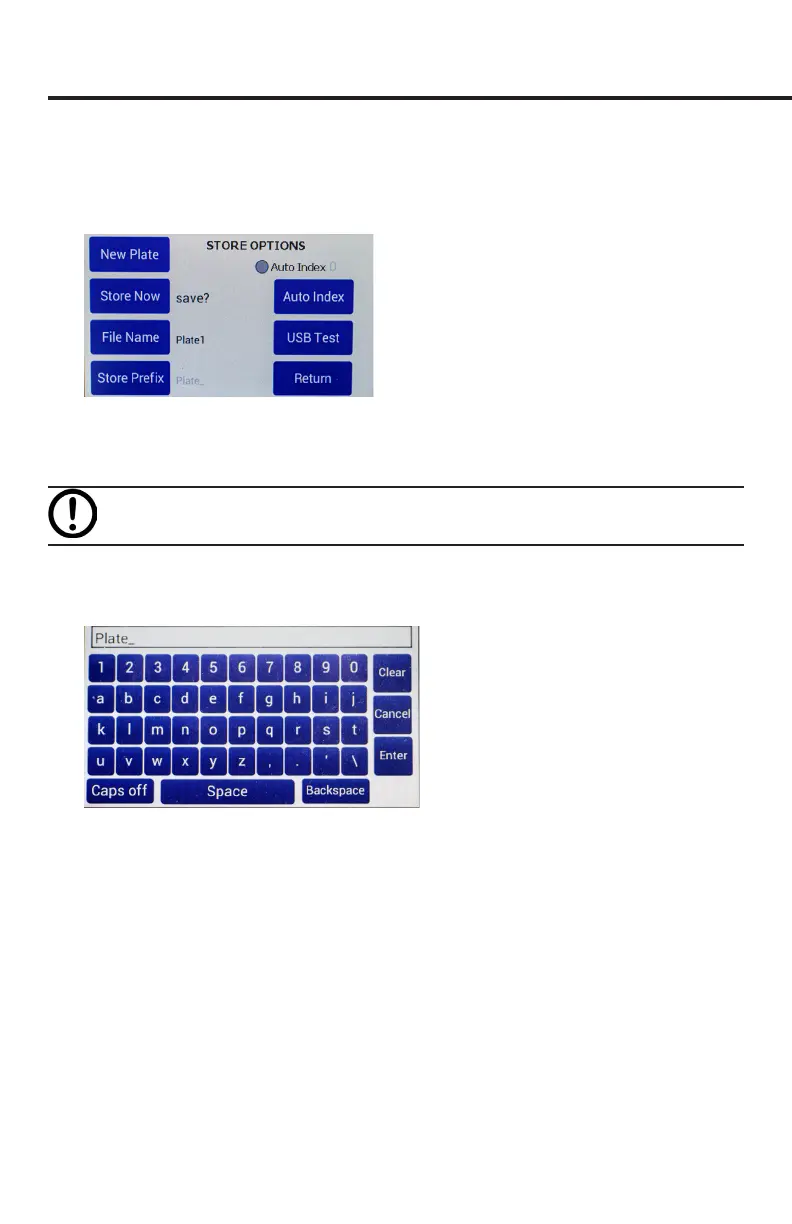
3. Press
File Name
to enter a unique name for your data le. In the entry page, select
Clear
, then type the le name, and press
Enter
when you nish. If you choose to
use your le name, auto-indexing must be disabled.
Fig. 24—Press Clear. Type the desire name. Press Enter.
4. If you prefer to use the
Auto Index
function, press
Store Prex
to enter a unique
le name that will be appended with sequential numbers each time your le is
saved. Select the
Auto Index
radio button to enable the
Store Prex
and
Auto Index
buttons
.
5. Press
Auto Index
if you want the EVOM™ Manual to automatically number
the new data les sequentially. Auto indexing changes the name to a numeric
sequence formatted with a prex and a sequential number (prexN).
6. Press Store Now to save the current data set. There is a time out if the USB write
fails. If this error occurs, the “Saving le…” notice will not change to “File saved.”
A le is typically saved in less than 20 seconds. If your le does not save, press
Return
and try using a dierent USB drive.
7. Press
Return
.