24 World Precision Instruments
3. Press
Setup
to access the
Setup
menu.
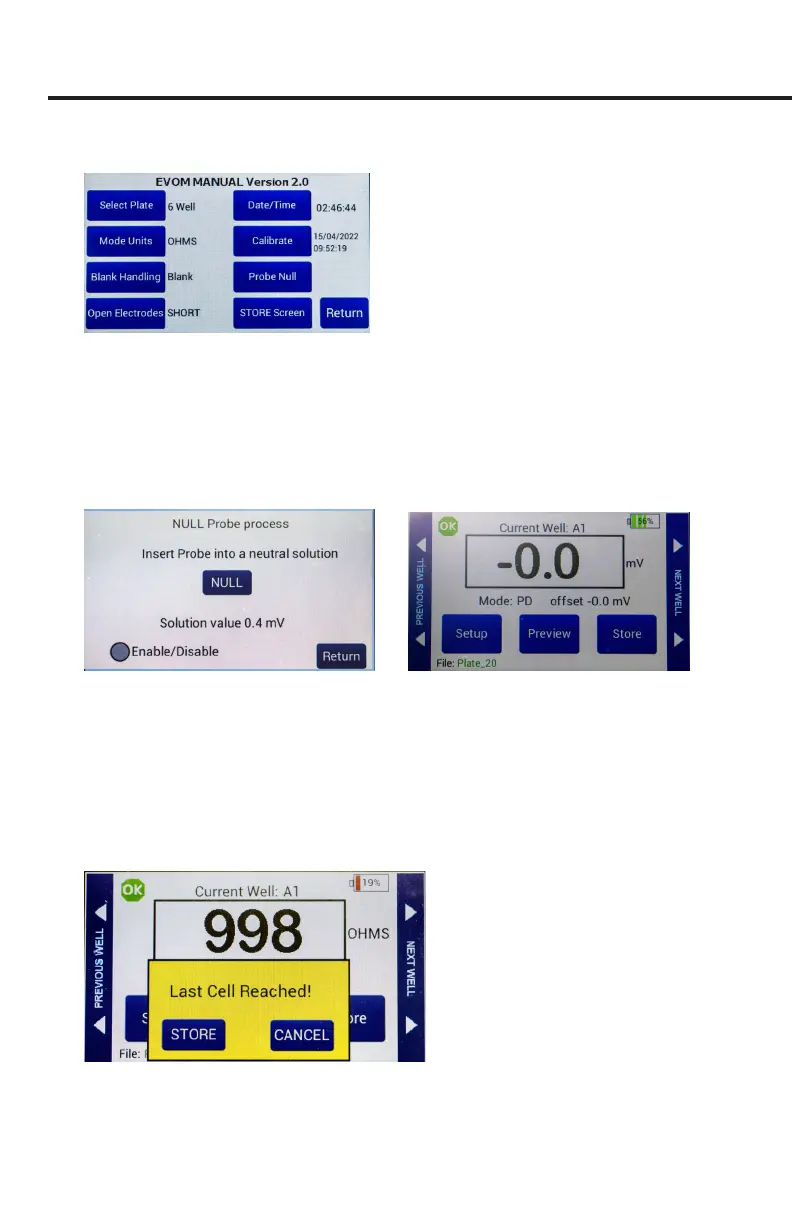
Fig. 44—Setup page
• Select Plate–Choose the plate size.
• Select Mode Units – Choose volts or millivolts (the normal mode is millivolts).
• Electrode Equilibration – Zero the electrodes' galvanic charge in saline.
• Press the
Probe Null
button. Push the
NULL
button. Wait for the second
message stating ”Solution value 0.0” before returning. This action removes
any voltage osets on the electrodes. Then activate the
Enable/Disable
radio
button to oset the electrode potential.
Fig. 45—(Left) Null probe process.
Fig. 46—(Right) The potential dierence oset shows on the main screen under the reading.
• Press
Return
to navigate back to the main menu.
4. Insert a USB drive into the USB port on the side of the EVOM™ Manual and
begin measuring by pressing the foot switch or touching the
Store
button on the
screen. Tap the
Next Well
area on the right side of the screen to advance to the
next well. Repeat the sampling process.
5. Once the last well has been recorded, the le storing selection notication appears.
Fig. 47—Warning that the last cell measurement was taken.