ENGINE
WG972-E4, WSM
1-S34
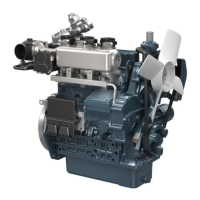
Piston Ring and Connecting Rod
1. Remove the piston rings using a piston ring tool.
2. Remove the piston pin (10), and separate the connecting rod (8)
from the piston (7).
(When reassembling)
• When installing the second compression ring (2), assemble the
rings so that the manufacturer's mark (11) near the gap faces
the top of the piston.
• Apply engine oil to the piston pin.
• When installing the connecting rod to the piston, immerse the
piston in 80 °C (176 °F) oil for 10 to 15 minutes and insert the
piston pin to the piston.
• When installing the connecting rod to the piston, align the mark
(9) on the connecting rod to the plug recess (6).
• Mark the same number on the connecting rod and the
piston so as not to change the combination.
9Y1211108ENS0055US0
(7) Crankshaft
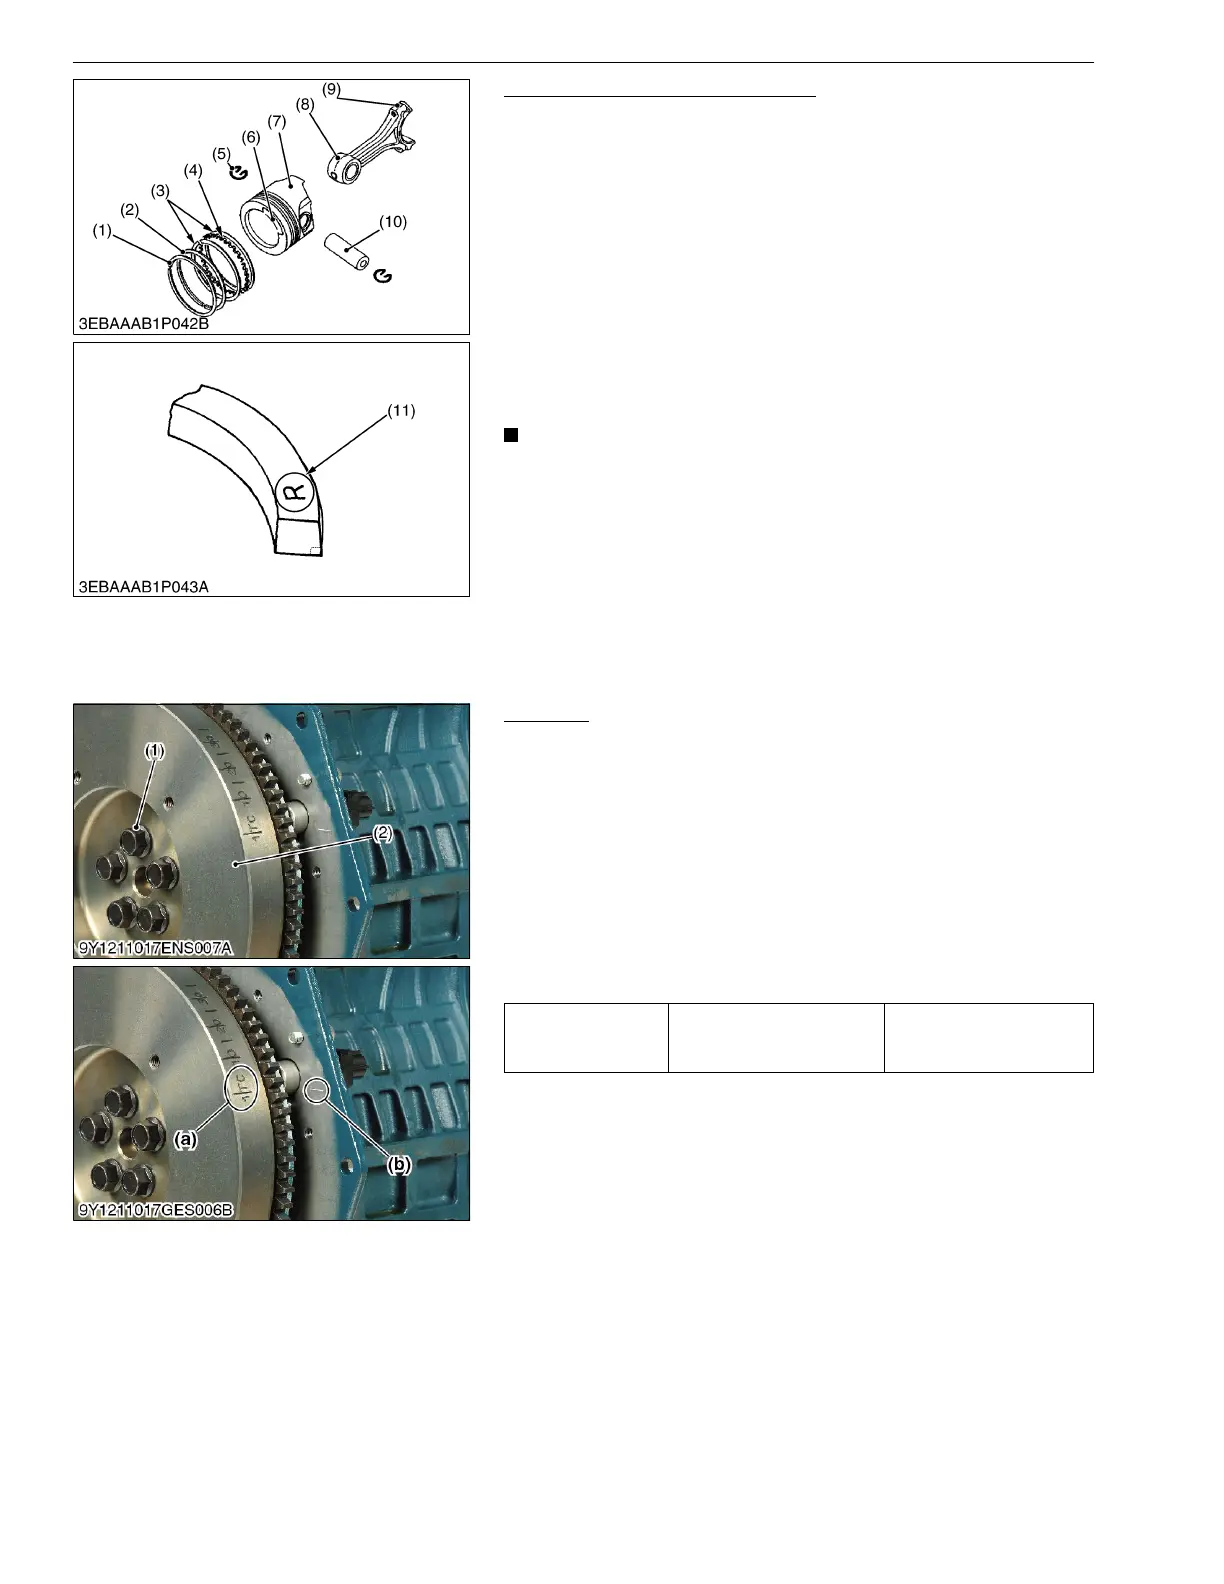
Flywheel
1. Secure the flywheel to keep it from turning using a flywheel
stopper.
2. Remove all flywheel screws (1) and then remove the flywheel
(2).
(When reassembling)
• Move crankpin of No.1 cylinder to top dead center position.
• Align the "1TC" mark (a) on the outer surface of the flywheel
horizontally with the alignment mark (b) on the rear end plate.
Now fit the flywheel in position.
• Apply engine oil to the threads and the undercut surface of the
flywheel screw and fit the screw.
9Y1211108ENS0056US0
(1) Top Ring
(2) Second Ring
(3) Side Rail
(4) Spacer
(5) Piston Pin Snap Ring
(6) Plug Recess
(7) Piston
(8) Connecting Rod
(9) Mark
(10) Piston Pin
(11) Manufacturer's Mark
Tightening torque Flywheel screw
54 to 58 N·m
5.5 to 6.0 kgf·m
40 to 43 lbf·ft
(1) Flywheel Screw
(2) Flywheel
(a) 1TC Mark
(b) Alignment Mark